
How do I set or edit a user's cost rate?
People & Team ManagementHandbookSet and report on a user's internal cost rate for better project cost management.Keeping track of the overall costs for a project can be an important factor in allocating resources or managing labor expenses.
By setting an individual user’s cost rate, you can easily compare the internal cost of that person’s time to the external rate that might be charged to a client.
Set a cost rate when adding a new user
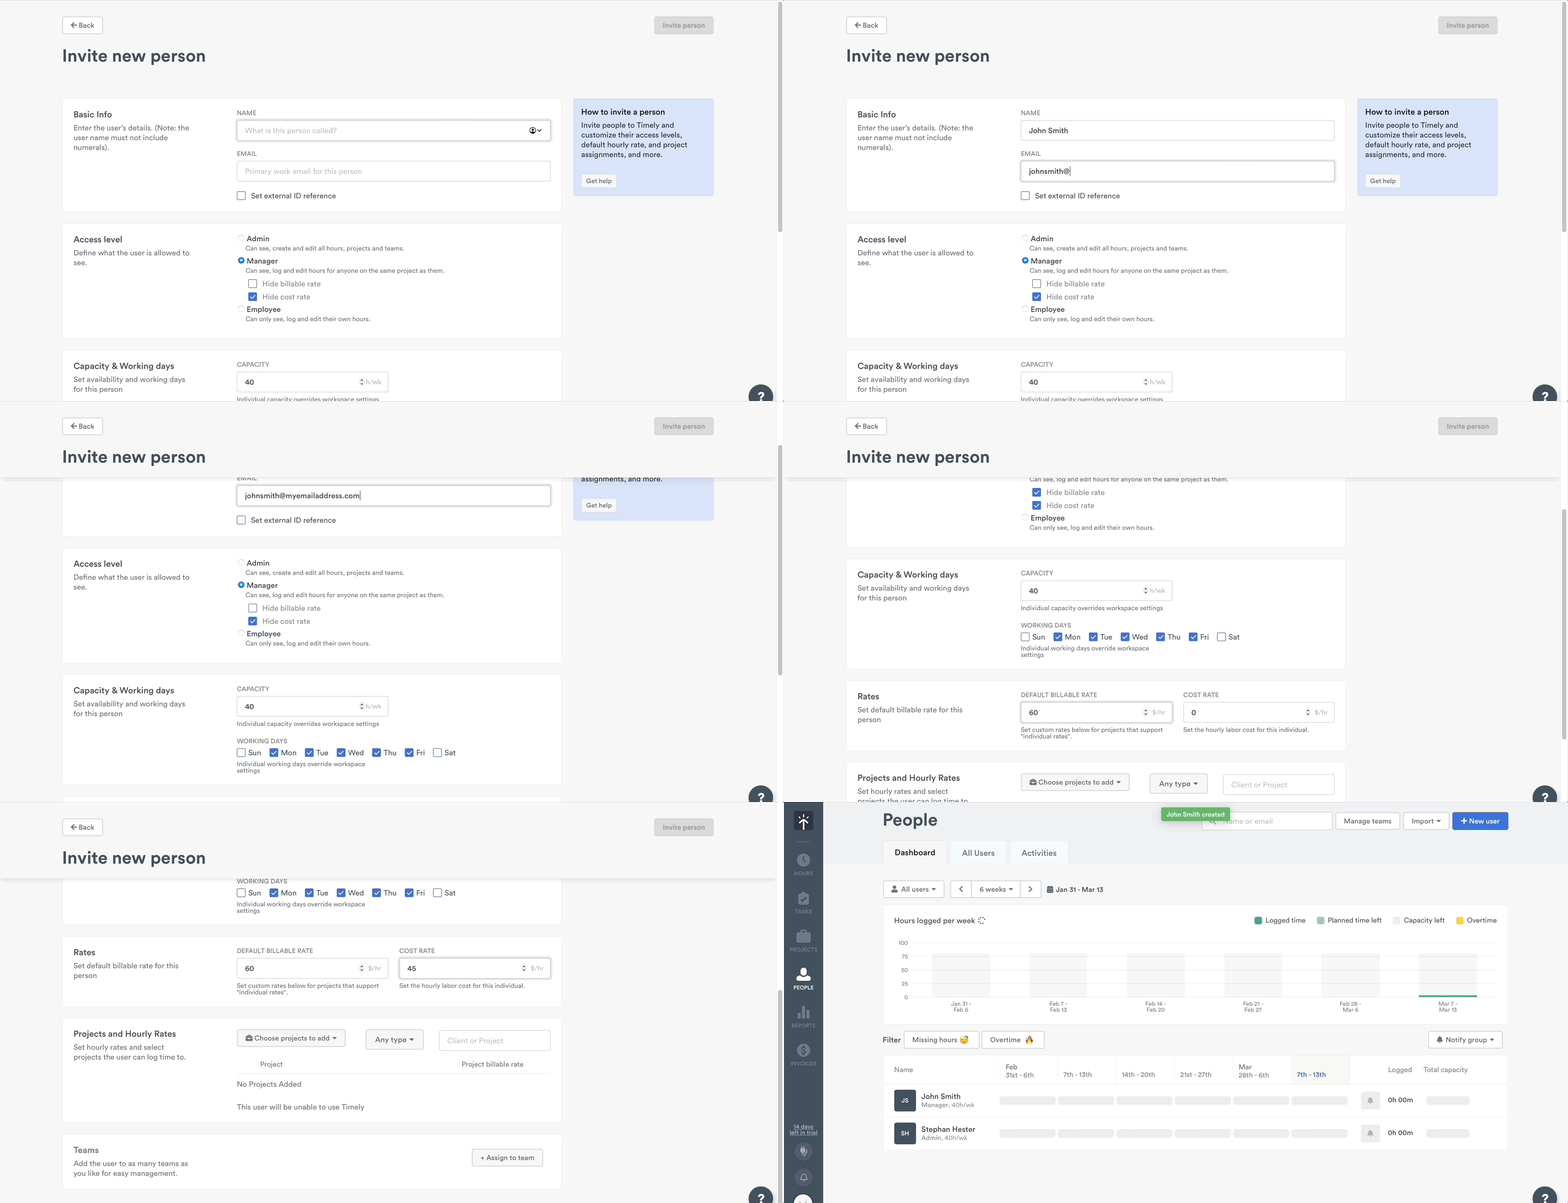
When adding new users to Timely, you can set their default hourly rate along with their cost rate — right from the start.
- Head to the People page in Timely.
- Click the “+New User” button in the top right-hand corner.
- Fill out the user’s details.
- Scroll down to the “Rates” section and set the desired amount.

Edit a user’s cost rate from their Permissions page
- Head to the People page in Timely.
- Click the user’s name you’d like to edit.
- Click “Edit User” in the top right-hand corner.
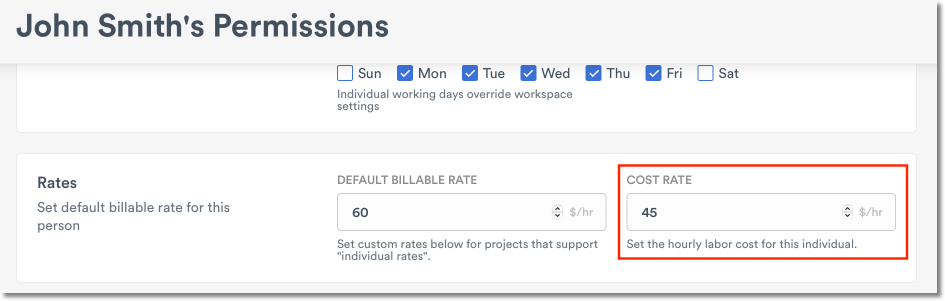
- Scroll down to the “Rates” section and set the desired cost rate.
- Click “Update Person”.
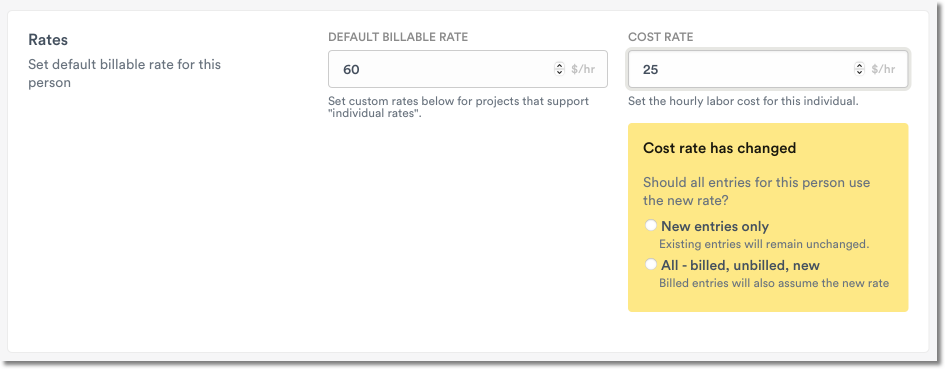
Limit a cost rate change to entries from a specific date
If you choose All entries, you can optionally pick an Apply from date. Only entries dated on or after that date are repriced; earlier entries keep their existing cost rate. Leave it empty to apply the new cost rate to all entries.
The date isn’t a rate schedule: an entry added later but dated before the chosen date will still get the new cost rate. The cost rate date is set separately from the billing rate date.
Exporting cost rates data
Once you have your team’s rates set up, it’s a snap to review the logged and planned cost as part of our rich data export process.
- Head to the Reports section in Timely.
- Create a custom report or utilize one of the pre-made templates.
- Tweak the settings to make sure you have the desired date range and data points.
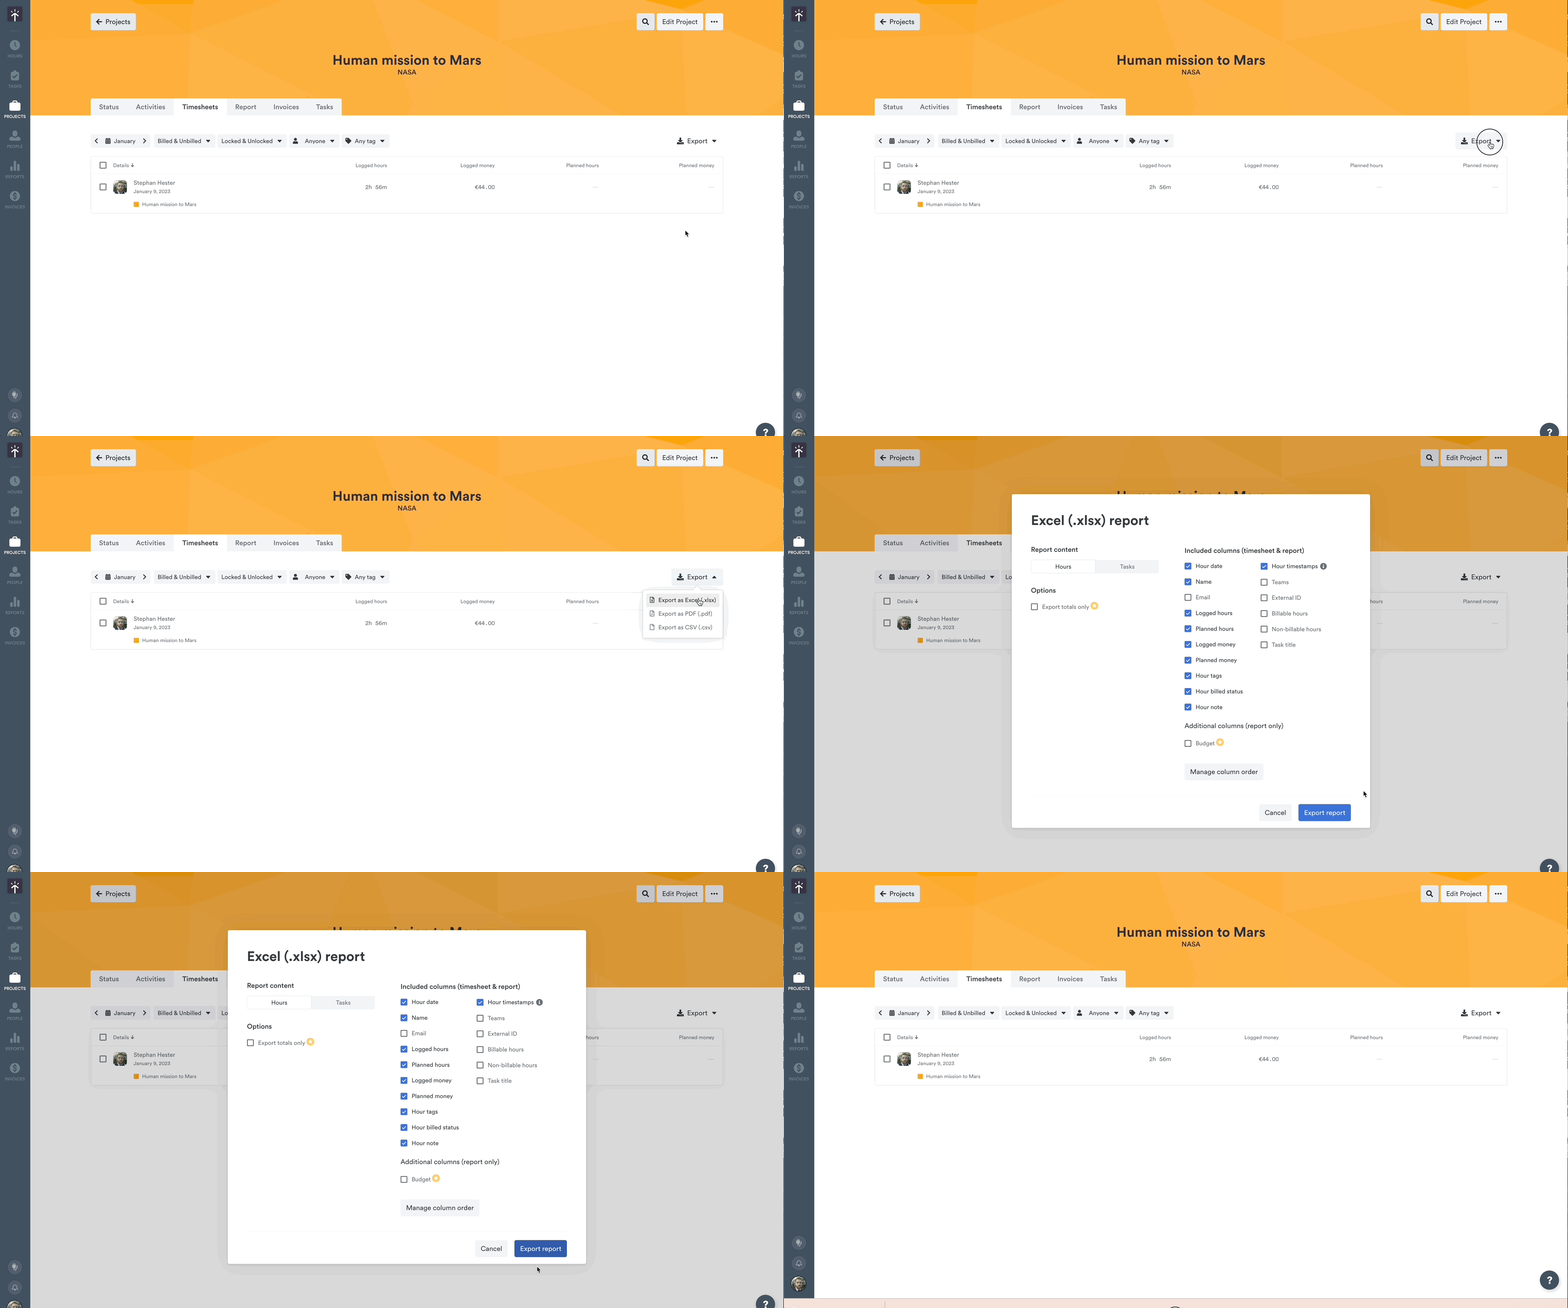
- Click the “Export” button in the top right-hand corner.
- Check the “Logged Cost” and “Planned Cost” option under “Included Columns”.
- Click “Export as Excel” or “Export as CSV”.
Last updated October 7, 2026
Have feedback for this article or need more help? Contact us now.