Exporting your reports
ReportingHandbookWe've revamped report exports in Timely, making it easy to grab your data — whether a spreadsheet, PDF, or automated report in your inbox.Say goodbye to clunky exports and hello to a streamlined, intuitive report-exporting experience! We’ve overhauled the way you generate reports in Timely, making it easier than ever to grab the data you need — whether it’s a quick spreadsheet, a polished PDF, or an automatic scheduled report sent straight to your inbox.
What’s new?
- Cleaner, more intuitive design — Everything you need is in one streamlined view.
- Fewer clicks, faster exports — Get your data quicker, with a clear breakdown of each step.
- Customizable exports — Pick and choose the data and columns you need.
- Real-time preview — See what your export will look like before you commit.
- Scheduled exports — Set it and forget it! Automate reports and have them sent to your inbox at regular intervals.
Create and save your report
Before exporting, you’ll need to generate a report that includes the data you want. Head to the Reports page and use filters to build out the data that best fits your needs. Choose the time range, people, projects, tags — whatever details matter most.
Once you’re happy with what you see, save the report so you can return to it or set up scheduled exports later.
For a full breakdown of how to create reports in Timely, check out our guide to Reports.
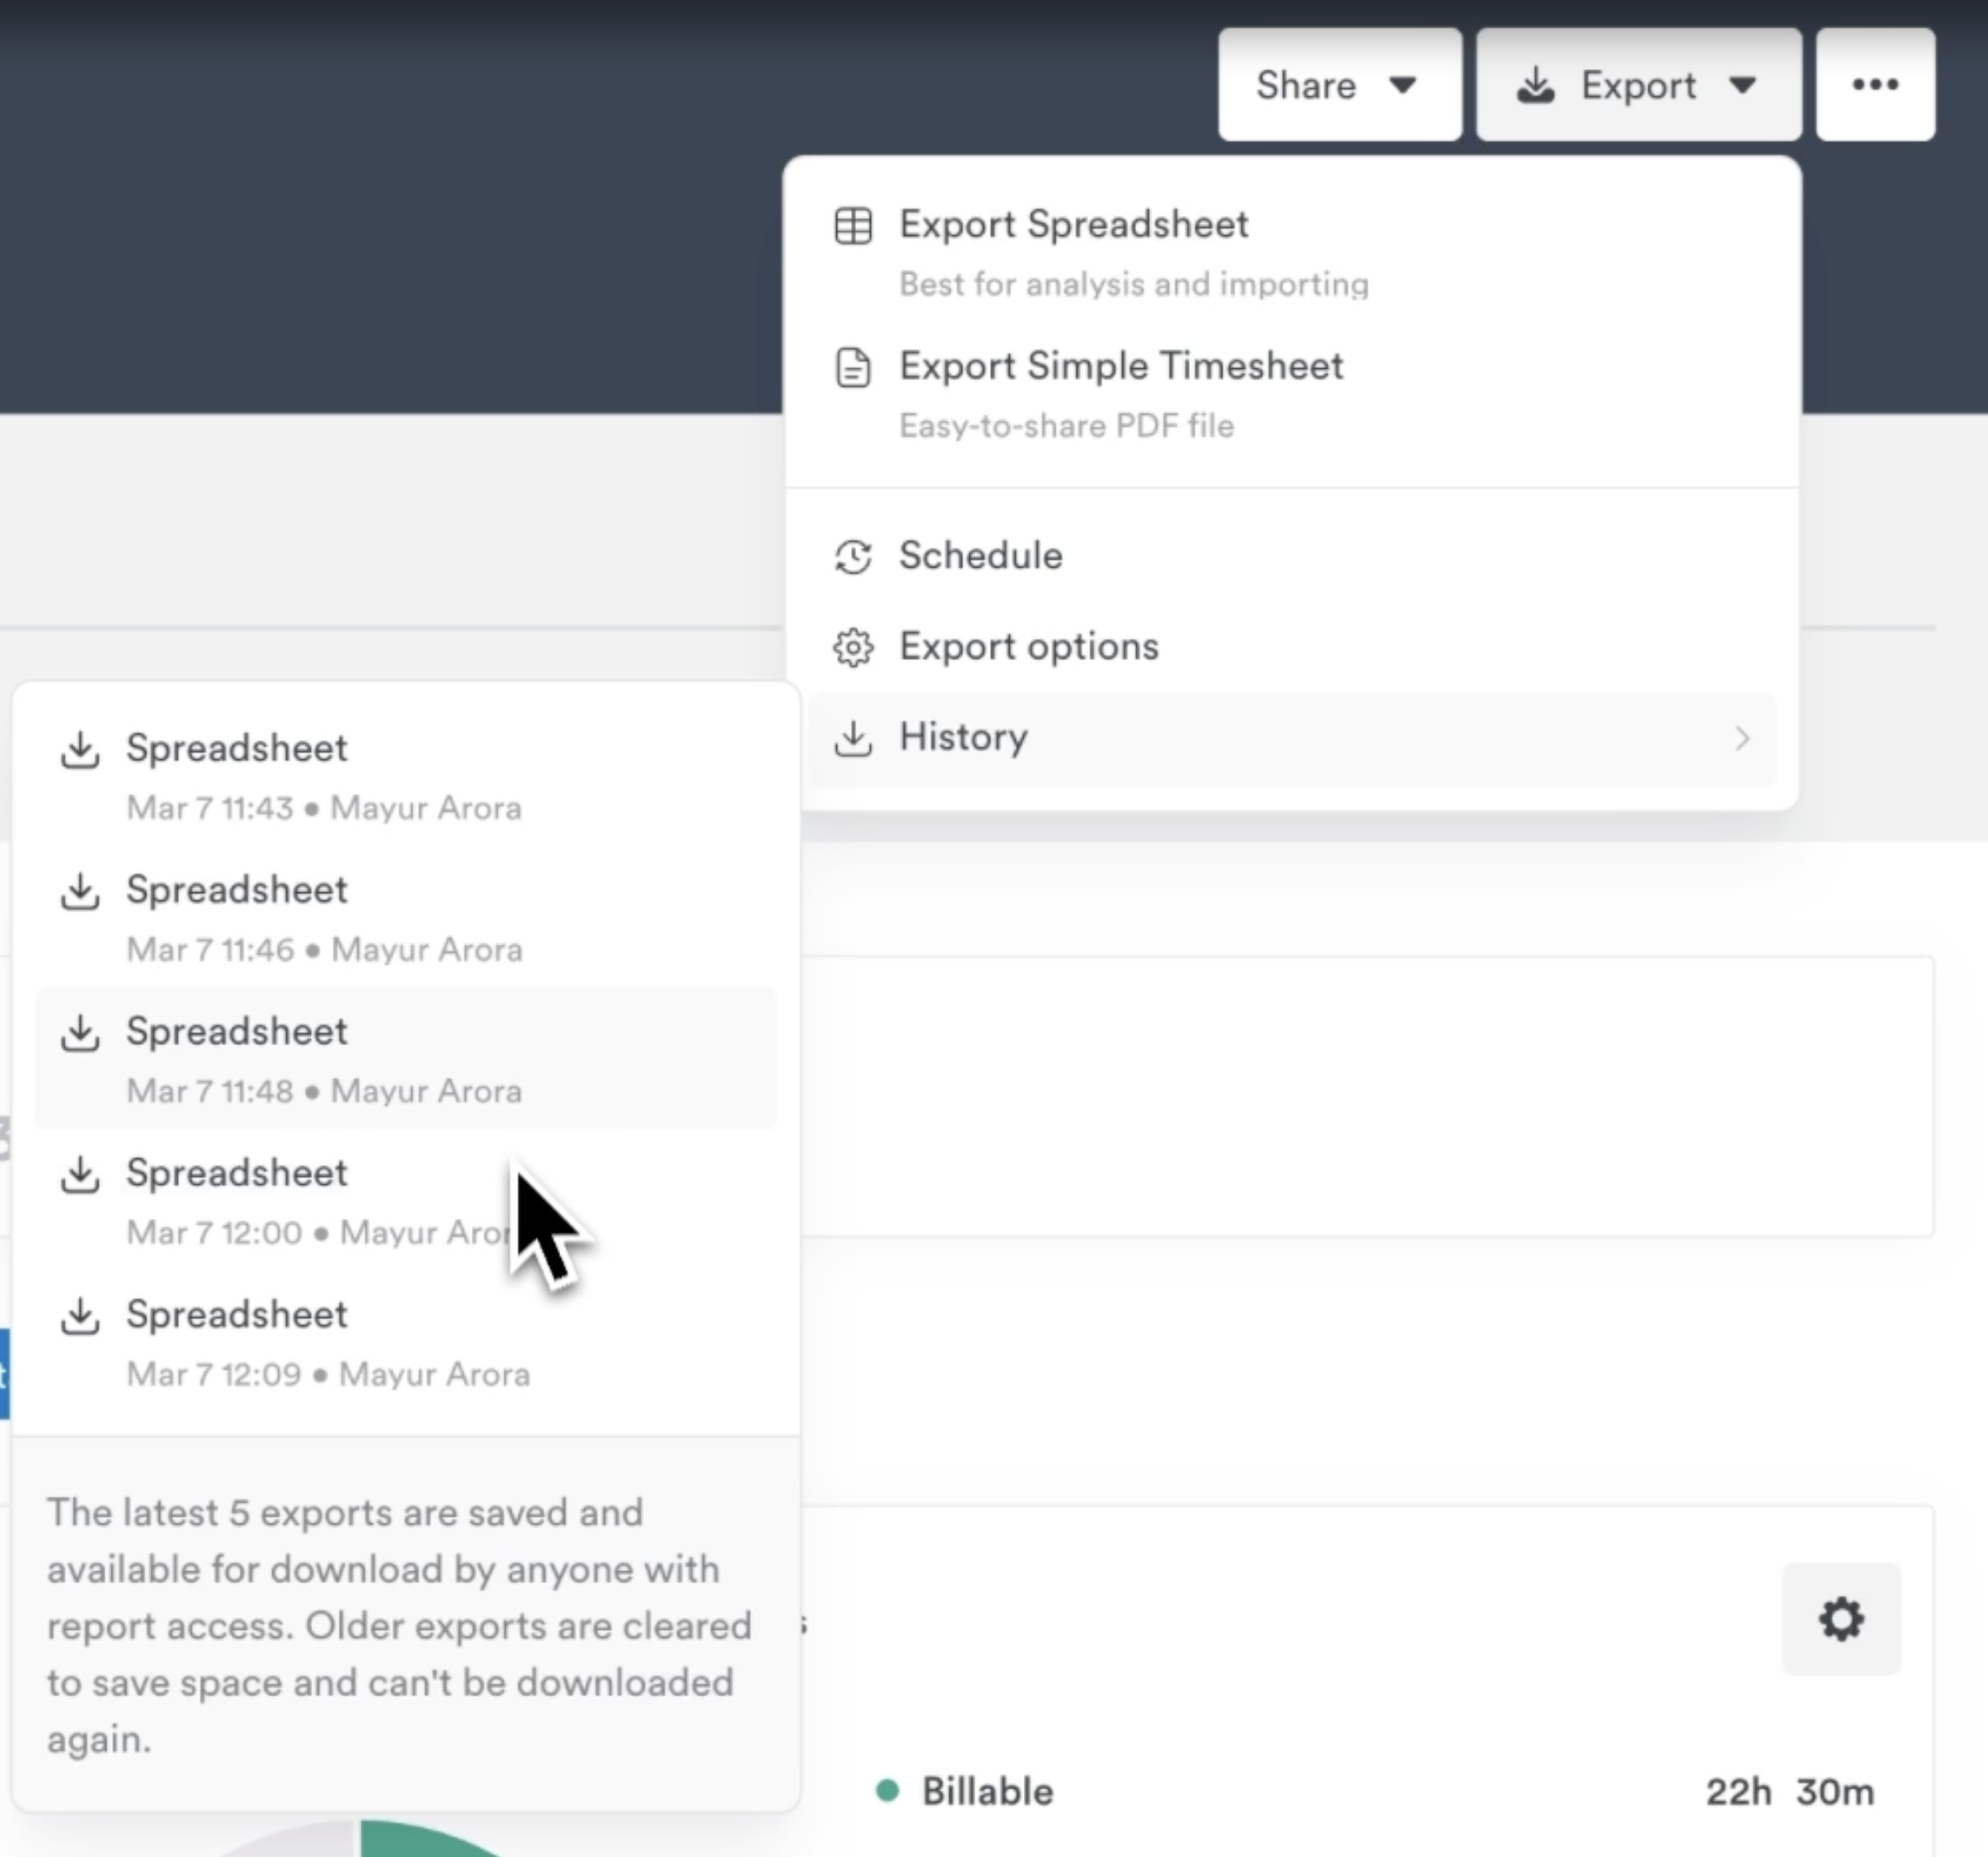
Open the export menu
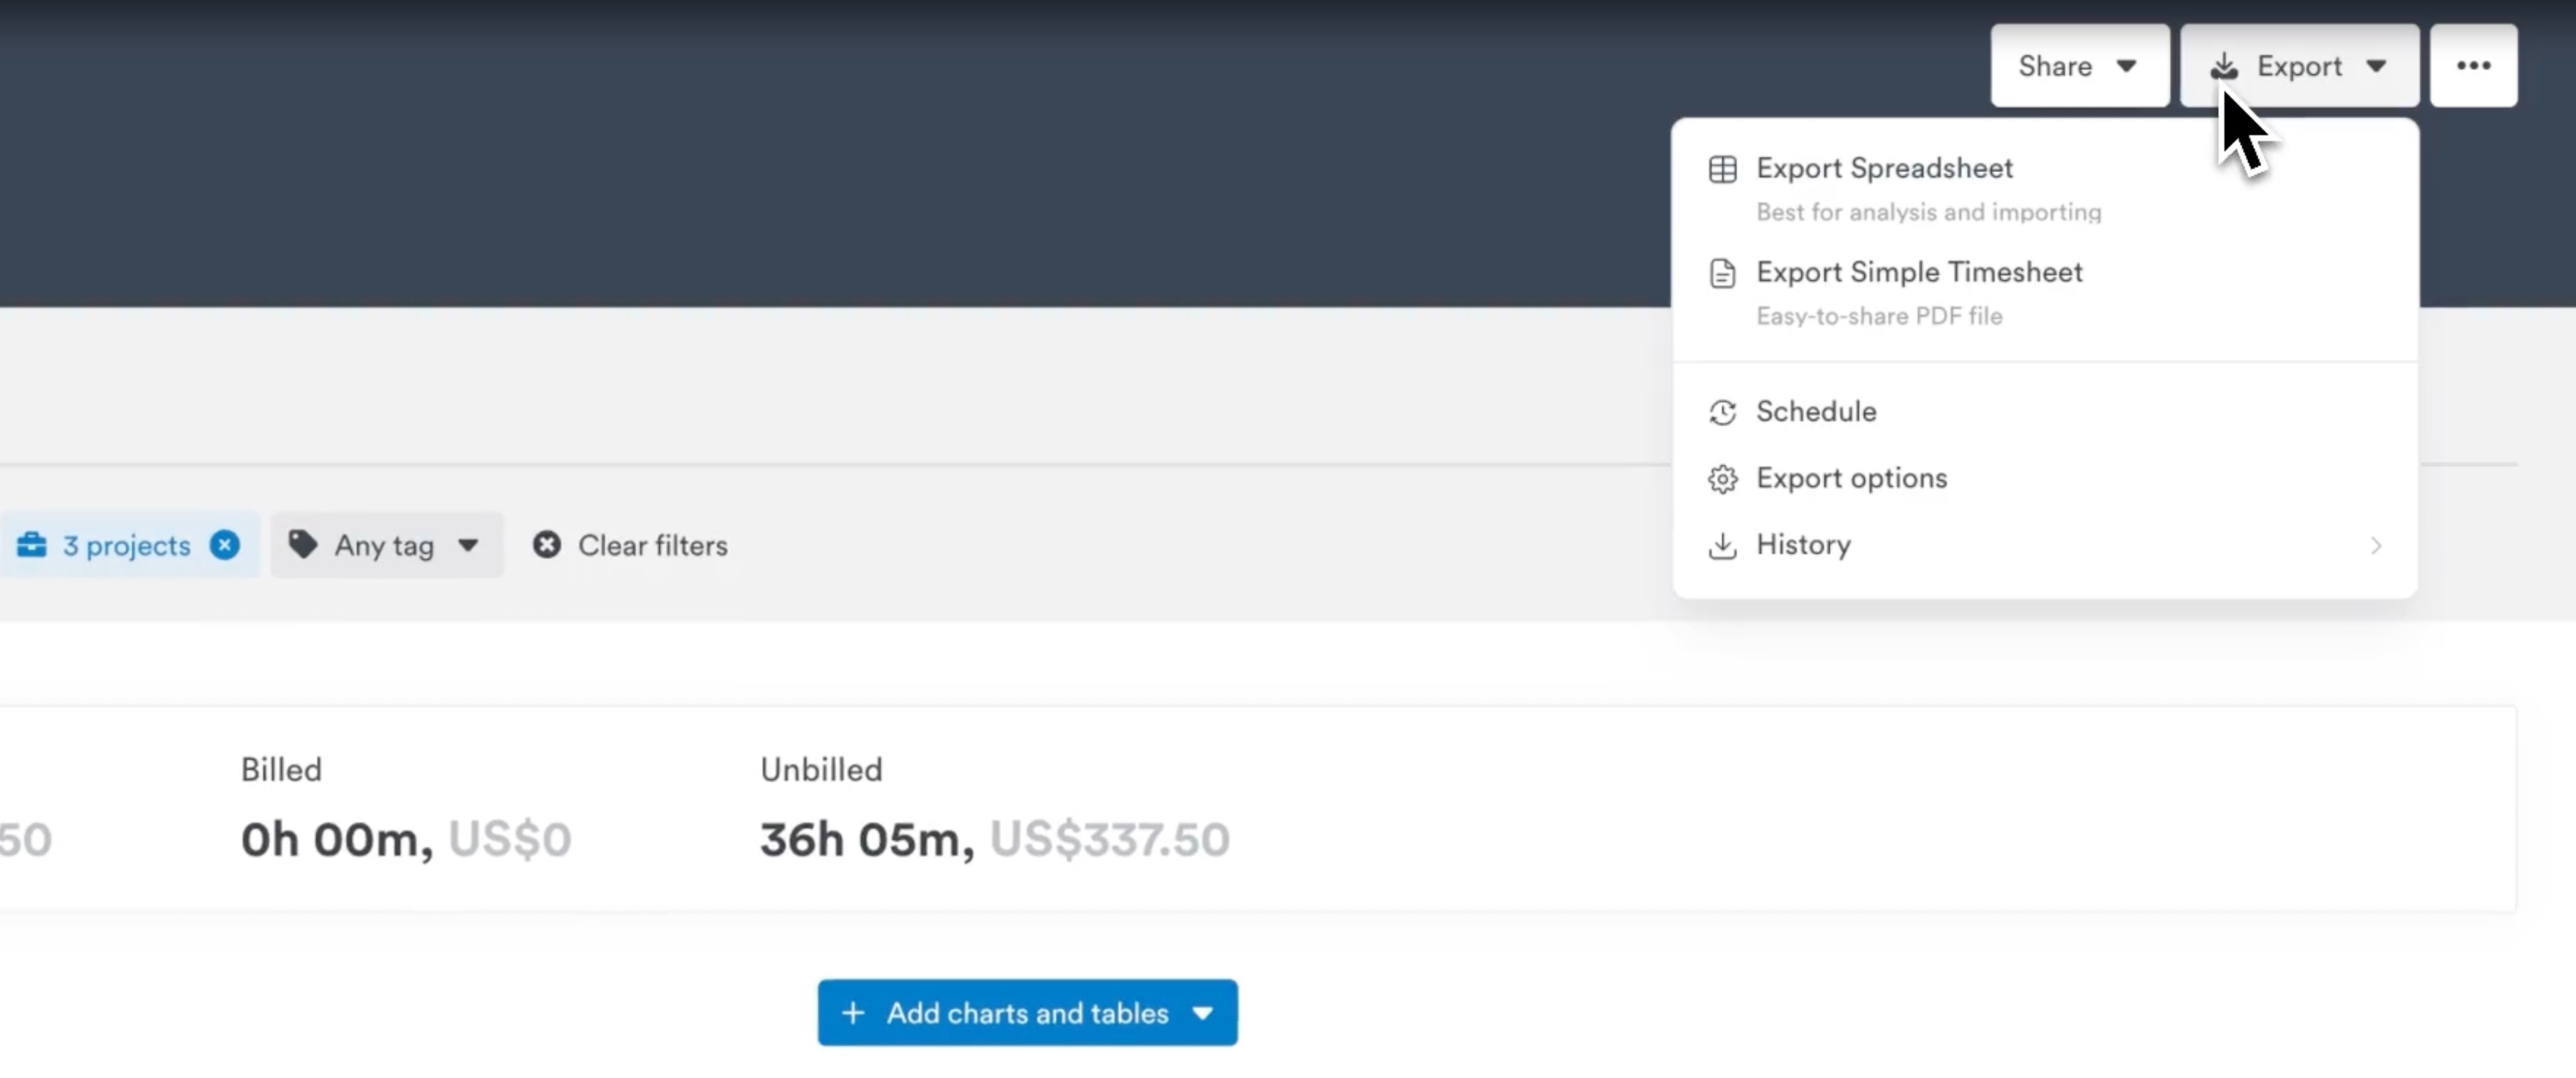
Click the Export button in the top-right corner of your saved report. You’ll see two export format options:
- Spreadsheet — for in-depth, customizable data
- Simple Timesheet — for a cleaner, PDF-ready summary
Each export option comes with its own format and purpose — so it’s worth knowing what to expect before you choose.
Exporting as a spreadsheet (CSV/XLS)
Choose this if you want full control over what data gets exported. Perfect for analysis, internal reporting, or sharing detailed breakdowns.
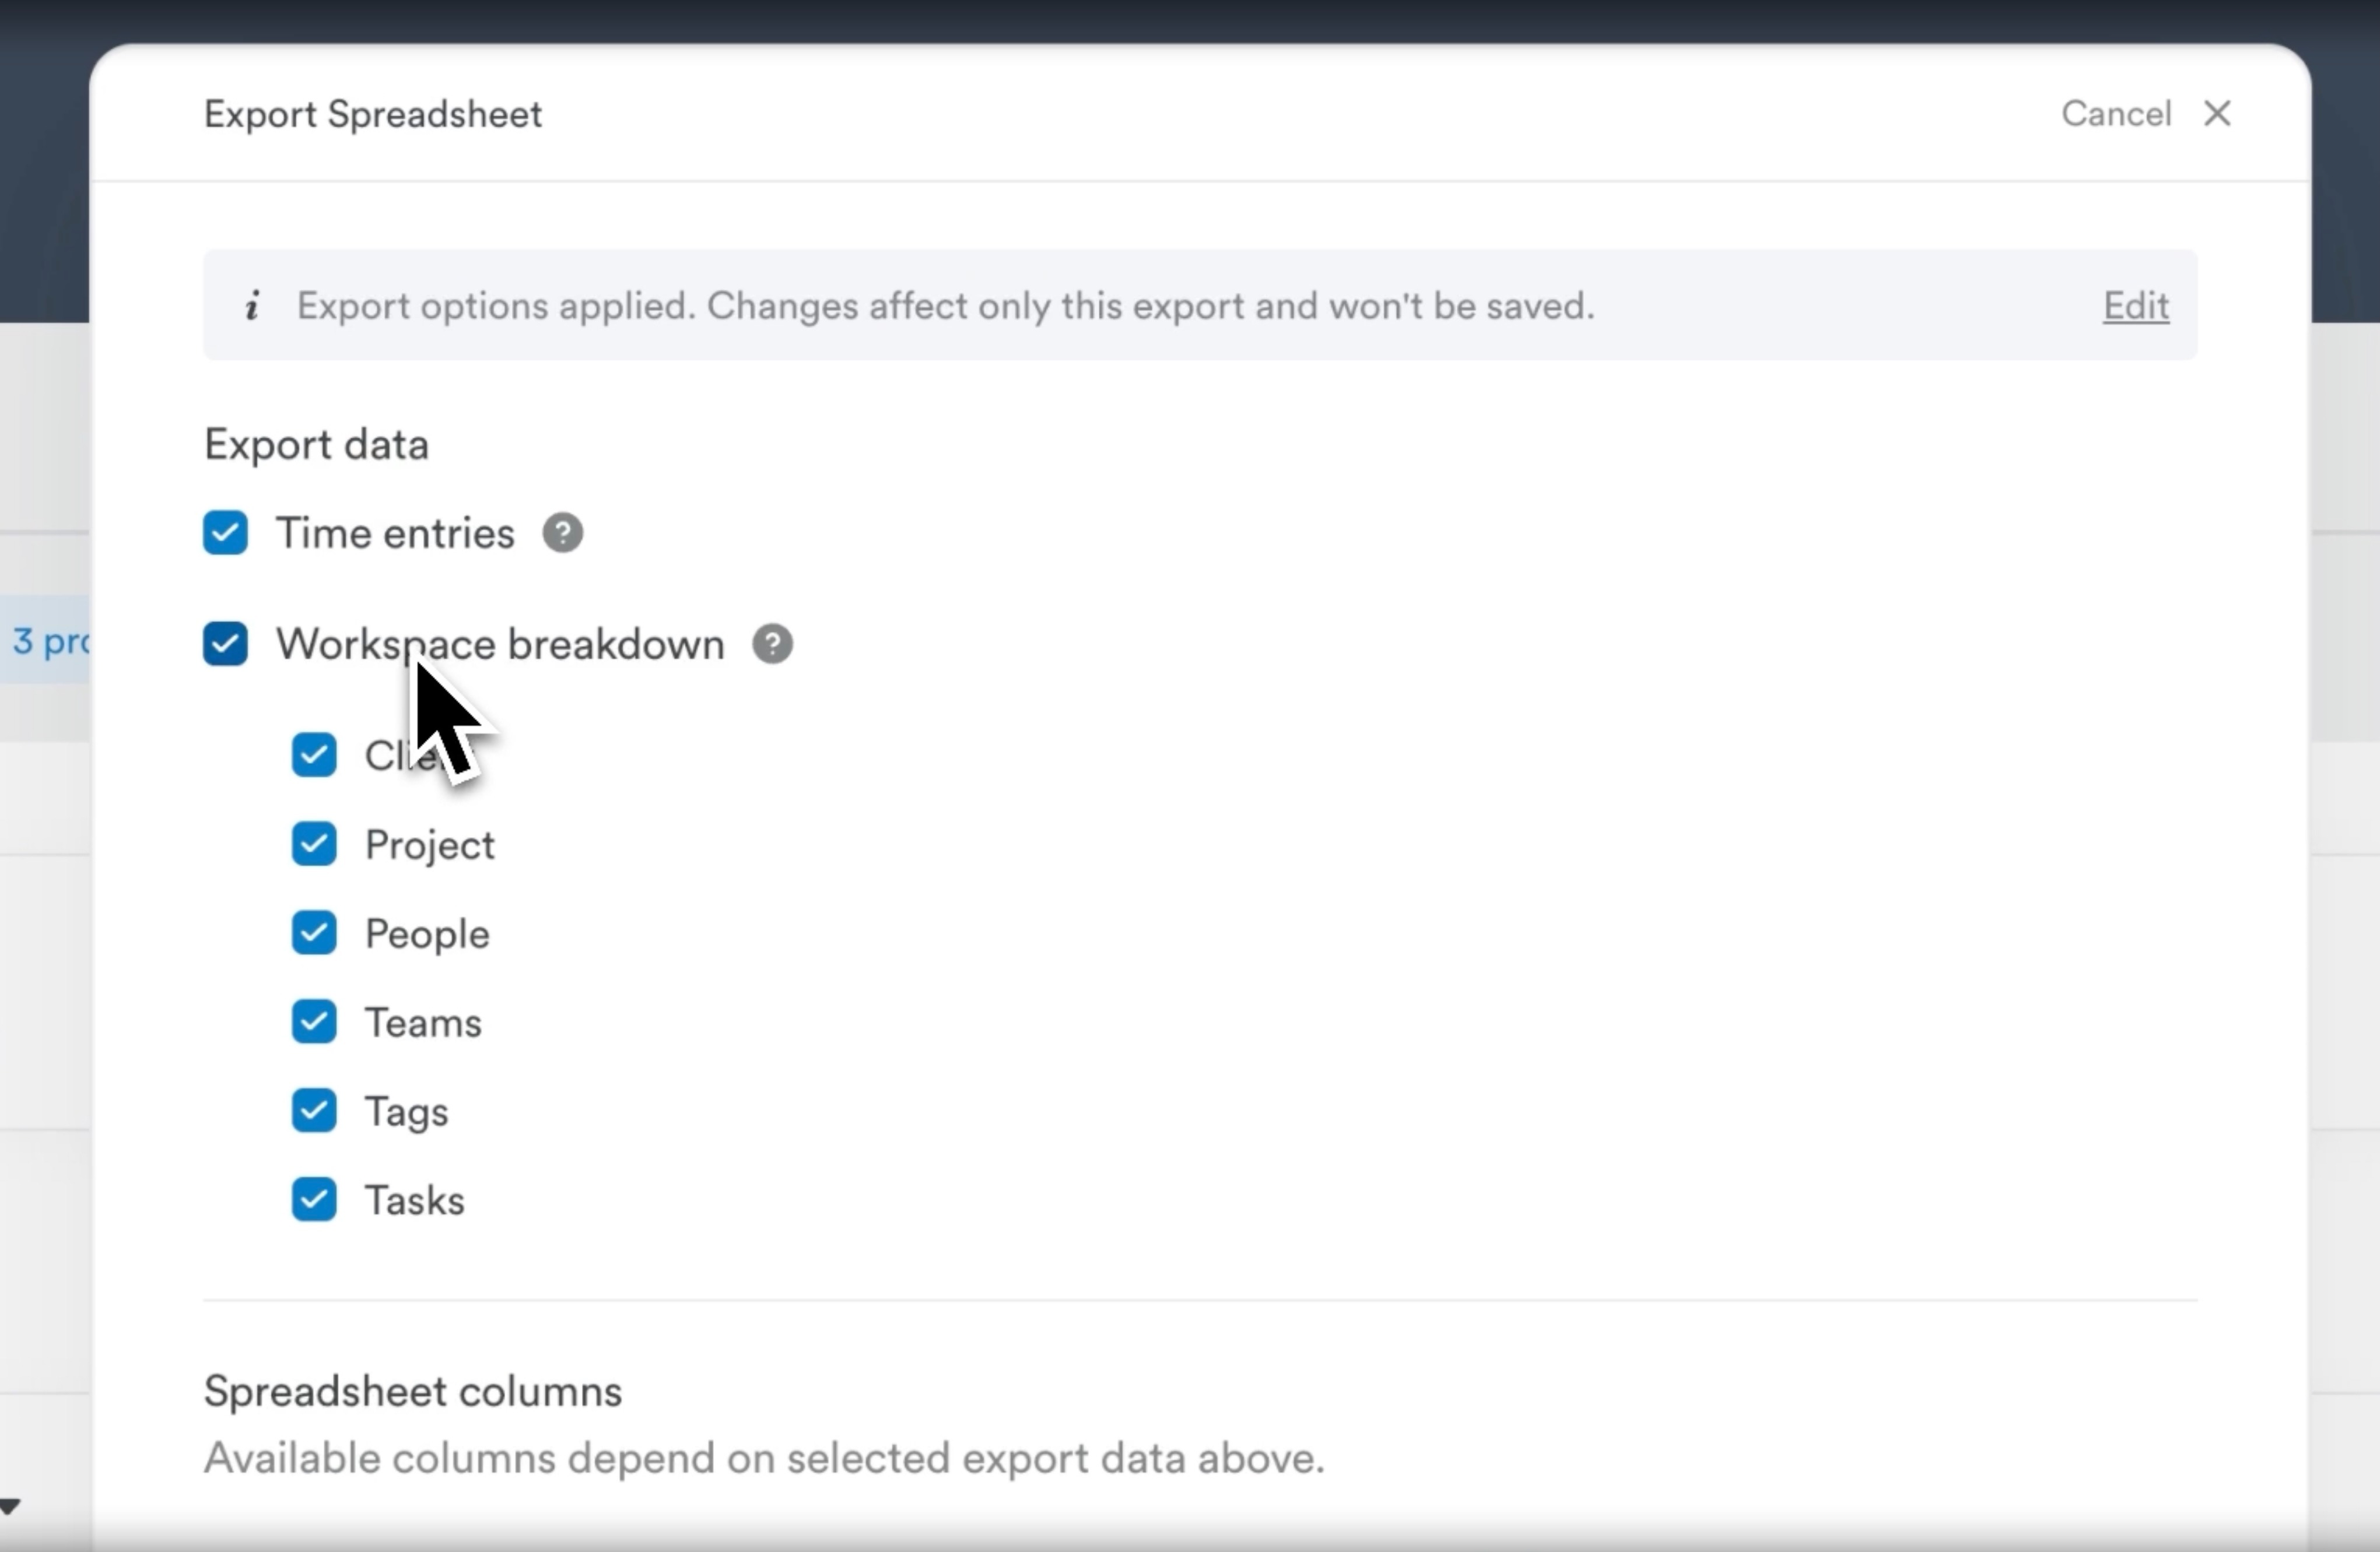
Data you can export:
- Time Entries — previously the “Entries only” option
- Workspace Breakdown — projects, clients, users, teams, tags, tasks (formerly the “Totals only” option)
- Combine both for a full picture (formerly the “Entries and Totals” option)
File format options:
- If you’re exporting one table: we’ll generate a CSV.
- If you’re including multiple tables: we’ll bundle them into a multi-sheet XLS file.
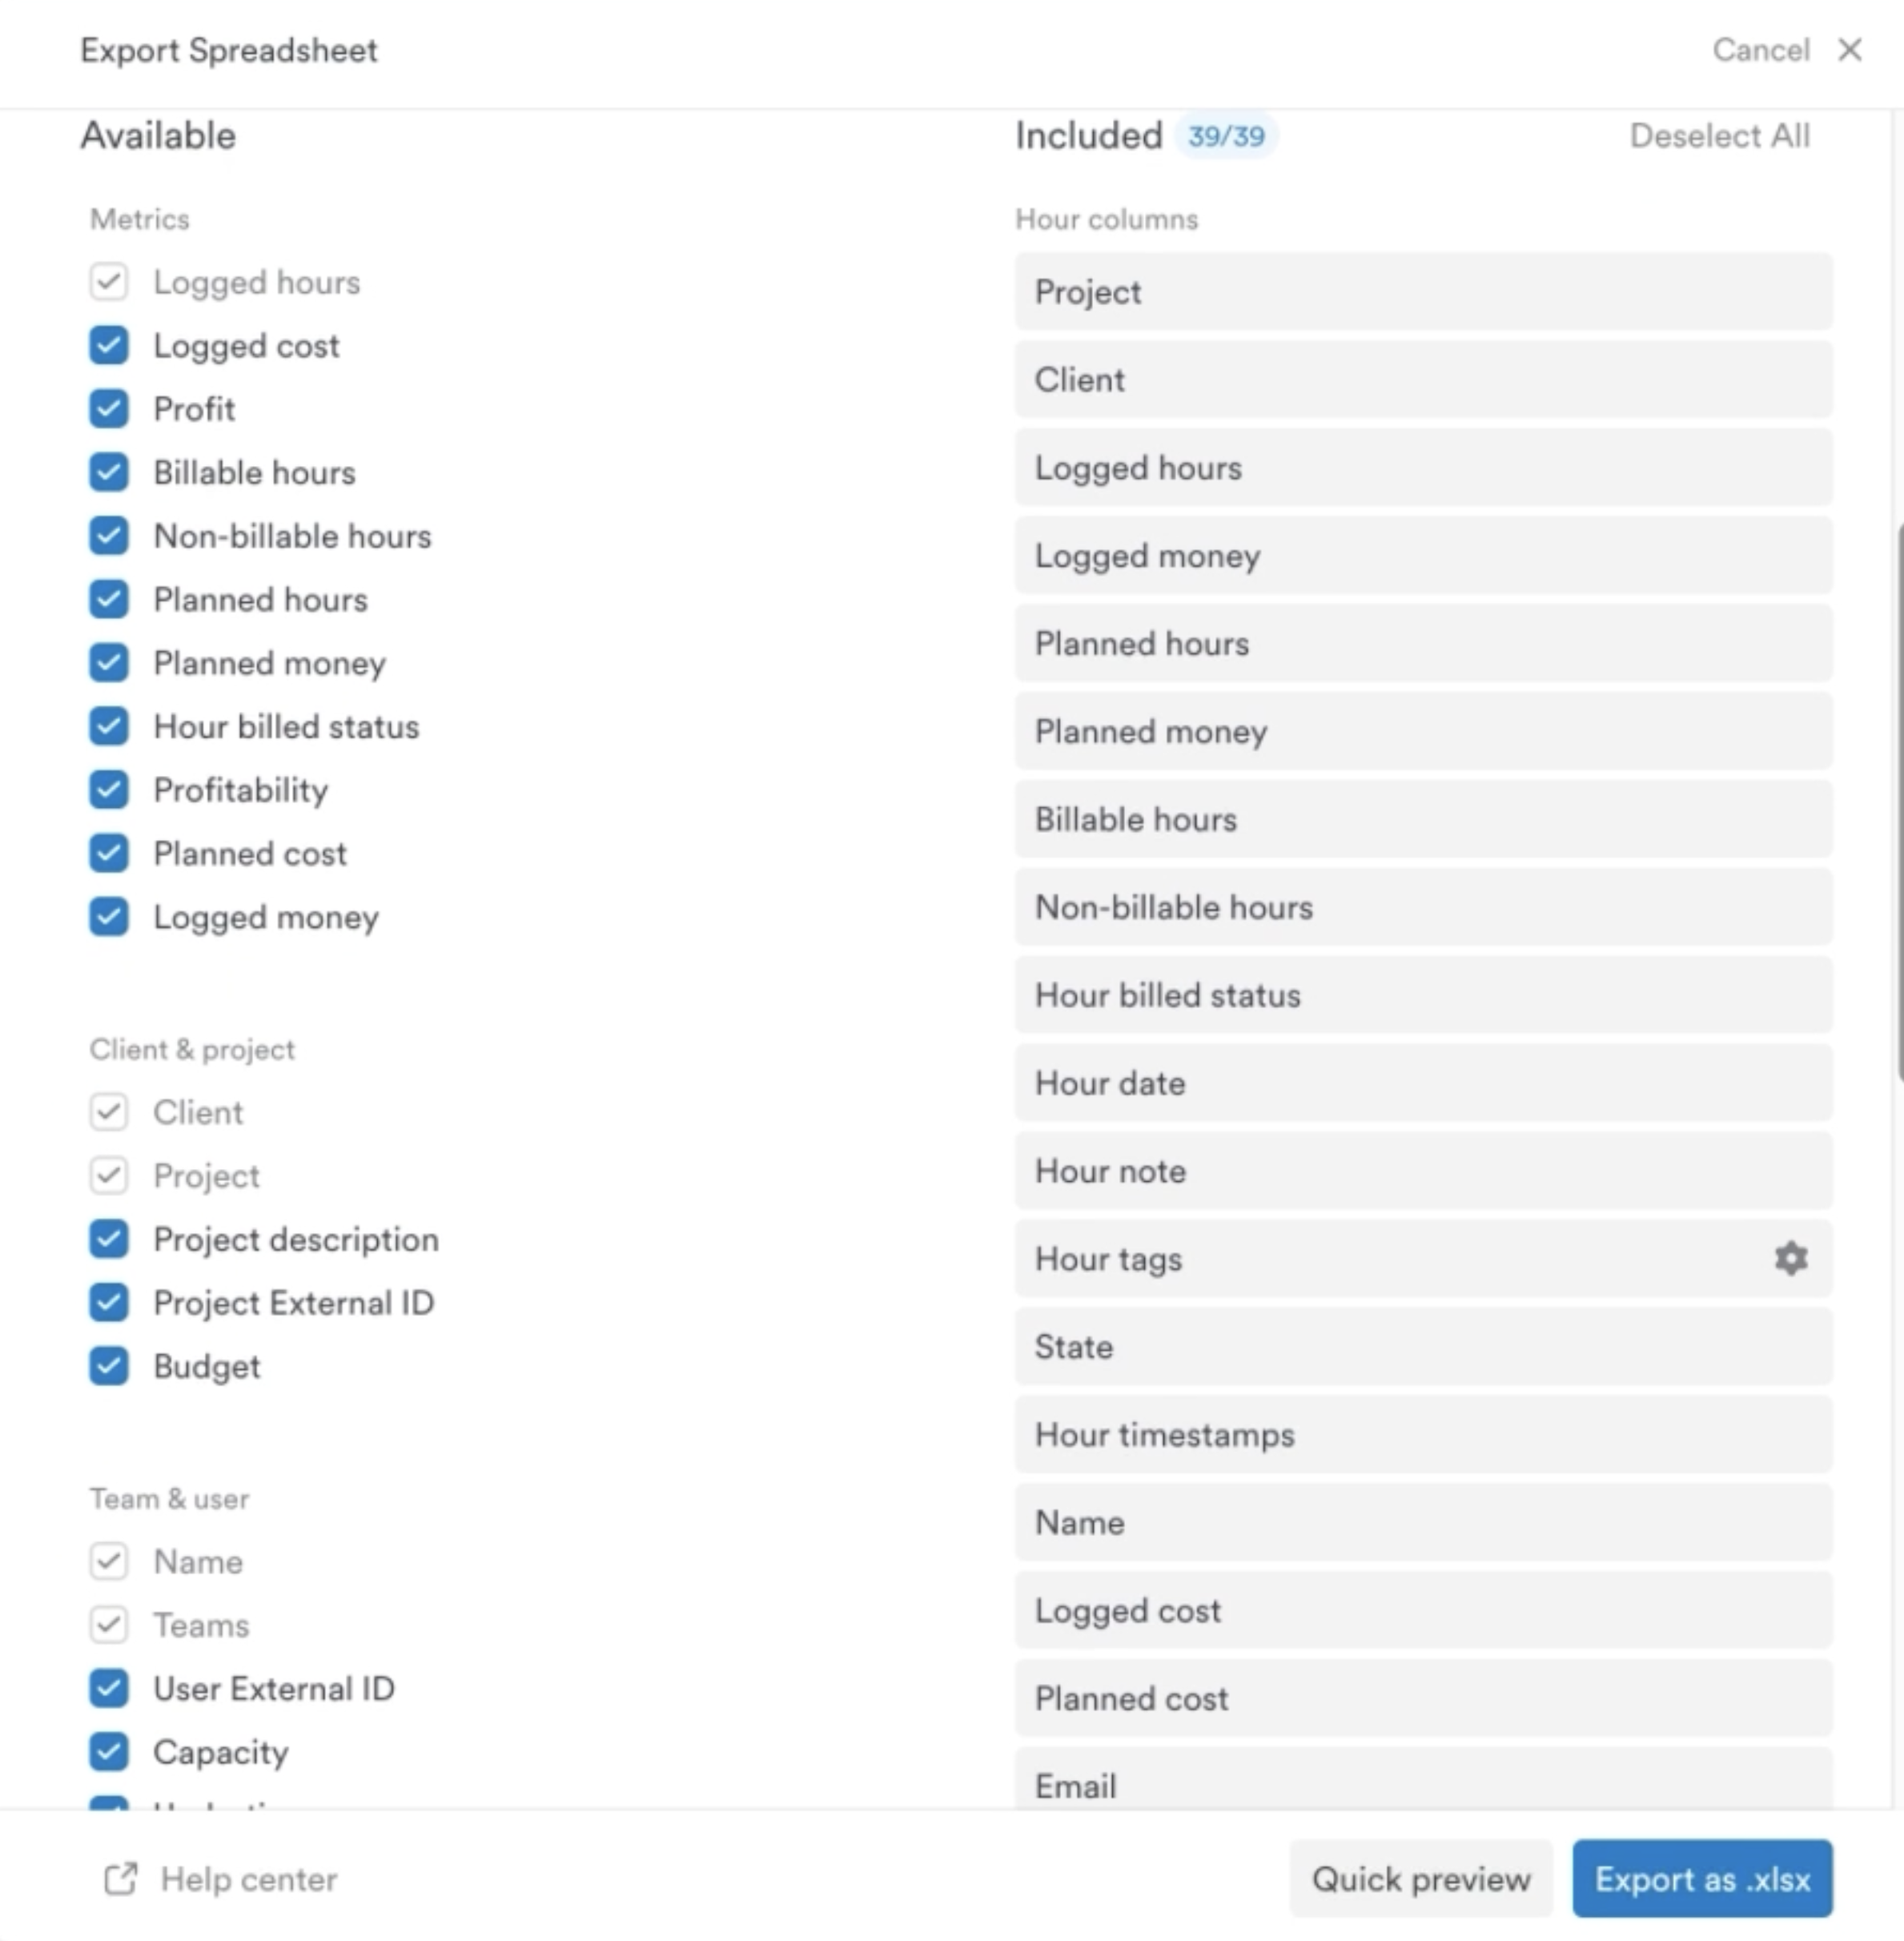
Customize your columns:
After choosing your data, you’ll be able to select which columns to include in the export:
- Some columns are mandatory (we’ll gray them out for you)
- Columns are grouped into easy-to-scan categories: Metrics, Client & Project, Team & User, Entry, and Tasks
Linked work columns (Jira):
If your account has the Jira sync integration enabled, you’ll also see linked work columns in the column picker, including:
- Linked Work Item N ID — the Jira issue ID for each linked ticket
- Linked Work Item N Title — the issue title
- Linked Work Item N Sync Status — whether the worklog synced successfully to Jira
- Linked Work Item N Jira Custom Field — the Timely client mapped from the linked Jira ticket’s custom field (for example, a Beneficiary field). Use this column alongside the standard client column to quickly spot mismatches between the client selected on a time entry and the client indicated by the Jira custom field.
One set of columns is generated per linked work item on each time entry (e.g. Linked Work Item 1 Jira Custom Field, Linked Work Item 2 Jira Custom Field).
Exporting as a simple timesheet (PDF)
Need something clean, polished, and easy to share? Choose the Simple Timesheet export for a quick PDF snapshot:
- No table breakdowns — just a streamlined list of time entries
- You can still select which columns to include
- Exports can include totals only or totals with entries
- Blank columns are optional (just like in spreadsheets)
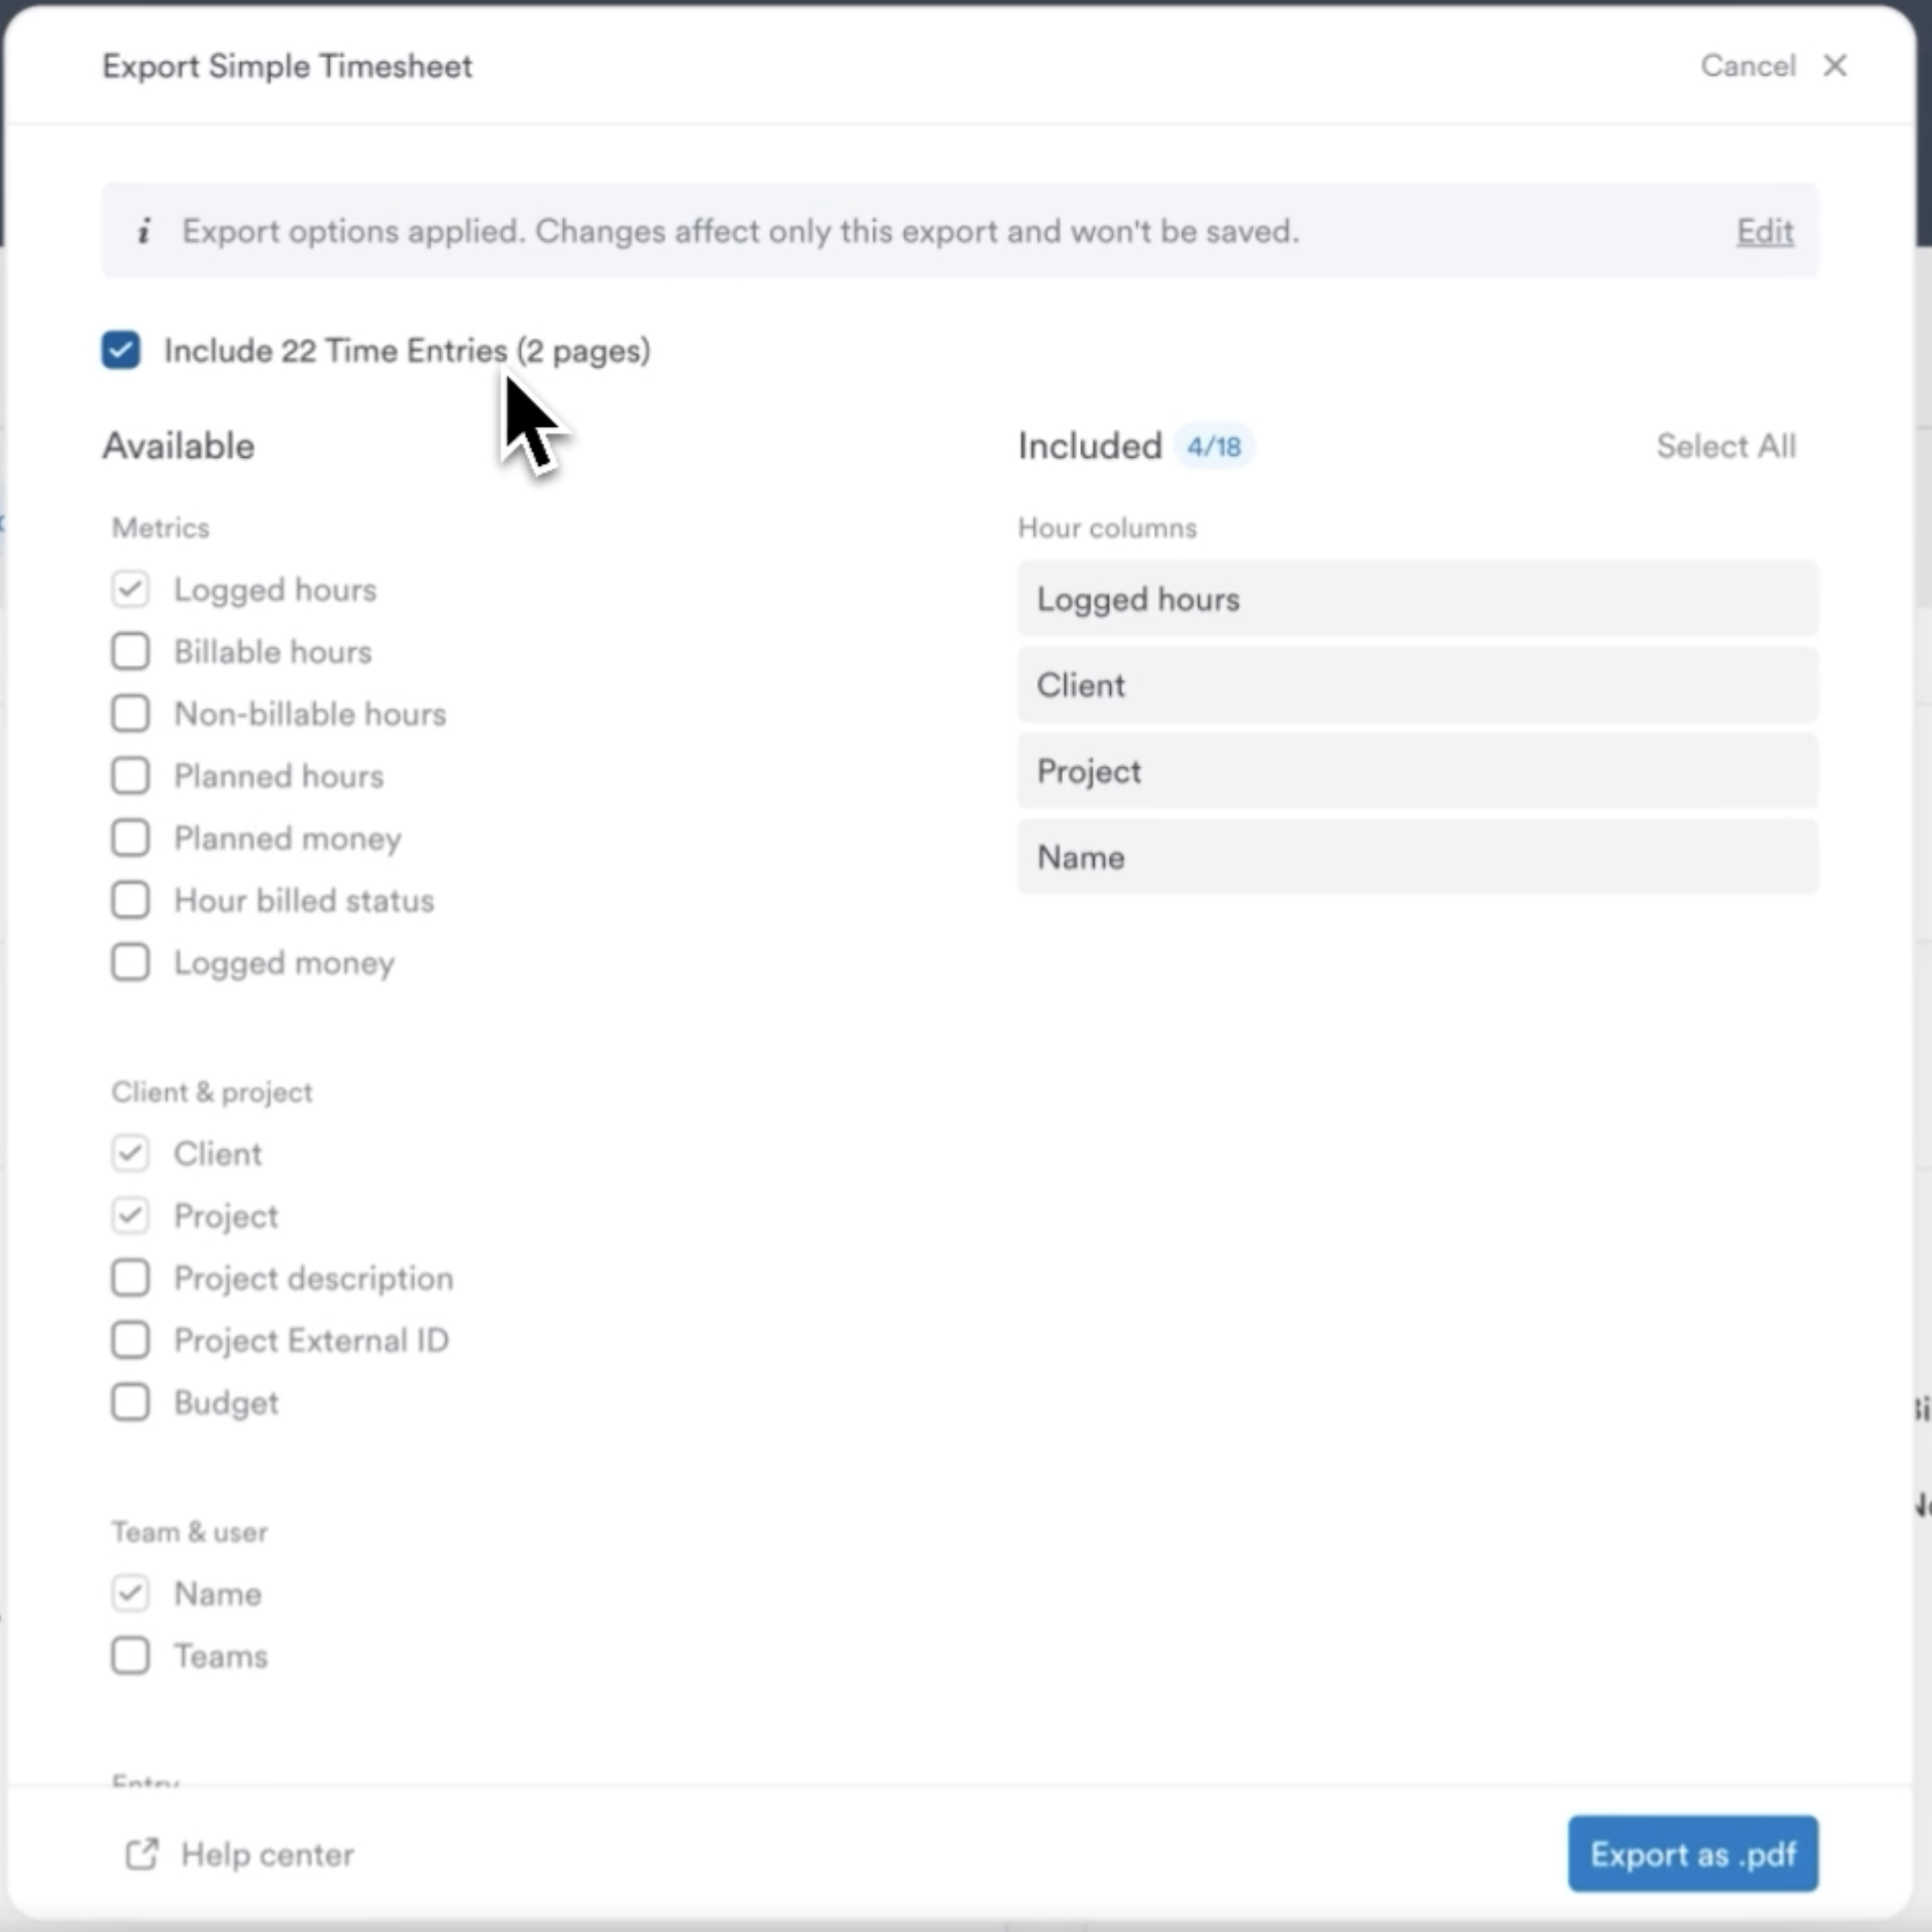
Once you’ve made your selections, click the Export button to generate your file. If you’re exporting a larger dataset, you might see a message letting you know the export is processing. We’ll email you the file as soon as it’s ready.
Set your export defaults (optional)
If you regularly export the same type of report, you can define default export settings using the Export Options menu. This lets you save:
- Your own customized default column selection and layout
- Tag display preferences
- Whether to include blank columns
These defaults will be applied automatically whenever you export from that report, as well as on scheduled exports, but you can update or override them anytime.
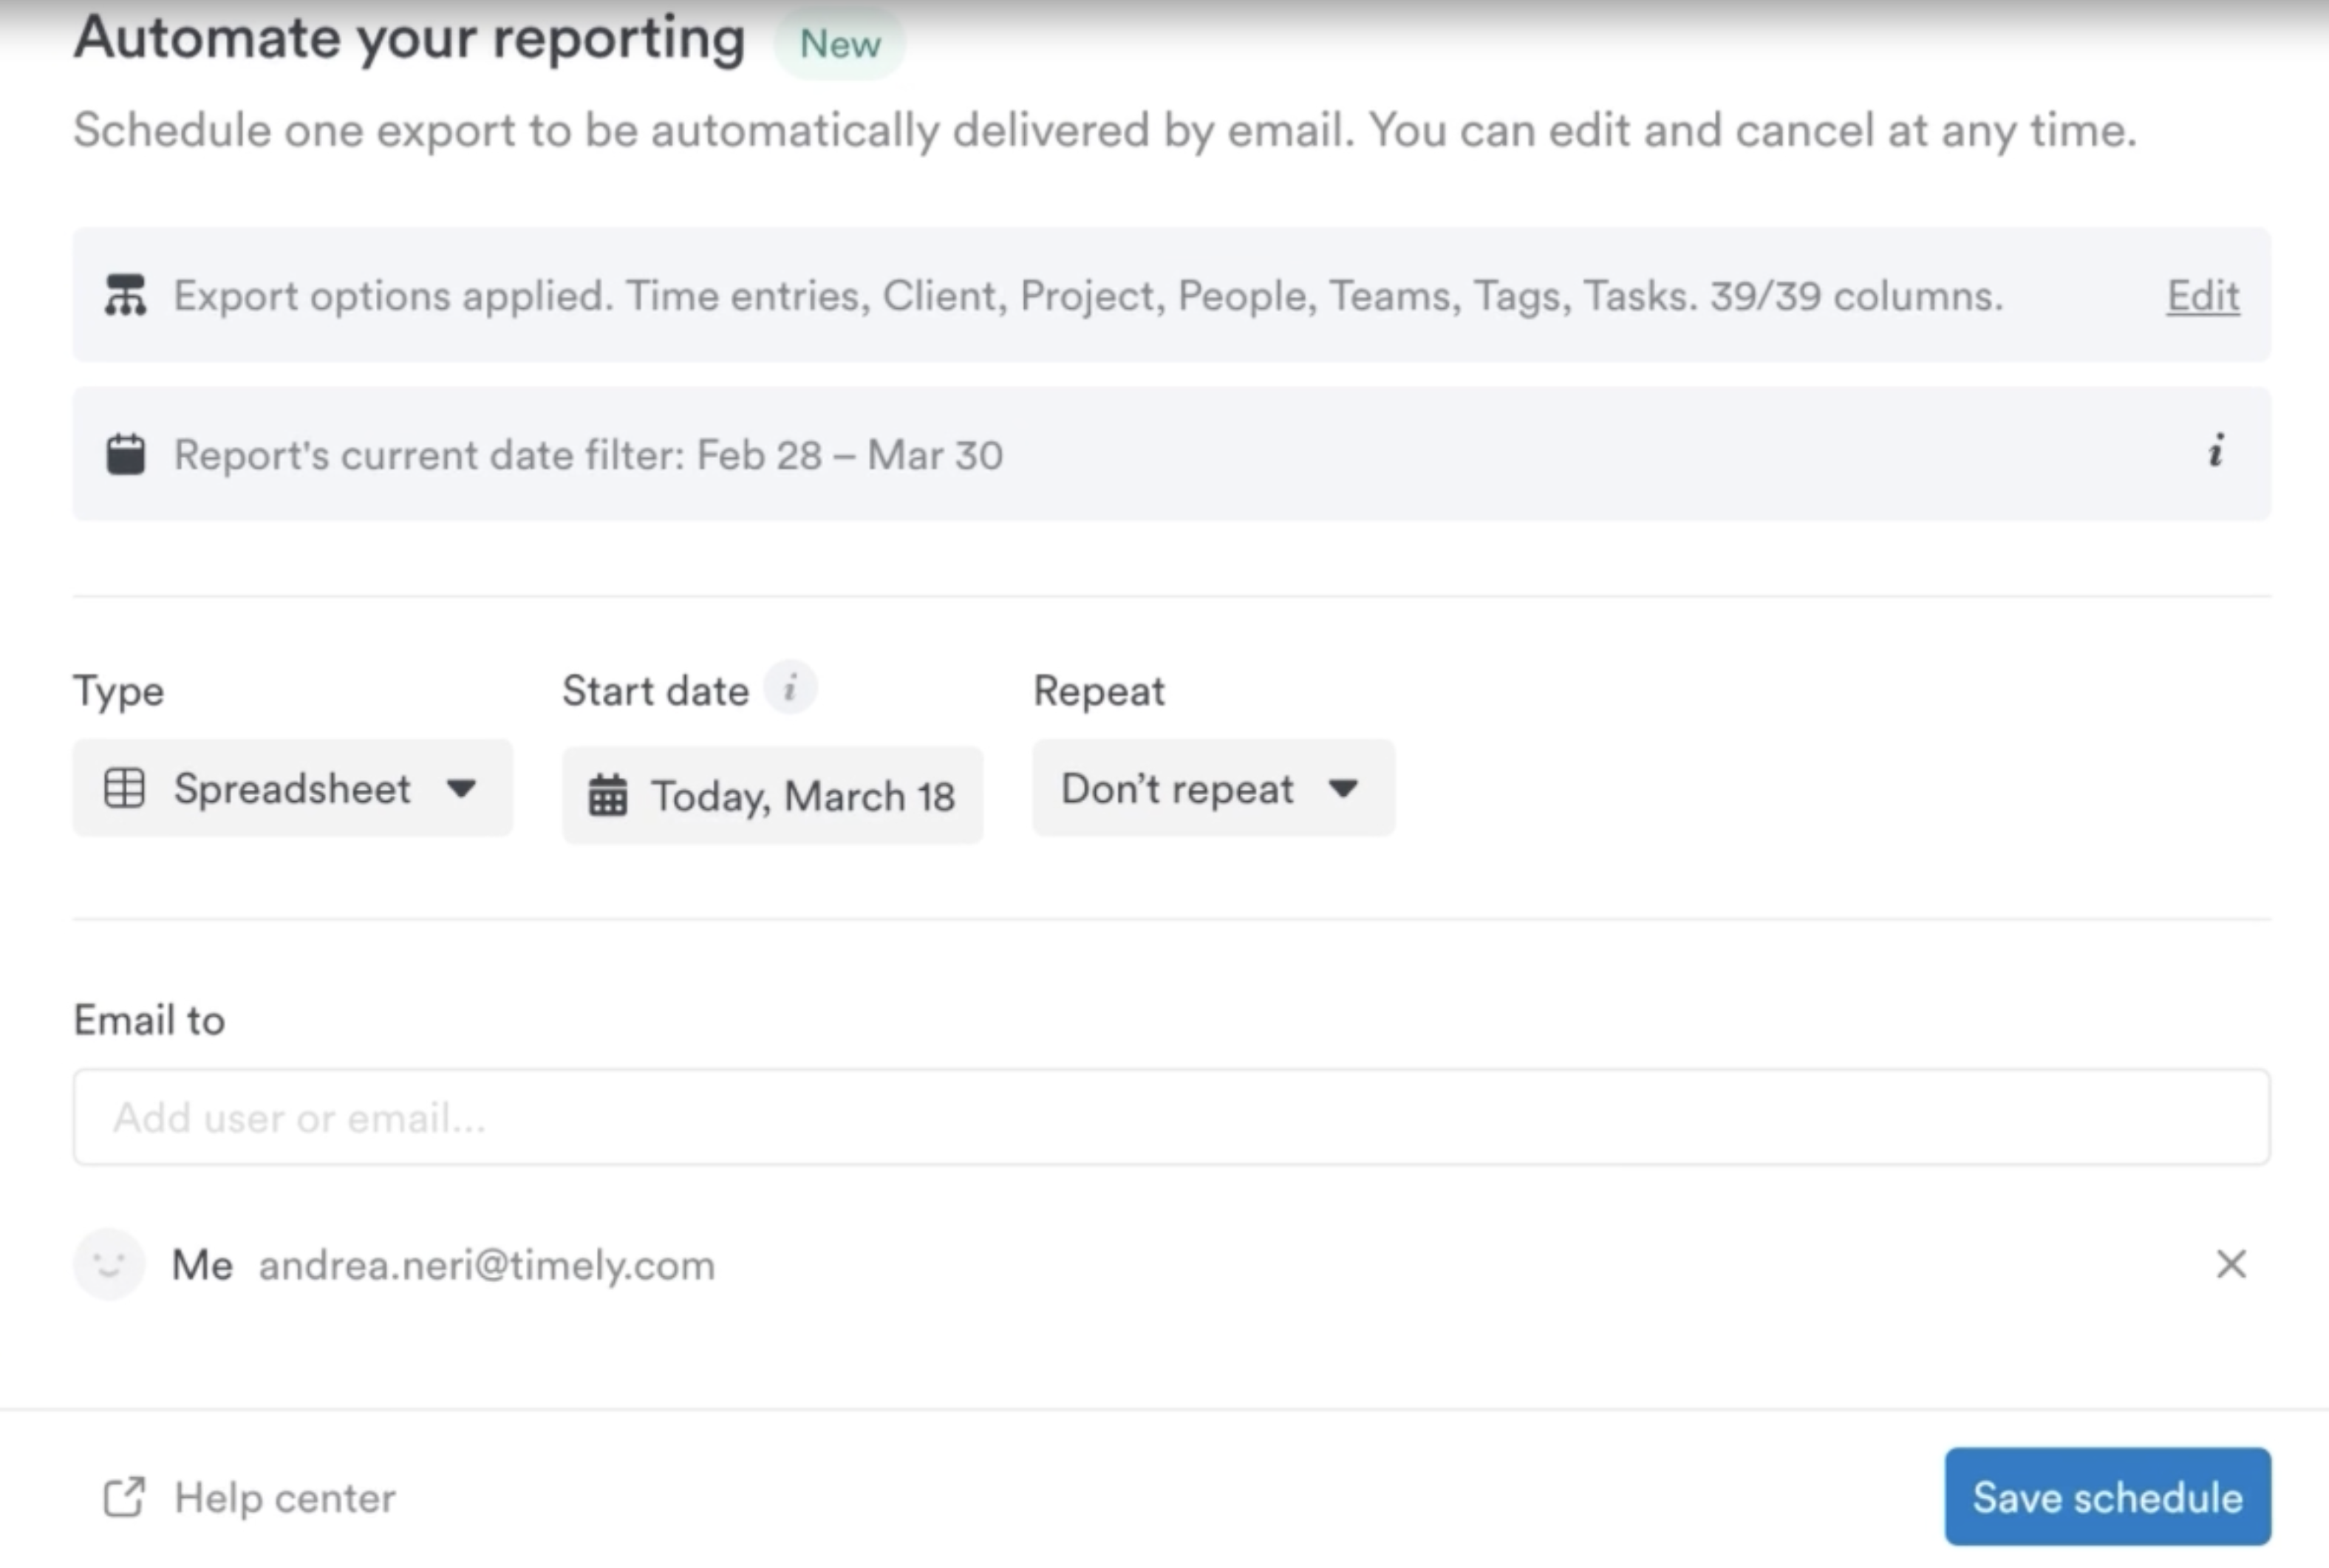
Schedule recurring exports (optional)
Save time and stay consistent by automating your exports. You can schedule any saved report to be sent via email on a regular cadence — weekly, bi-weekly, monthly, or yearly.
- Found in the Export dropdown menu under the Schedule option
- Each report supports one active schedule at a time
- Deliver to one or more email addresses
- Scheduled exports use your saved Export Options and current filters
- Reports are generated at midnight based on the schedule start date
- Use dynamic date ranges (like “This Month” or “Last Week”) for up-to-date data every time
Access past exports
Need to re-download a recent report? No problem. Timely automatically saves your last five exports in the Export History menu, so they’re easy to find and grab again. Older exports are cleared out to keep things tidy.
Exporting from the Timesheet tab
When exporting directly from the Timesheet view, what you see is exactly what you get.
- The export will reflect your current filters, columns, and layout
- The report downloads instantly as a CSV file
- Sorting is preserved for key fields like name, project, tags, client, and billable status
- If you’ve chosen to show tags in multiple columns, they’ll be placed at the end of the file
Just click the Export button in the top right-hand corner of your timesheet and your file will begin to download.
A few final tips
- Removing a data source (like “Hours”) doesn’t automatically remove related columns — make sure to review column selections before exporting.
- For very large exports, we’ll send your file by email instead of triggering a direct download.
- Export formatting and defaults can be managed at both the workspace level and the individual report level.
CSV and Excel export fields
As you generate your CSV or Excel export files and select the appropriate columns, you can reference the different fields available and their descriptions below.
| Field Name | Description | Notes |
|---|---|---|
| Budget Total | The total amount of money or time allocated for a project. | Can be set on the project’s settings page. |
| Hour date | The specific date when the hours were logged for. | |
| Name | The name of the person who logged the hours. | |
| The email address of the person who logged the hours. | ||
| Logged hours | The number of hours logged. | Expressed in decimals (e.g. 1h 30m becomes 1.5) |
| Planned hours | The number of hours that were planned to be worked. | |
| Logged money | The amount of money corresponding to the logged hours. | Based on the billable rate set either on the user, or on the associated project. |
| Planned money | The amount of money corresponding to the planned hours. | Based on the billable rate set either on the user, or on the associated project. |
| Hour tags | Tags associated with the logged hours for categorization. | By default, tags will be displayed as a comma-separated list. This can be customized by Workspace Admins under Settings > Workspace > Report Tags. |
| Hour billed status | Indicates whether the logged hours have been billed (Yes/No). | Only works with the “Marked as billed” feature in Timely. |
| Hour note | Additional notes or comments about the logged hours. | |
| Hour timestamps | The exact time range during which the hours were logged. | |
| User External ID | An external identifier for the user who logged the hours. | Can be set on the user’s settings page. |
| Teams | The teams to which the user belongs. | If a user belongs to multiple teams, they will be listed as a comma-separated list. |
| Project External ID | An optional external identifier for the project. | Can be set on the individual project’s settings. |
| Billable hours | The number of hours that can be billed to the client. | Controlled by whether or not a billable rate has been added to the project. |
| Non-billable hours | The number of hours that cannot be billed to the client. | Individual time entries can be marked as “non-billable” when logging. |
| Logged cost | The cost associated with the logged hours. | Based on the internal cost of the user. |
| Planned cost | The cost associated with the planned hours. | Based on the internal cost of the user. |
| Task title | The title of the task associated with the logged hours. | Only applicable if using the Tasks add-on. |
| Project description | A description of the project for which the hours were logged. | Can be set on the project’s settings page. |
| Linked Work Item N ID | The ID of the Nth Jira issue linked to the time entry. | Only available on accounts with the Jira sync integration. |
| Linked Work Item N Title | The title of the Nth linked Jira issue. | Only available on accounts with the Jira sync integration. |
| Linked Work Item N Sync Status | Whether the worklog for the Nth linked issue synced successfully to Jira. | Only available on accounts with the Jira sync integration. |
| Linked Work Item N Jira Custom Field | The Timely client mapped from the Nth linked Jira ticket’s custom field (e.g. Beneficiary). Useful for identifying mismatches between the client selected on a time entry and the client indicated by the Jira custom field. | Only available on accounts with the Jira sync integration. |
FAQs
What’s different in the new export experience?
The new export system is more intuitive and flexible! Instead of selecting a format first, you now configure your data first and then choose the format that best suits your needs. You can also preview your export, schedule automatic reports, and customize your export settings without leaving the page.
Can I still export reports the way I used to?
Most of the core functionality remains the same, but the process is now more streamlined. Instead of picking CSV or PDF upfront, you first define your report details, then select the format. Some terminology has changed too — what used to be called “Entries only” is now Time Entries, and “Totals only” is now Workspace Breakdown with Clients, Projects, People, etc.
What’s the difference between the export file types?
CSV — CSV exports are ideal when you’re pulling a single table of raw data. These open easily in tools like Excel or Google Sheets, and are perfect if you want to build your own formulas, charts, or dashboards — or if you’re piping Timely data into another system.
XLS — XLS files are used when your export includes multiple tables (like time entries and project breakdowns). Each table gets its own sheet, making it easier to explore data from different angles. Great for pivot tables, reporting templates, or anything more complex in Excel.
PDF (Simple Timesheet Export) — PDF exports give you a clean, easy-to-read snapshot — ideal for sharing with clients, teammates, or stakeholders. Use them to provide proof of hours worked, generate internal timesheets, or support your billing process with a polished report.
Last updated June 30, 2026
Have feedback for this article or need more help? Contact us now.