Self-Service Import Manager
Getting StartedHandbookImport projects, users, tags and time entries into Timely with the self-service Import Manager tool.Overview
Managing data in Timely just got a whole lot easier! We’re excited to introduce Self-Service CSV Imports, a powerful new tool that helps workspace admins quickly add and update users, projects, tags, and time entries — without all the manual work.
If you’ve ever needed to onboard a large team, reorganize project structures, or clean up your workspace, you know how time-consuming it can be. With this new feature, you can upload your data in bulk using simple CSV files, making setup and ongoing management more efficient than ever.
We’ve built this feature from the ground up with flexibility in mind! You can map your data exactly where it needs to go, preview changes before they’re applied, and even catch errors before they cause any headaches. Plus, every import is logged, so you can track what’s been updated and make adjustments as needed.
In this article we’ll discuss:
- Getting Started
- Starting a New CSV Import
- Project template interactions
- Best Practices, Tips & Tricks
- CSV Import File Templates & Instructions
- Reviewing Previous CSV Imports
- FAQs
Getting Started
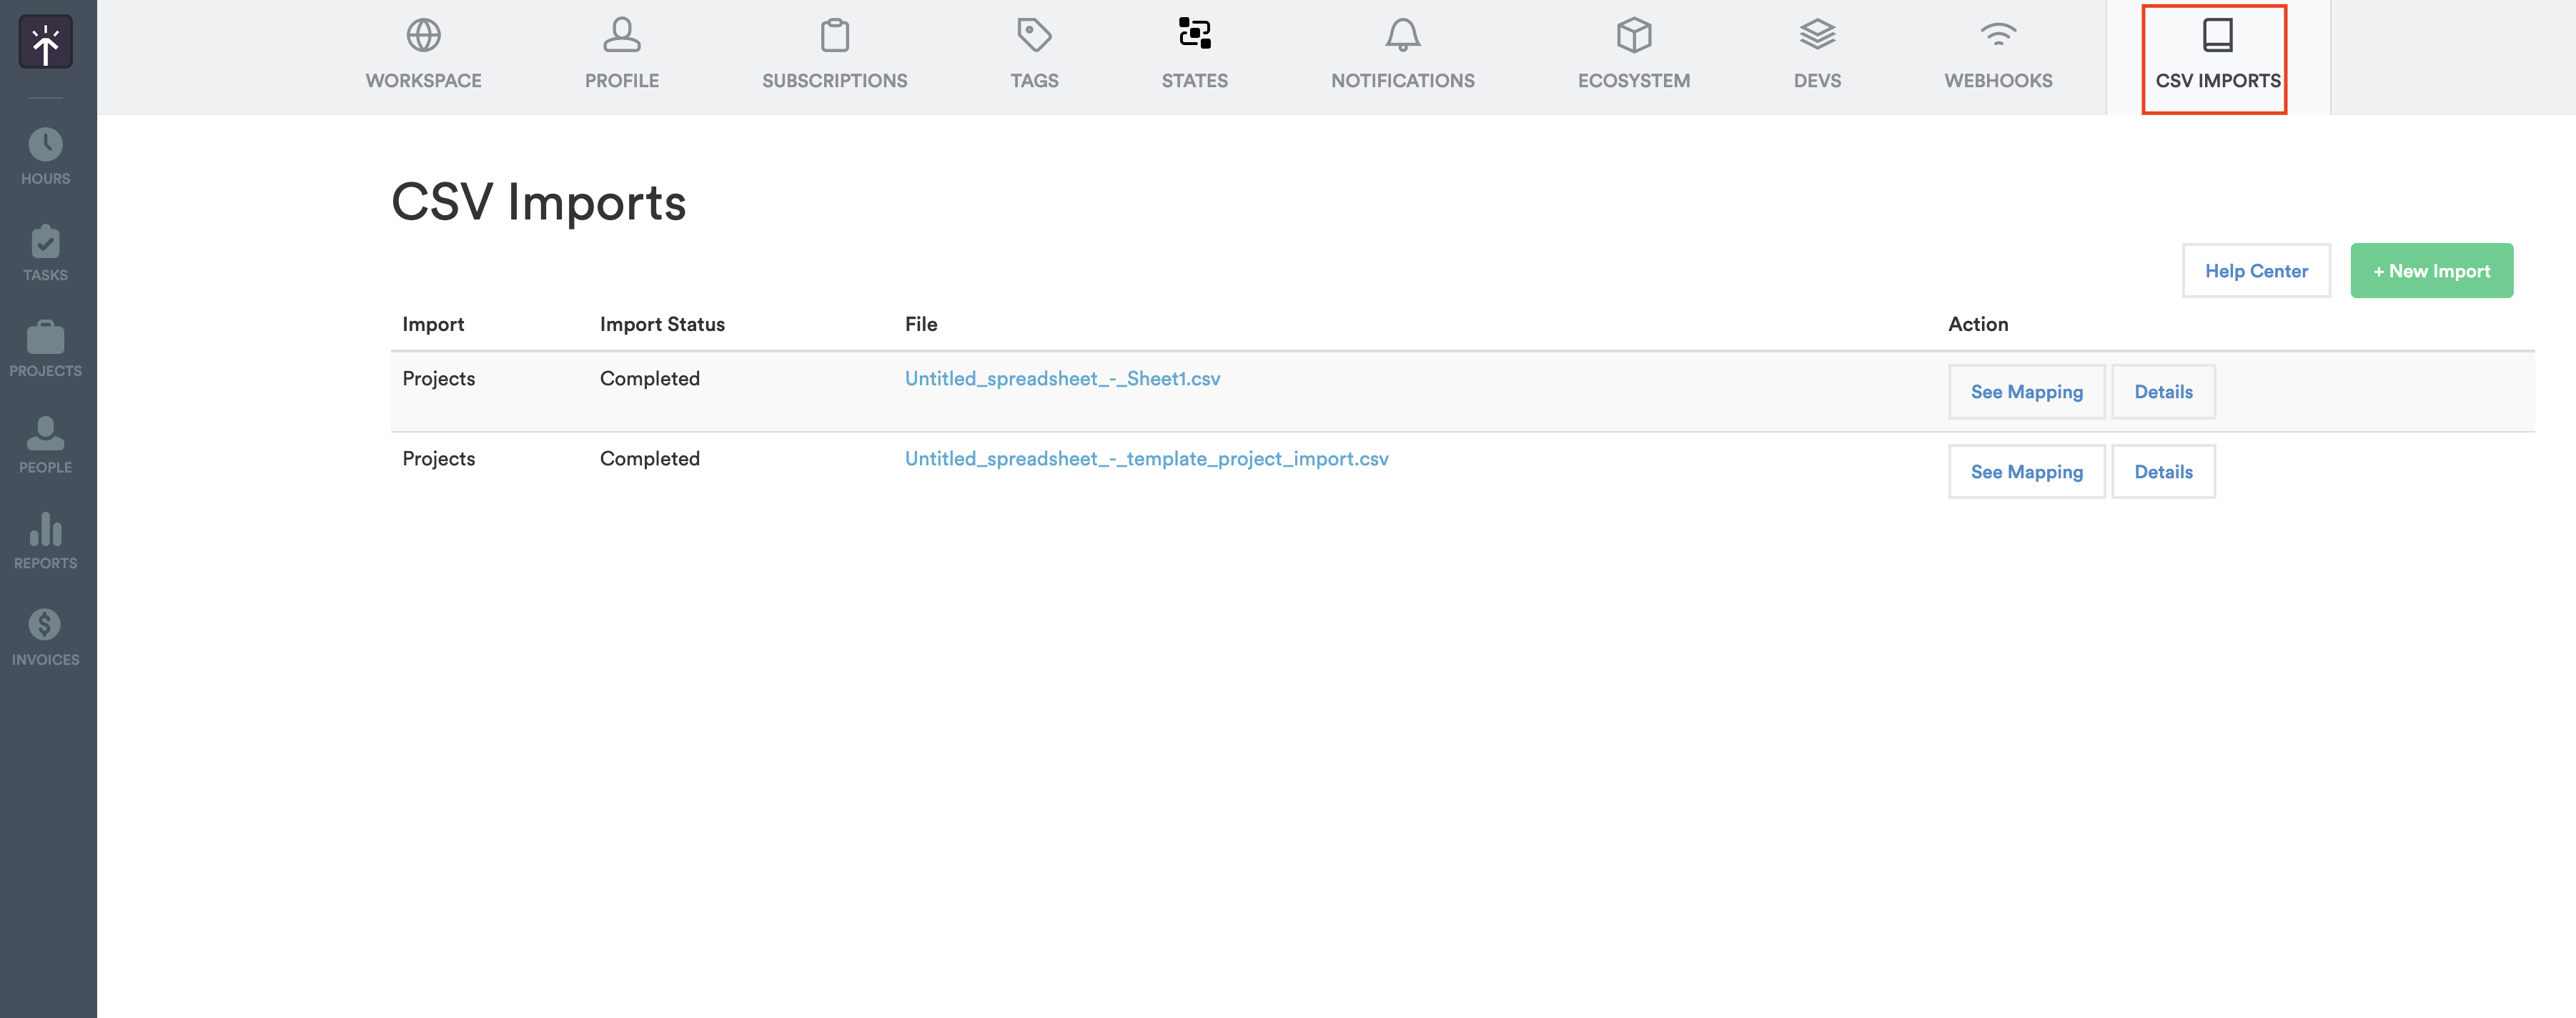
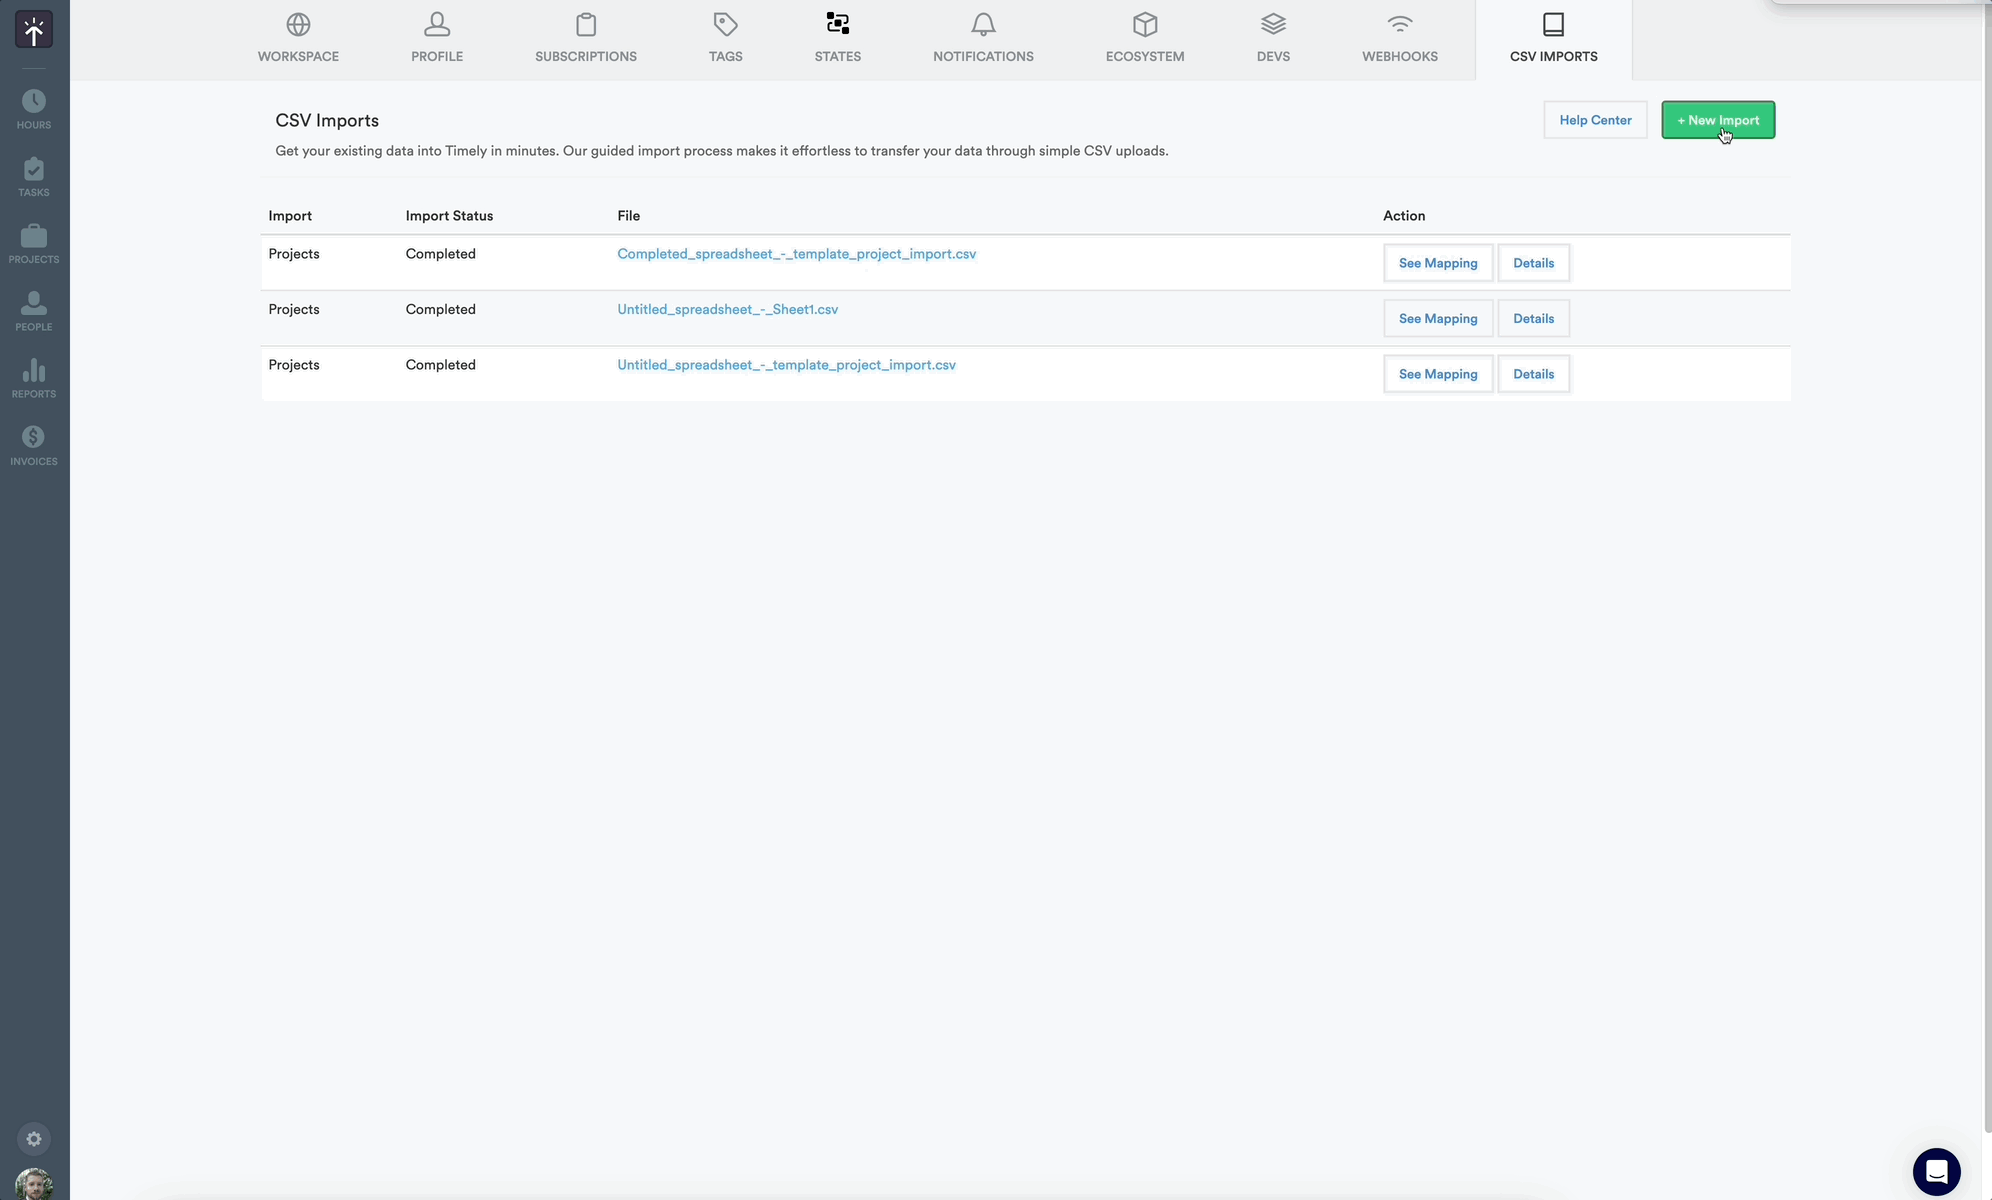
You’ll find the new CSV Imports section conveniently located in your Timely Settings, with the other admin options. From here, you’ll see your workspace’s import history and status at a glance, as well as the ”+ New Import” button to begin a new import.
Using this process you can create new objects — such as projects, tags, or users — or modify existing data to better reflect changes in your workspace. Whether you’re building out your team structure, updating tag groupings, or populating client project lists, this feature is designed to streamline those tasks.
Starting a New CSV Import
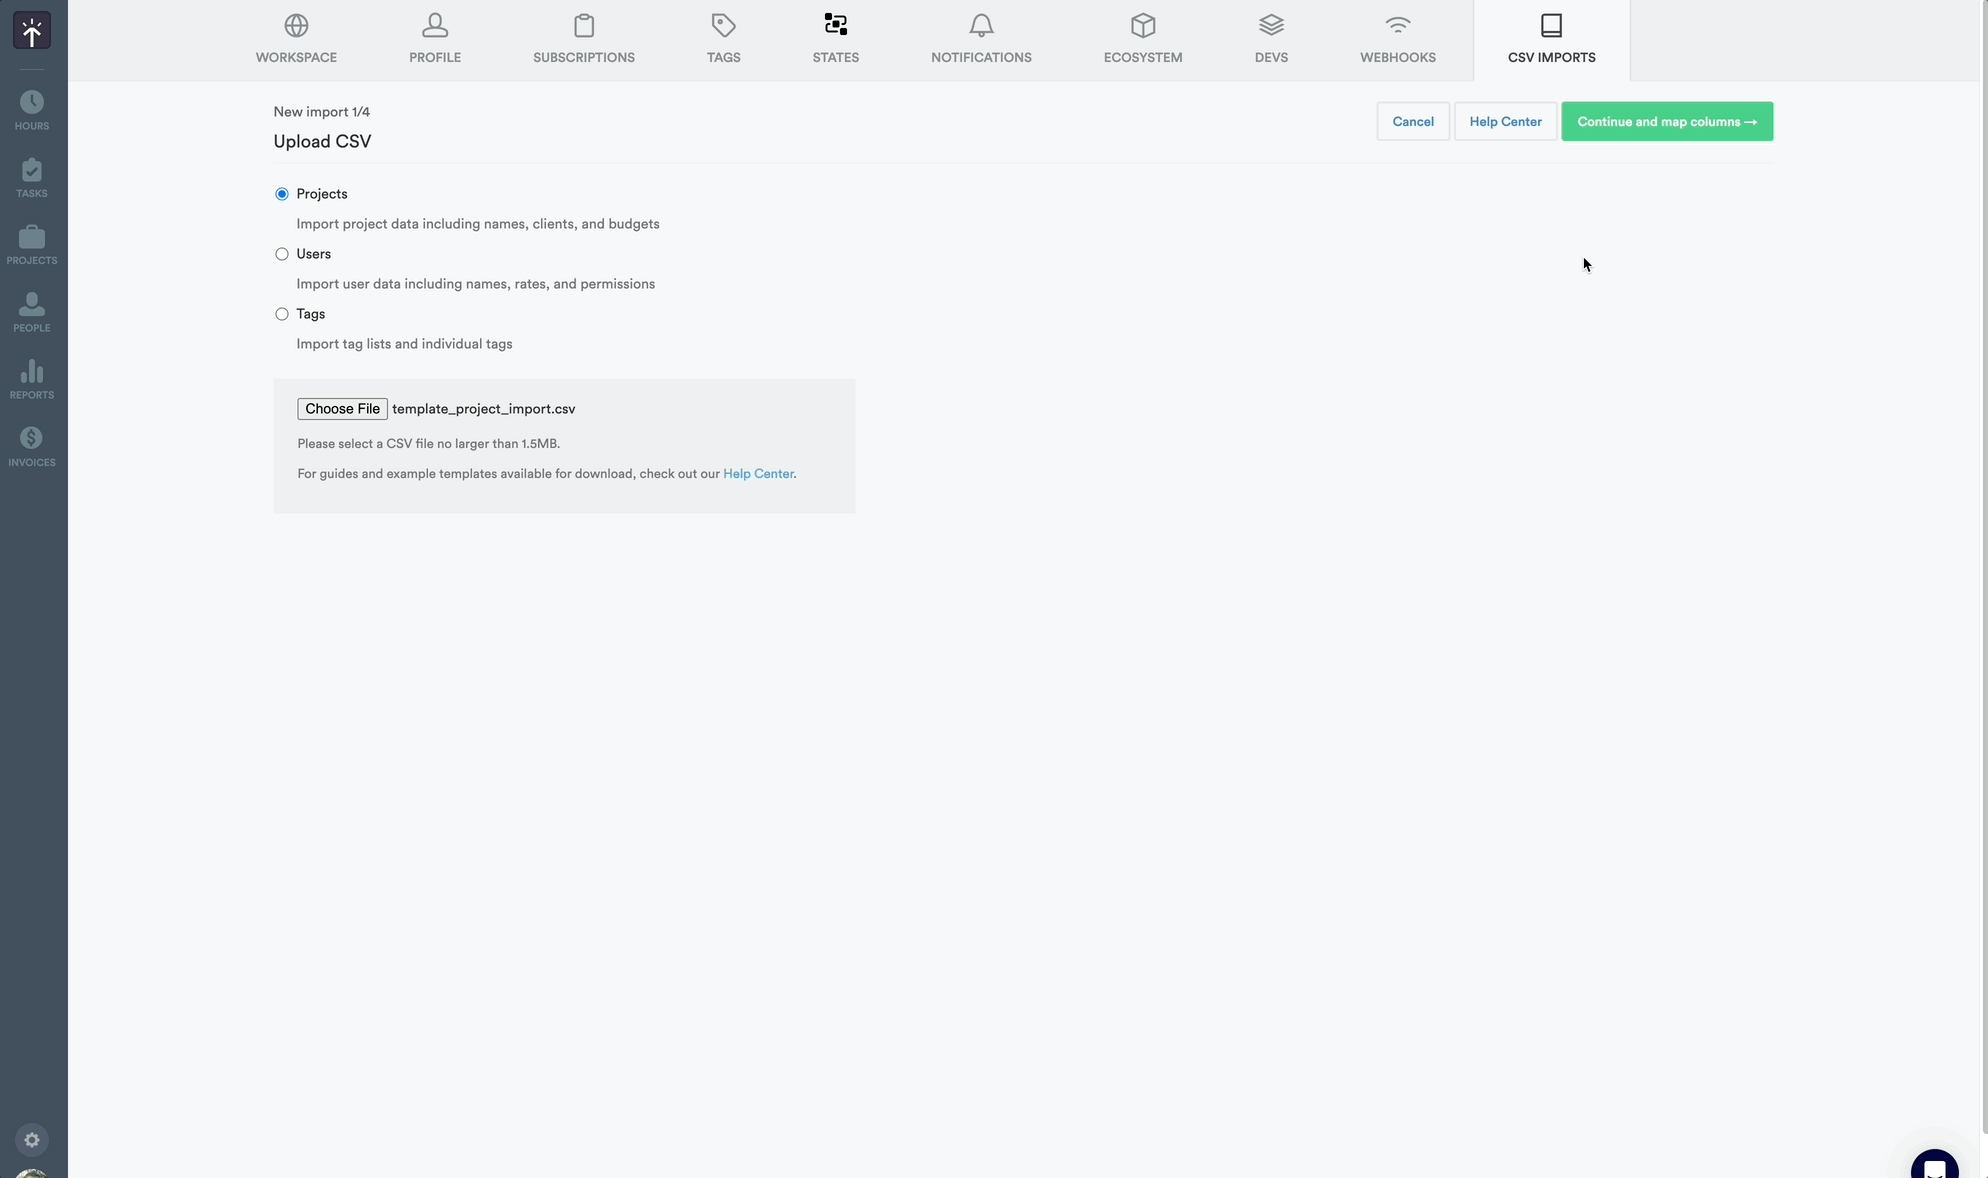
Step 1: Download & Prepare Your Import Template File
While you can technically use any CSV file for your import process, and map each column to an existing data field in Timely, we’ve put together a standard template with all the required fields. This will make the import process a lot easier and reduce the risk of any errors.
Each template includes all the columns you’ll need. You’ll want to ensure that you input your data into the rows of those templates exactly as laid out in the template instructions.
You can use any common spreadsheet app, like Google Sheets or Excel, to edit and manage these files.

An example import file completed
Step 2: Review & Upload
Once your CSV is ready:
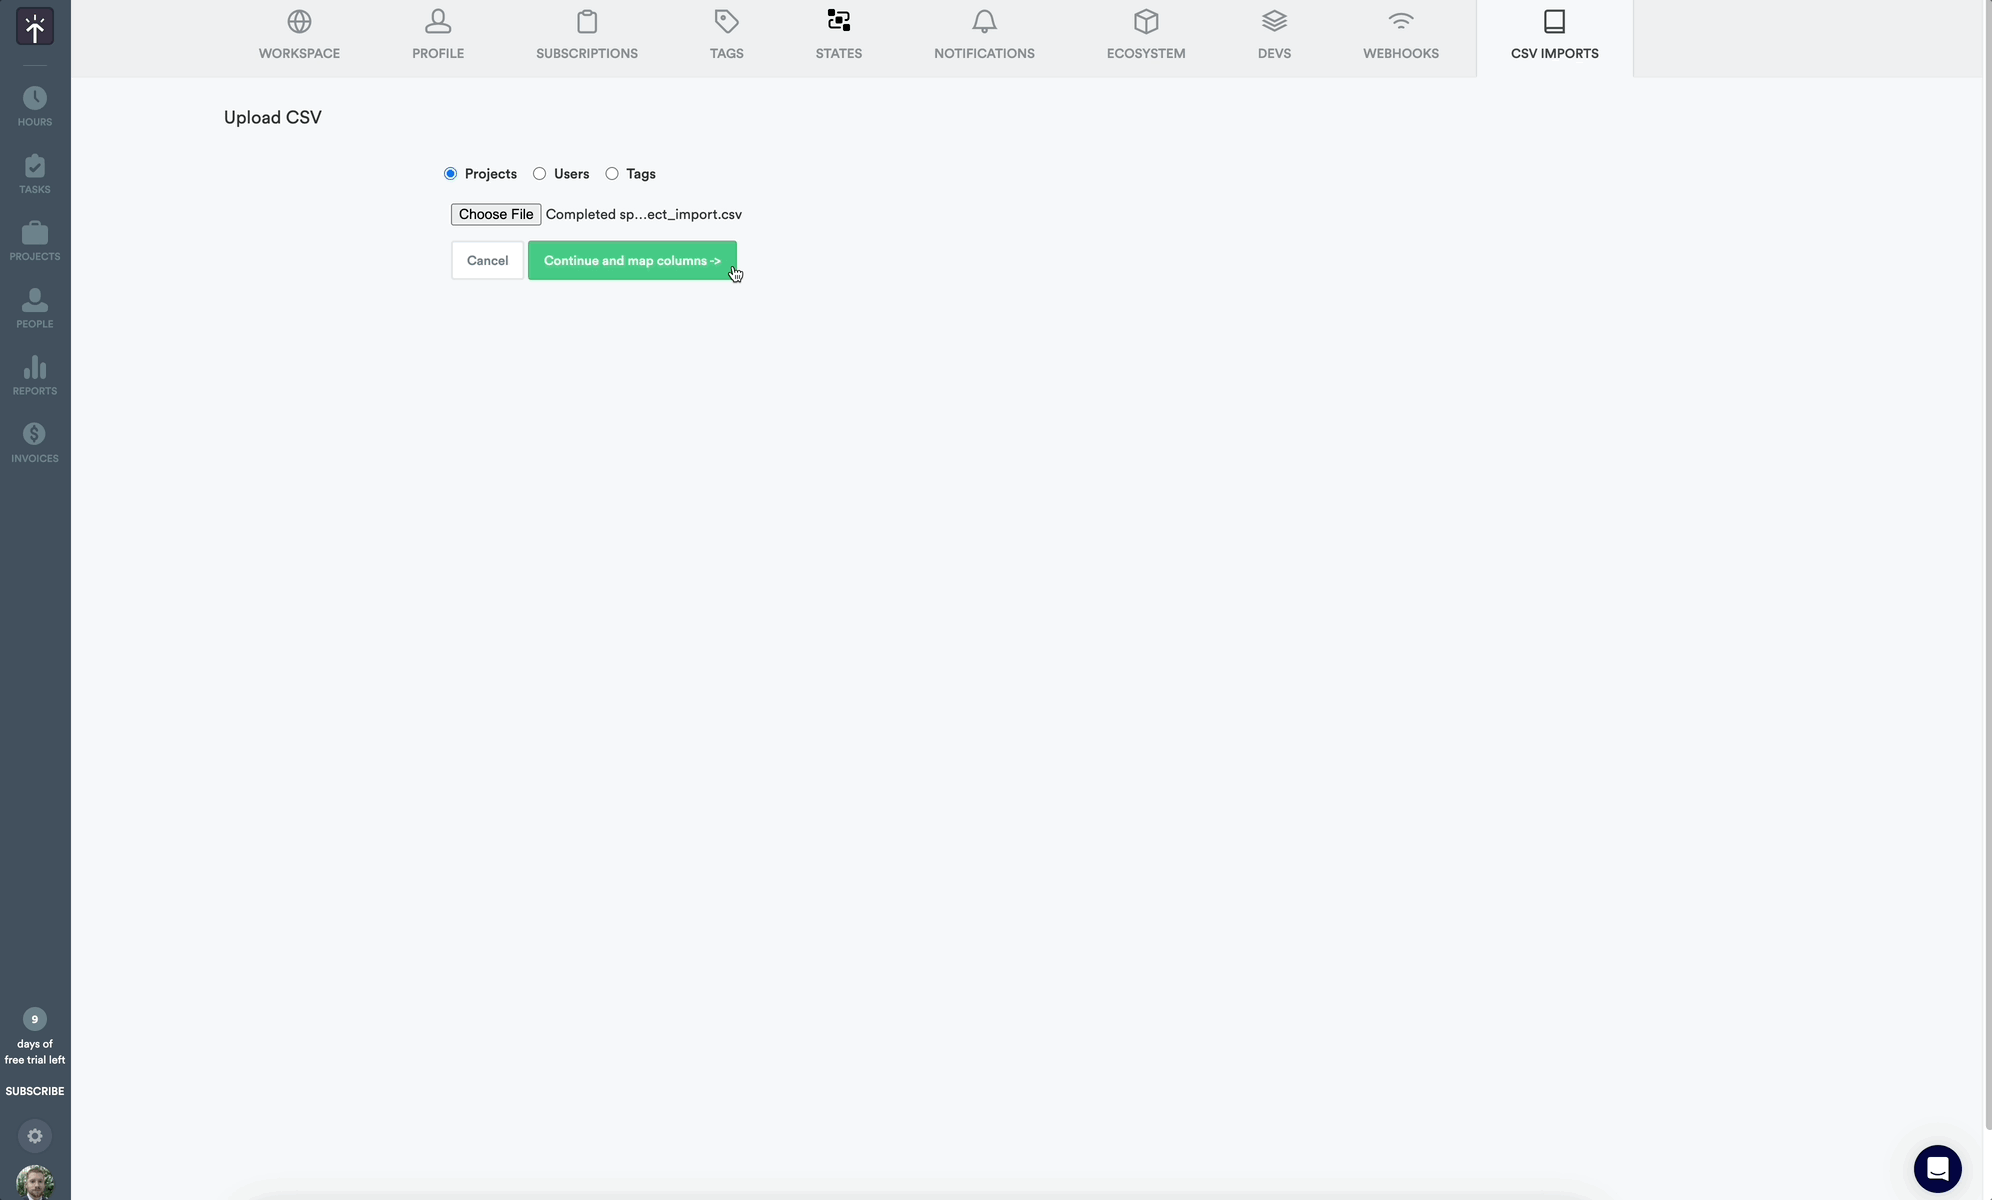
- Navigate to Settings > CSV Import in Timely.
- Click the ”+ New Import” button.
- Choose the type of data you’d like to import (Projects, Users, Tags, or Time Entries).
- Upload your completed CSV file using the file selector.
After uploading, you’ll be prompted to review the column matching and ensure everything aligns in the next steps.
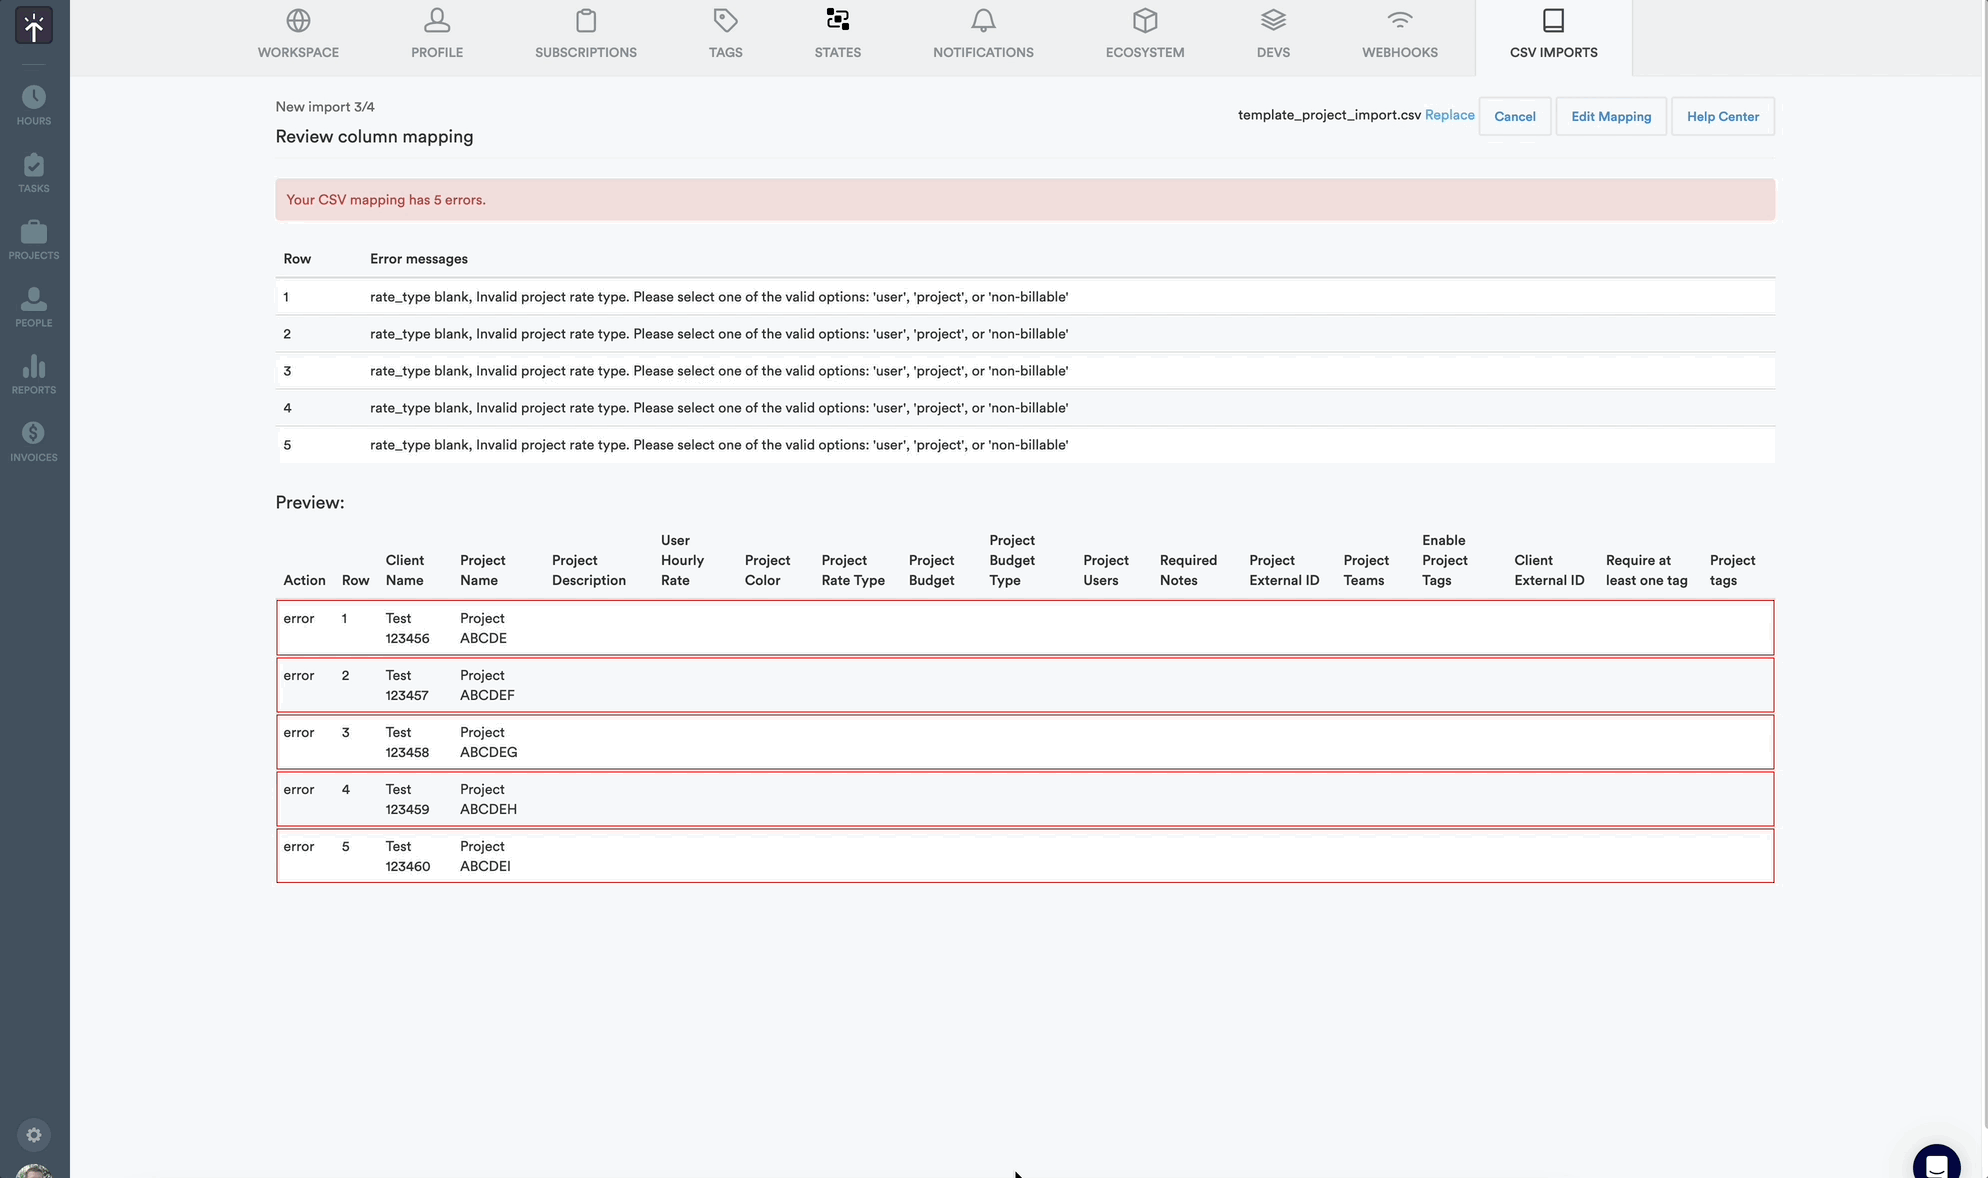
Step 3: Map Columns & Review Warnings
During this step, Timely will help you match the columns in your CSV file to the fields in Timely. This ensures your data is imported accurately.
- Carefully review the CSV column options as taken from your spreadsheet and compare them closely to the required fields in the Timely section.
- If you use any other import file besides the provided templates, Timely will attempt to match your columns to the Timely fields, but you will need to adjust the mapping to ensure fidelity.
- Look closely for any errors and adjust your mapping using the drop down selector to the right of each field.
- Once everything looks good, click the “Continue and review mapping” button at the bottom to proceed.
Step 4: Process Upload & Review Outcome
After mapping is complete, confirm your import:
- Perform a final quick review to ensure that the number of objects listed along the top matches what you expect from the import file.
- If anything doesn’t appear correct, click the Edit Mapping button to go back to the last step and adjust your column mapping as needed.
- If there are data issues, you can click the Cancel button to stop the process, adjust and correct your import file as needed, and then start the process again at some other point.
- If everything looks good, click the Create x objects button along the top to finalize this import.
- Once the import is processed, a summary will display the number of successful entries and any that encountered issues.
Project template interactions
When you import projects through the CSV Import Manager, new clients may be created as a side effect (when a Client Name in your CSV doesn’t already exist in Timely). Whether project templates automatically create projects for those new clients depends on each template’s trigger source configuration.
Understanding trigger sources
Project templates can be configured with different trigger sources that control when they fire:
- All sources: Templates fire for every new client, including imported ones
- Specific integrations: Templates only fire for clients from named integrations (like “jira”)
- Import side effects: Templates only fire for clients created as a side effect of a CSV project import
How template firing works during imports
When a projects CSV import creates new clients as a side effect, template firing is automatic — there is no manual switch during the import itself. Which templates fire depends entirely on each template’s trigger source setting:
- Templates configured for All sources will always fire for any new client, including those created during a CSV import
- Templates configured for Specific integrations will only fire if the client was originally associated with that named integration
- Templates configured for Import side effects will fire specifically for clients created as a side effect of a CSV project import
This gives you precise control over which templates activate during imports without requiring any extra steps in the import process itself.
Best Practices, Tips & Tricks
- Double-Check Your Data: Mistakes can’t be undone! Be sure to review your CSV carefully before importing.
- Use Unique Identifiers: For updating existing data, make sure the data you’ve input into your import file matches exactly what is already within Timely. Be careful of trailing spaces or other small character issues which may throw off an exact match.
- Start Small: For larger data sets, consider running a smaller test import first to catch any potential issues.
CSV Import File Templates & Instructions
While you can use any CSV file of your choosing to kick off the import process, and map the columns to fields, we highly recommend utilizing one of our comprehensive import templates to ensure best results.
Projects Import
Download Project Import Template (CSV)Template Instructions:
| Field | Description |
|---|---|
| Client Name (required) | Name of the client. Any valid client name. |
| Project Name (required) | Name of the project. Any valid project name. |
| User Hourly Rate | The hourly rate for the user assigned to the project. Numeric values only. |
| Project Color | The project’s color code. Enter a valid hex code (e.g., #c697c0). |
| Project Rate Type | Choose: user, project (default), or non-billable. |
| Project Budget | The total budget allocated to the project. Numeric values only. Default is 0. |
| Project Budget Type | Select: hours, money, or non-billable (default). |
| Project Users | Email addresses separated by commas, or all for all workspace users. |
| Required Notes | Specify if notes are mandatory: Y (Yes) or N (No, default). |
| Project External ID | Alphanumeric value up to 512 characters. |
| Project Teams | Team names separated by commas, all, or none. |
| Enable Project Tags | Choose: all, none (default), or custom. |
| Client External ID | Alphanumeric value up to 512 characters. |
| Project Description | Up to 300 characters. Useful for AI suggestions with AutoSheet. |
| Require at least one tag | Y (Yes) or N (No, default). Requires tags to be enabled. |
| Project Tags | Comma-separated tag list names. Requires custom tags enabled. |
| Enable Default Tags | Y (Yes) or N (No, default). |
| Default Project Tags | Comma-separated tag list names. Must be separate from project tags. |
Users Import
Download User Import Template (CSV)Template Instructions:
| Field | Description |
|---|---|
| User Name (required) | Name of the user. Only normal letters allowed. |
| User Email (required) | Email of the user used to sign in Timely. |
| User Role | admin, manager, or employee (default). |
| Hide Default Billable Rate | Y (Yes) or N (No, default). |
| Default Billable Rate | Default hour rate. Numeric values only. Default is 0. |
| Deleted | Y (Yes) or N (No, default). Marks user as deleted. |
| Teams | Team names, all, or none. New teams are created if they don’t exist. |
| User External ID | Alphanumeric, max 512 characters, must be unique. |
| User Cost Rate | Cost rate. Numeric values only. |
| Team Lead | Marks user as lead for given team names. |
| User Projects | Use all to assign to all projects, or leave blank. |
Tags Import
Download Tag Import Template (CSV)Template Instructions:
| Field | Description |
|---|---|
| Name of Tag list (required) | Tag list name. Any string. |
| Name of Tag | Sub tag name related to the tag list. Any string. |
Time Entries Import
Download Time Entries Import Template (CSV)Template Instructions:
| Field | Description |
|---|---|
| date (required) | Date the time entry was logged. Use YYYY-MM-DD format (e.g., 2026-05-14). |
| name | Full name of the user the entry belongs to. Must match an existing user in the workspace. Either name or email is required to identify the user. |
Email of the user the entry belongs to. Must match an existing user in the workspace. Recommended over name for an exact match. | |
| seconds | Duration of the entry in seconds. Numeric values only. Provide either seconds or hours — not both. |
| hours | Duration of the entry in decimal hours (e.g., 1.5 for 1 hour 30 minutes). Numeric values only. Provide either hours or seconds — not both. |
| note | Free-text note describing the entry. Up to 1,000 characters. |
| client | Name of the client the entry is logged against. Must match an existing client. |
| project (required) | Name of the project the entry is logged against. Must match an existing project the user has access to. |
| tags | Comma-separated list of tag names to apply to the entry. Tags must already exist in the workspace and be enabled on the project. |
Reviewing Previous CSV Imports
After an import has been completed you’ll see it listed in the CSV Imports panel within your workspace settings. You can then click the See Mapping button for each import to look over how the columns and fields were aligned, or click the Details button to see how many specific objects were successfully imported.
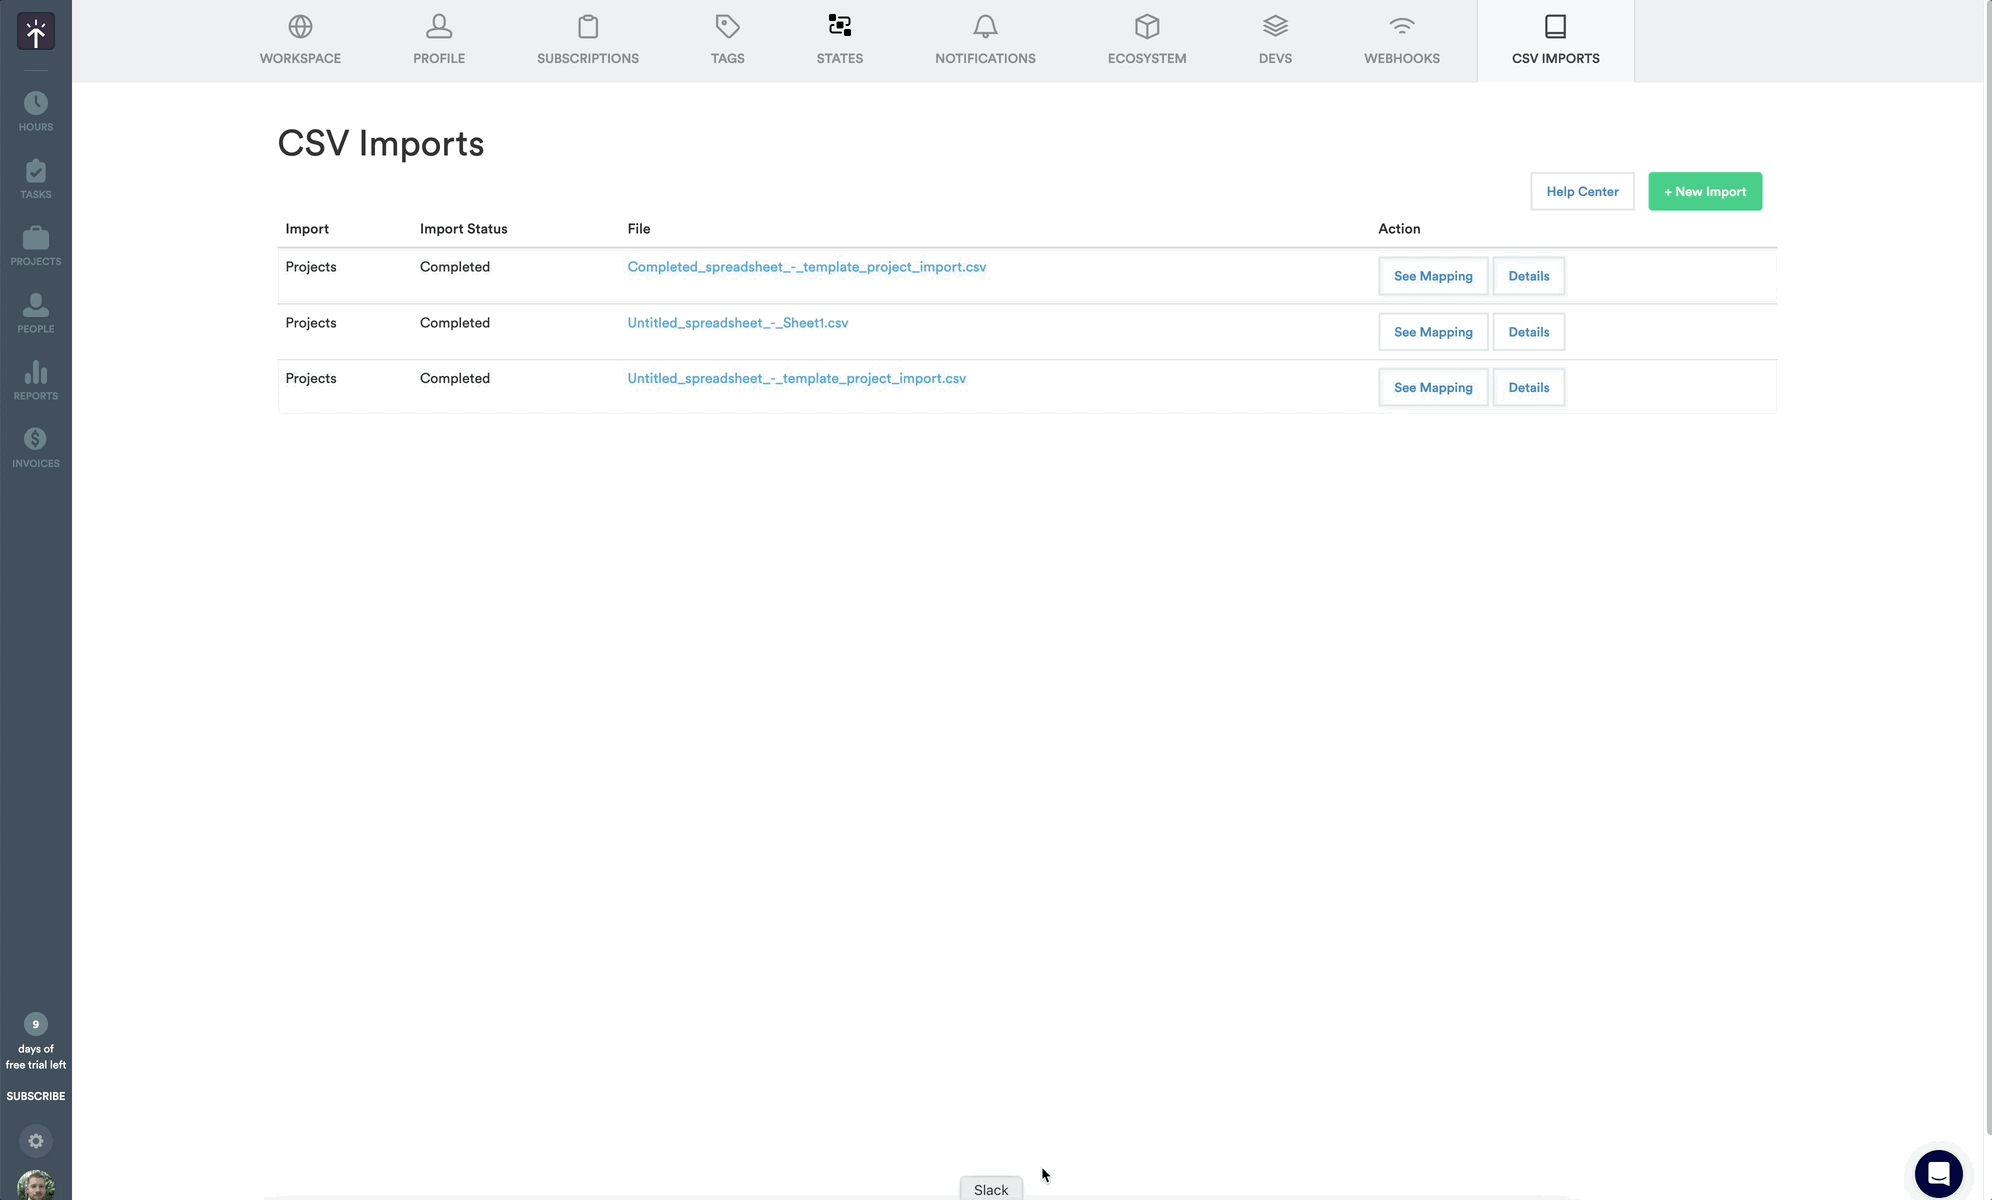
When you are done reviewing those items you can click the Done button to return to the previous screen.
If adjustments need to be made to these imported objects, it isn’t possible to revert or roll back an import. You would need to manually adjust those items within Timely, or perform another CSV import to revise and update those objects as needed.
FAQs
What happens if I upload duplicate data?
If the system detects an existing record with one changed attribute, it will update the record instead of creating a duplicate.
Can I undo an import?
Unfortunately, imports cannot be reversed. We recommend carefully reviewing your data during the validation step before proceeding.
What do I do if I encounter validation errors?
Errors will be highlighted, and problematic rows will appear at the top of the preview list. Correct these errors in your file and re-upload to proceed.
How many rows can I import at once?
There is no strict limit, but larger files may take longer to process. For optimal performance, we recommend splitting files into manageable sizes if working with very large datasets.
I don’t see the CSV Imports section in Timely settings?
This feature is available to admin level users of Premium, Unlimited, Unlimited+ plans.
Can I import other types of data?
Currently, the supported import types are Users, Projects, Tags, and Time Entries. If you need to import additional data types, let us know via feedback!
Will a CSV project import trigger my project templates?
It depends on how your project templates are configured. Templates set to fire for “all sources” will always create projects for imported clients. Templates configured for specific integrations or “import side effects” will only fire when those conditions are met during the import process.
Last updated June 15, 2026
Have feedback for this article or need more help? Contact us now.