Memory for Windows
Time Tracking: AutoSheetHandbookAn overview of best practices, troubleshooting, and set up of the Memory for Windows application.Memory is Timely’s tool that automatically records everything you do to your own, private timeline. It captures the time you actively spend in files, on apps, browsing websites, your calendar events, attending meetings, and more — the sky’s the limit! By capturing everything you do, you get a complete picture of what you work on each day.
Downloading Memory for Windows
So you’ve signed up for Timely and have dived into learning about all the amazing features available to you. Fantastic!
Now as you dive into your work you are ready to install the companion Memory for Windows app, so you can automatically capture all the tasks and activities you plug away at throughout the day. It’s time to “set it and forget it”.
Head on over to the Memory download page and select the Memory for Windows option to begin your download. Memory is also available for Mac and Linux systems.
Installing Memory on your Windows device
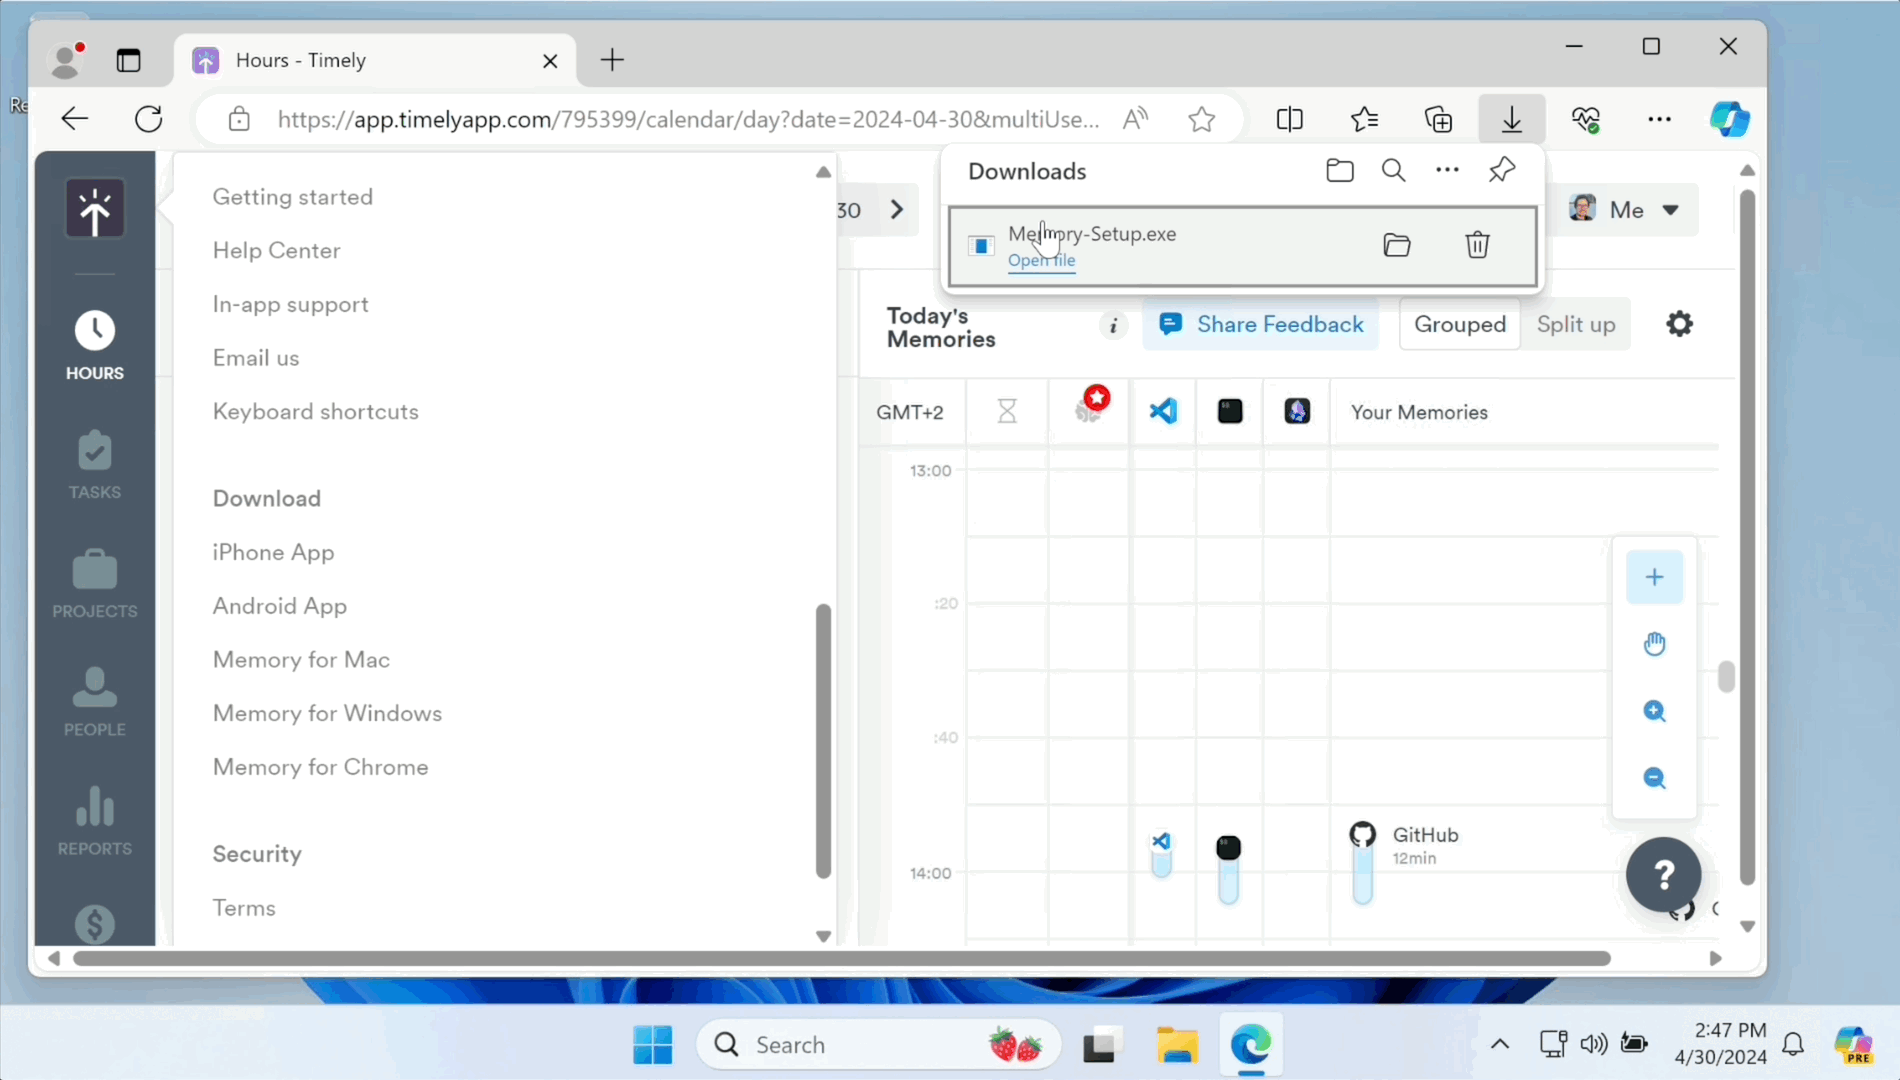
Once you’ve downloaded the app, save the .zip file, extract the files, and double-click Memory.exe.
You might get a message saying Windows protected your PC and a button that says Don’t run. Just click on More info and Run anyway to grant Memory an exception.
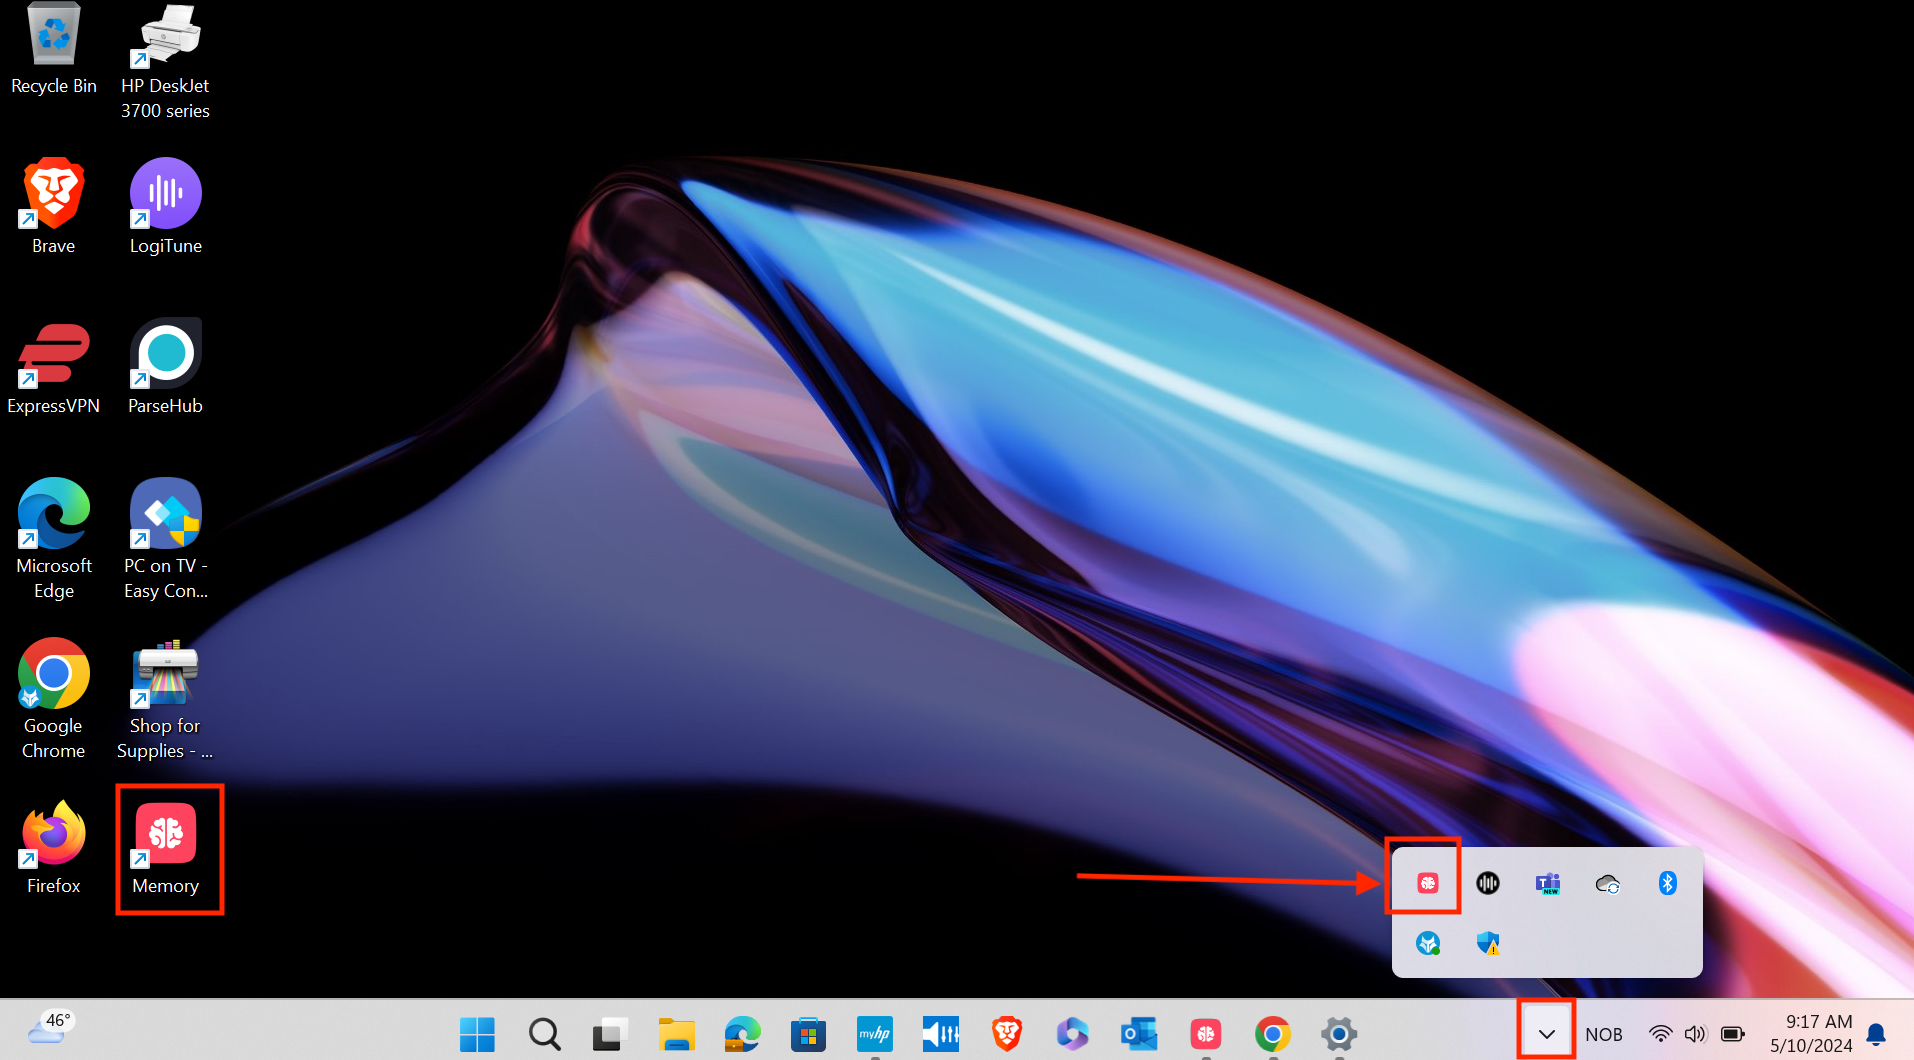
You can open the Memory app by clicking the brain icon in the System Tray. It’ll look like this:
Allow Timely to make changes to your device by selecting Yes then launch the application and click to log in. You’ll then be routed to sign in on a browser using your email address and password, Google or Apple authentication:
Signing into the Memory for Windows app
The first time you run the Memory for Windows app you’ll be prompted to sign in:

Click the “Connect account” button which will open your browser and take you to the Timely authentication page (auth.memory.ai). If you’ve already logged into Timely in your current browsing session, your account will be connected to the Memory app automatically. If you are not, you’ll be asked to sign in using your regular login method, including any SSO options you have configured.
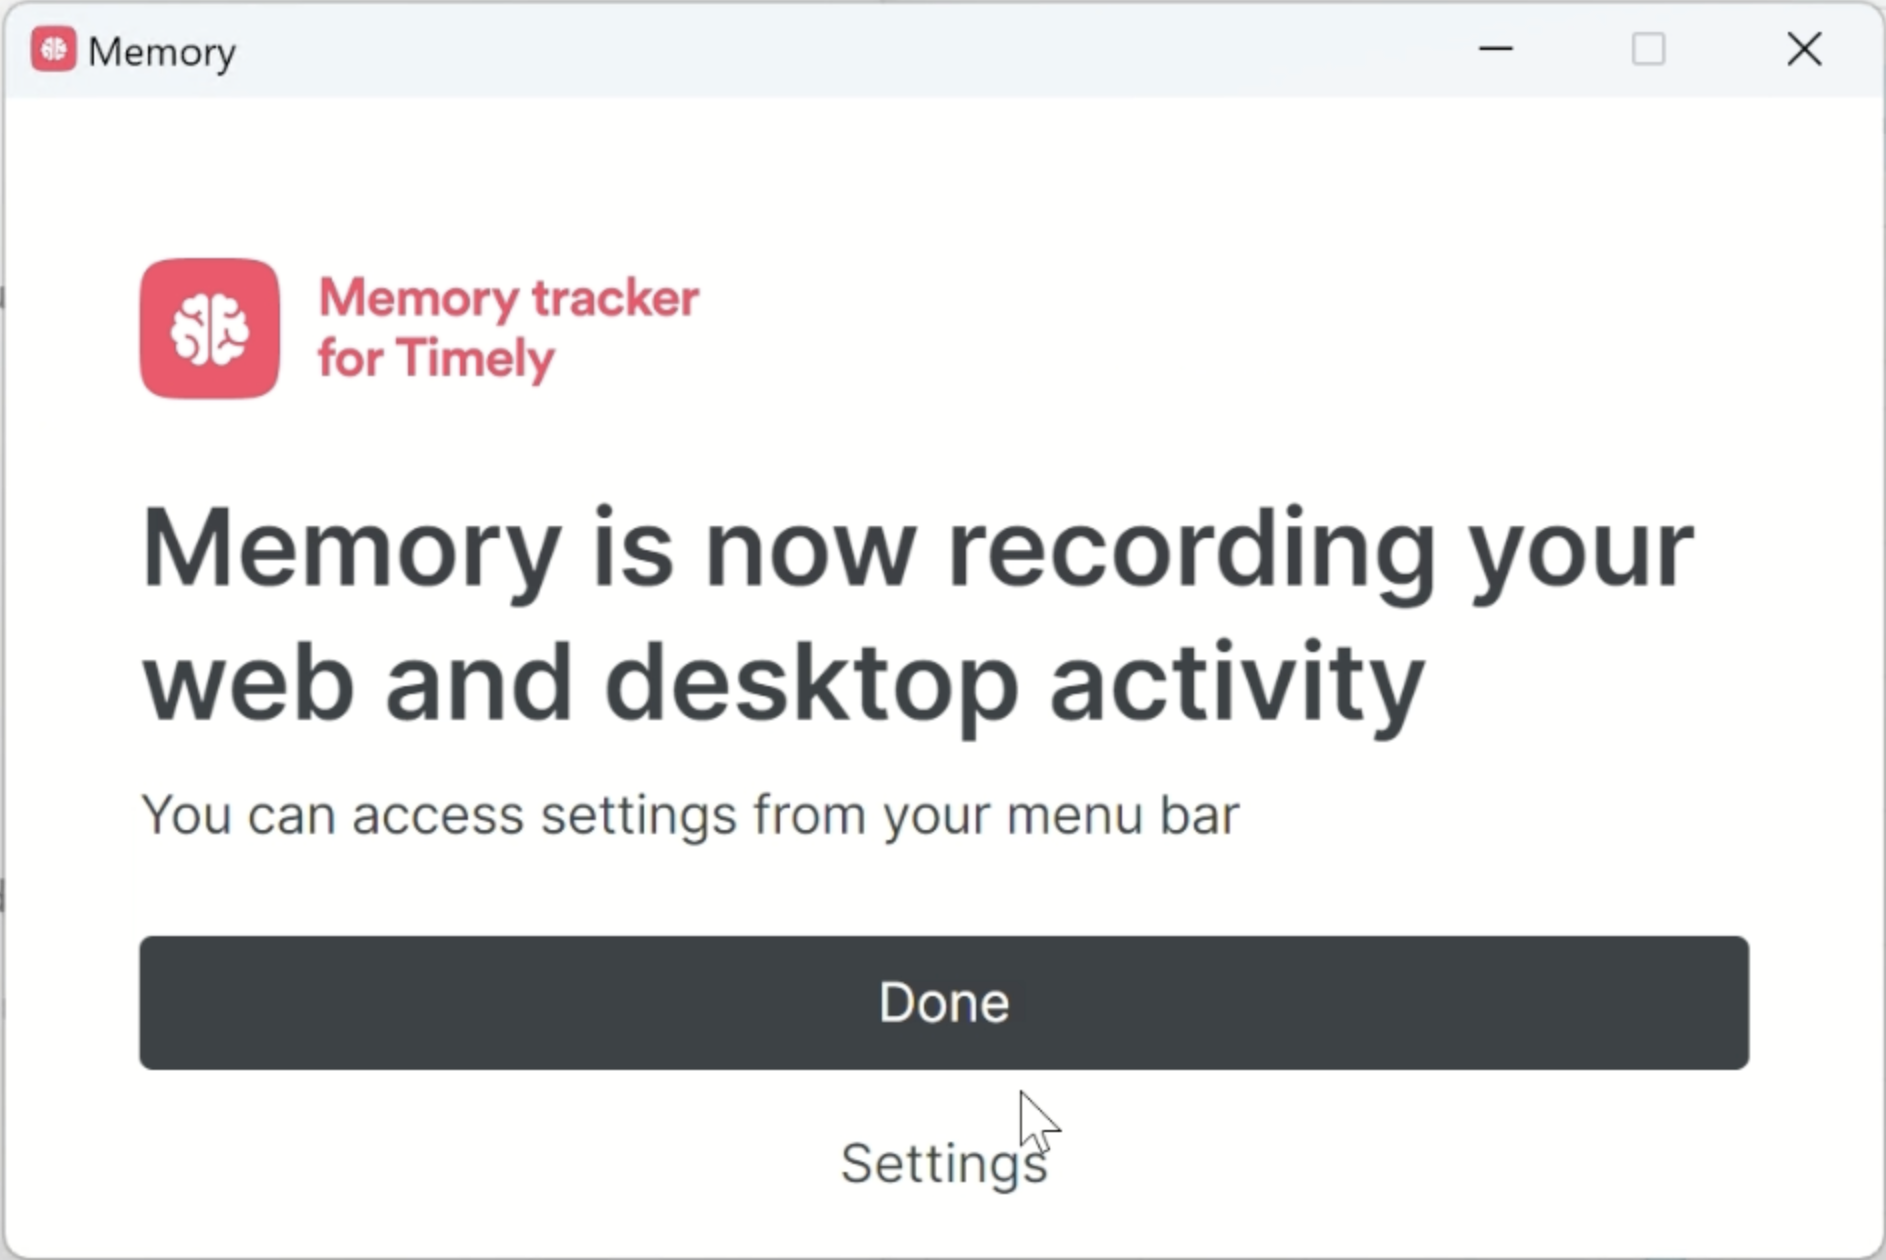
From there you’re all set! You’ll see a message that “Memory is now recording your web and desktop activity” to let you know the process has been completed. You can go ahead and dive back into your work as normal!
Pausing or turning off Memory tracking
All done with work for the day? Want to take a break for a bit? No problem! You can easily control when or if Memory is capturing your activity. Go ahead and click the Memory (brain icon) in the system tray of your Start Menu.
You can then turn the Memory Track “On” or “Off” via the options in the Memory menu.
![]()
That said, it can be super easy to turn Memory off for a bit, hop back into work, and forget to enable it once again. So as to not lose any of that activity, there is a handy Pause option where you can select specific time intervals for your break:

General settings
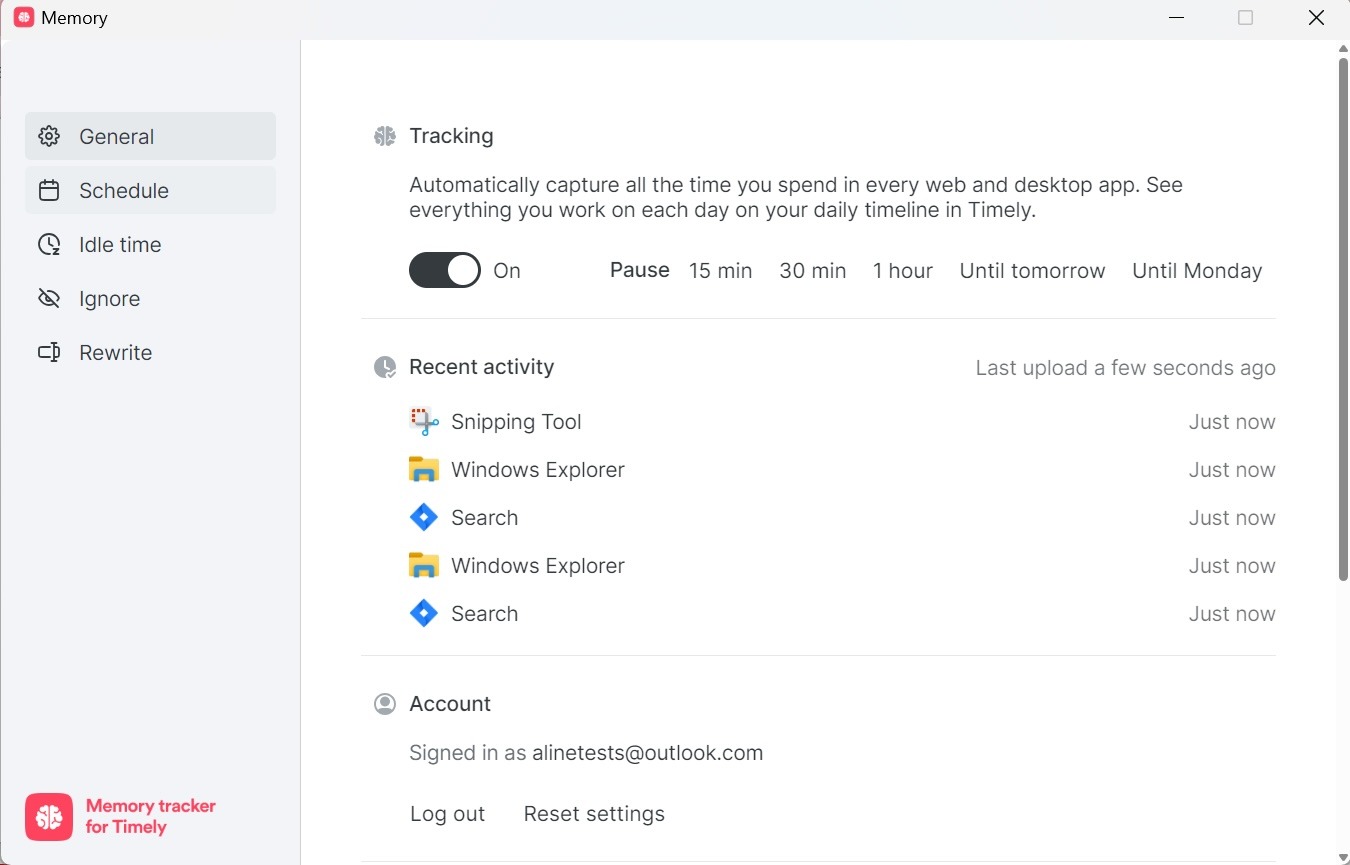
After clicking the Memory icon in your system tray, you’ll see the option for “Settings” listed right below your account email. This will open a new window where you can select the different options available:
- Along the top you’ll see those same options to pause or disable the Memory tracker where needed under the Tracking header.
- From the Recent Activity section you’ll see what Memory has captured on your device over the last while. If you hover over any of the items listed you can see the additional context that will become available on your timeline after processing.
- Under the Account header you’ll find the email address you are logged in with along with a Log out and Reset settings option if needed.
- Under the General settings you’ll find the default options to Launch on Startup and Install updates Automatically. We always recommend leaving both options enabled at all times, to ensure the best possible experience. In this section you’ll also find the current version number and status for the Memory app, along with the option to manually check for updates.
Creating a custom schedule for Memory
If you have specific days and times where you are in “work mode”, Memory has a handy little feature that lets you set those specific times where you want it to keep track of your activity. Memory will not capture your activity outside of that set schedule once enabled.
This is especially handy if you use your personal computers for work, ensuring that any personal browsing or desktop activity outside of work isn’t recorded.
From the Settings < Schedule section within Memory, click the “Enable Schedule” option and select the days of the week and time frames that you are working:

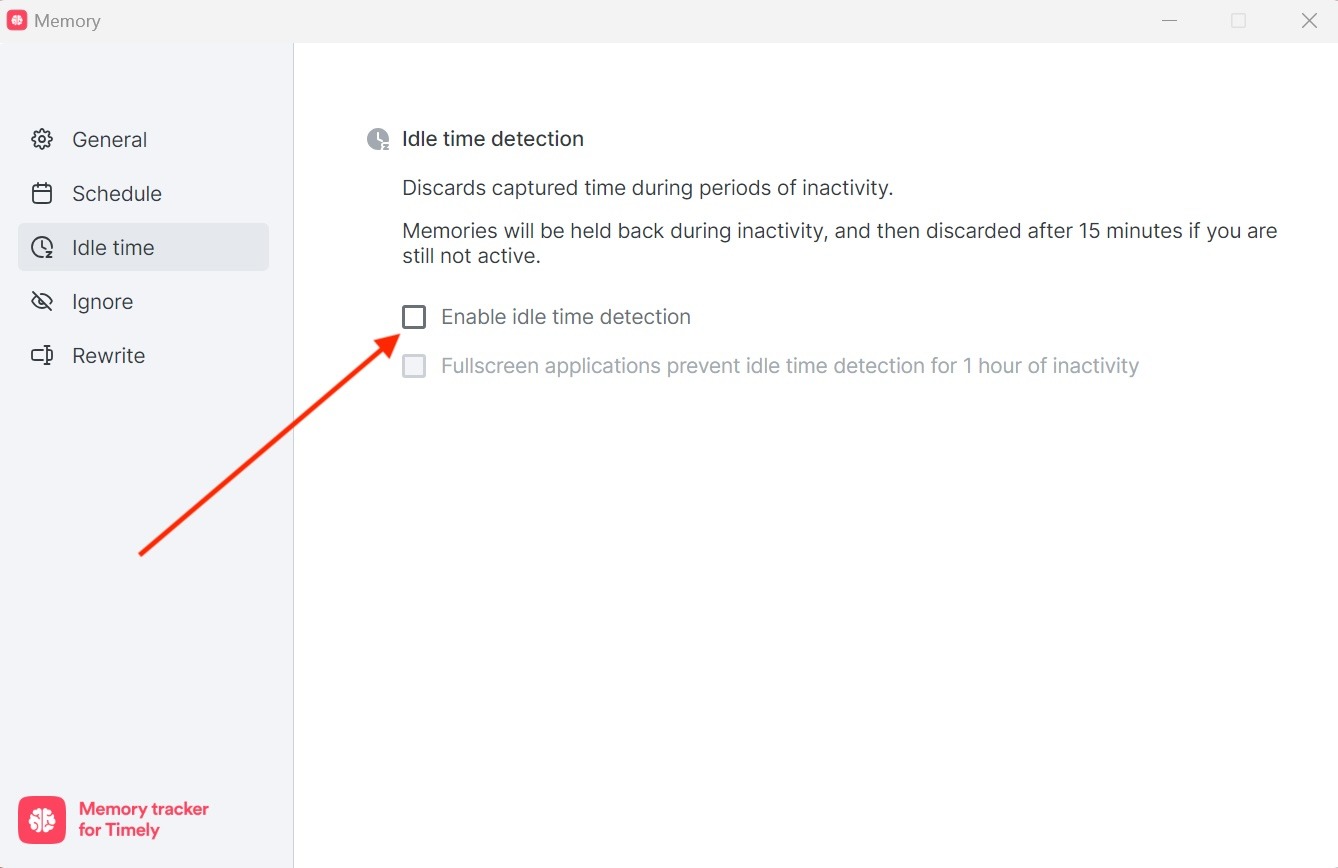
Idle time detection for Memory
Sometimes things happen and you have to step away for a bit, maybe it’s time for lunch or you have an “IRL” water cooler meeting — life happens! But your laptop is still running regardless.
Idle time detection is a handy feature, that’s enabled in Memory by default, that will discard any activity captured if you’ve been away from your computer for about 15 minutes or so. For full screen apps, such as Zoom windows or media players, idle time will not kick in until an hour or so has passed.
This feature can be disabled if needed from the Settings < Idle time section within Memory:
Idle exclusion list
Some applications need to keep recording even when you’re not actively using your keyboard or mouse. For example, during long software builds, video calls where you’re primarily listening, or when reading documents. Memory includes an idle exclusion list that lets you mark specific apps as “idle-exempt”.
When an app on your exclusion list is the active window, Memory will continue capturing your activity even without keyboard or mouse input. This ensures important work sessions aren’t lost due to periods of reduced interaction.
To configure your idle exclusion list:
- Open Memory settings and navigate to the Idle time detection section
- You’ll see a list of apps you’ve already added, or an empty list if none have been added yet
- Use the “Add app” dropdown to select from recently used applications
- Apps already in your exclusion list will show a “Remove” button
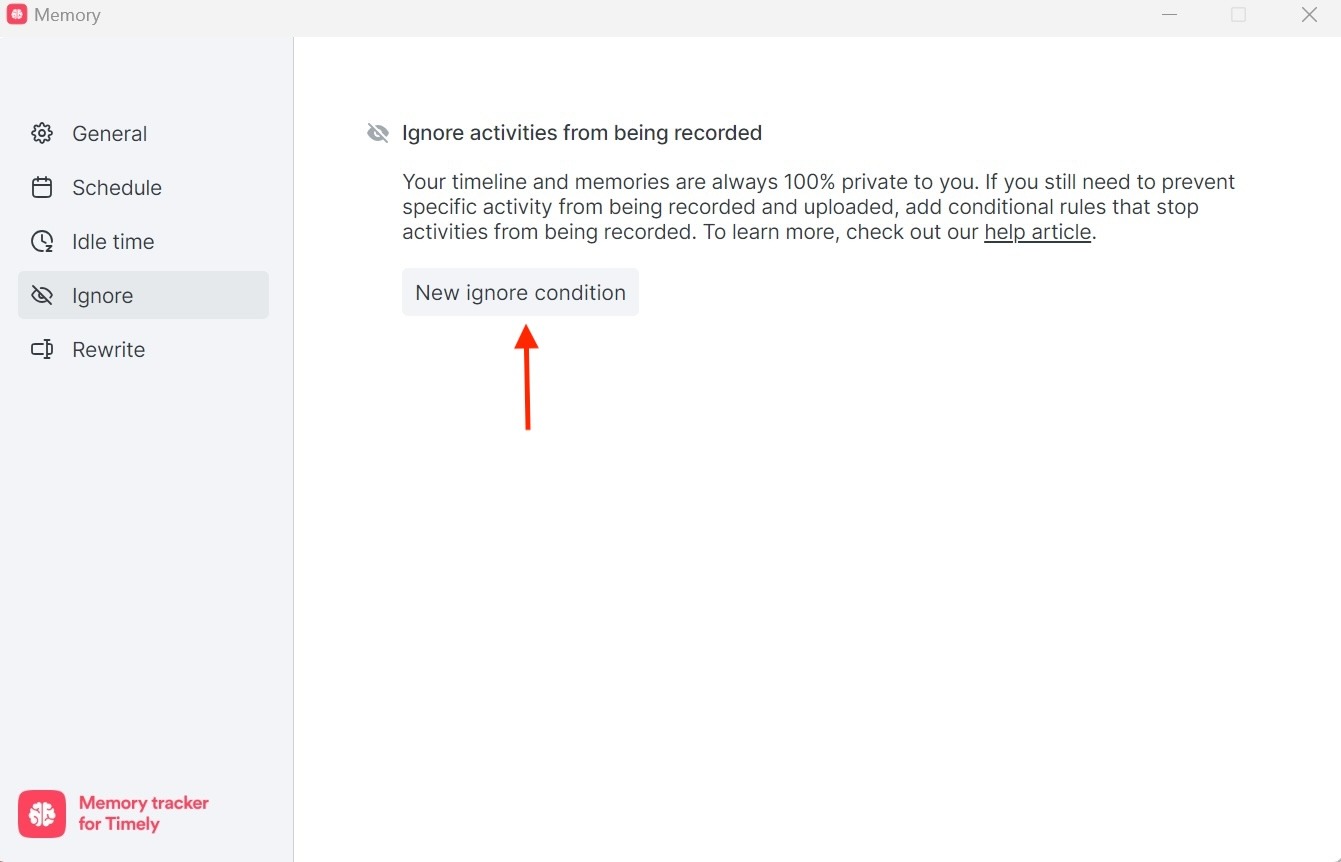
Creating rules for Memory to ignore and rewrite specific activities
Every activity, website, or app doesn’t necessarily need to be captured by Memory. Some folks might have certain common items that would be a pain to constantly discard from their main timeline or would just prefer not to capture this app or that website. We’ve got you covered!
From the Settings < Ignore section within Memory, you can create specific rules that instruct Memory to discard any activities that match a specific app name, website title, or URL. You can be extremely precise, or use more open options and wildcards to cast a wider net:
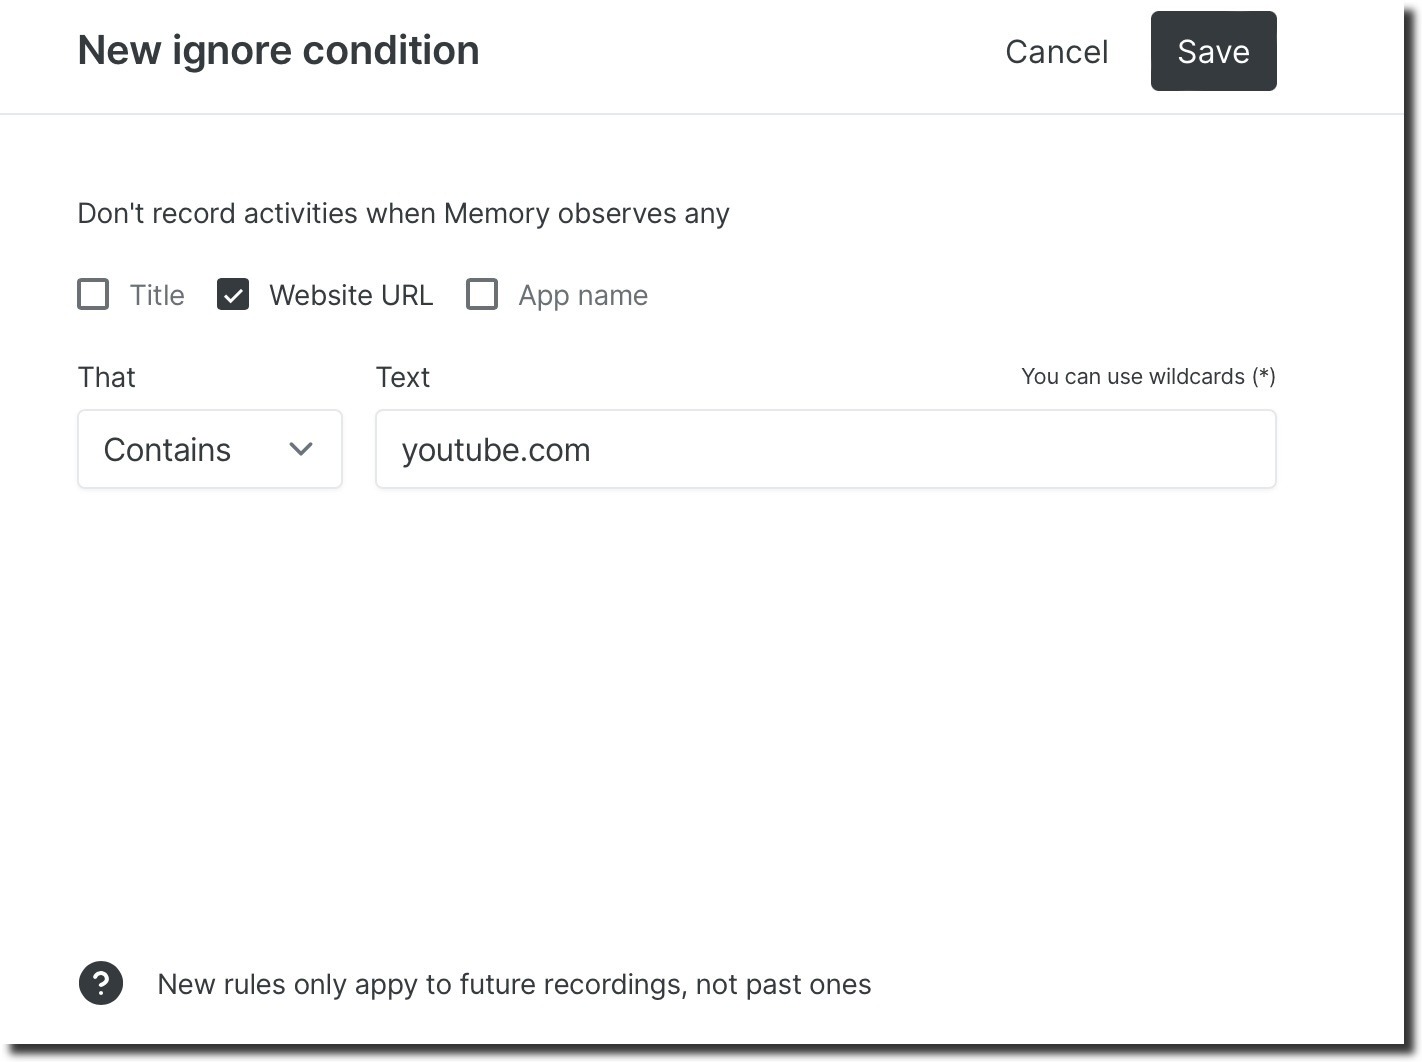
It’s always best practice to configure and then test each new rule as it’s created, to ensure it functions as expected. We’d also recommend starting the rule broadly, with the “Contains” option, then narrowing the scope to other options if needed.
Do you still want to capture an activity, but perhaps the way it displays on your timeline isn’t quite how you’d like it? No problem! From the Settings < Rewrite section within Memory you can configure rules to rewrite specific activities instead of totally ignoring them:
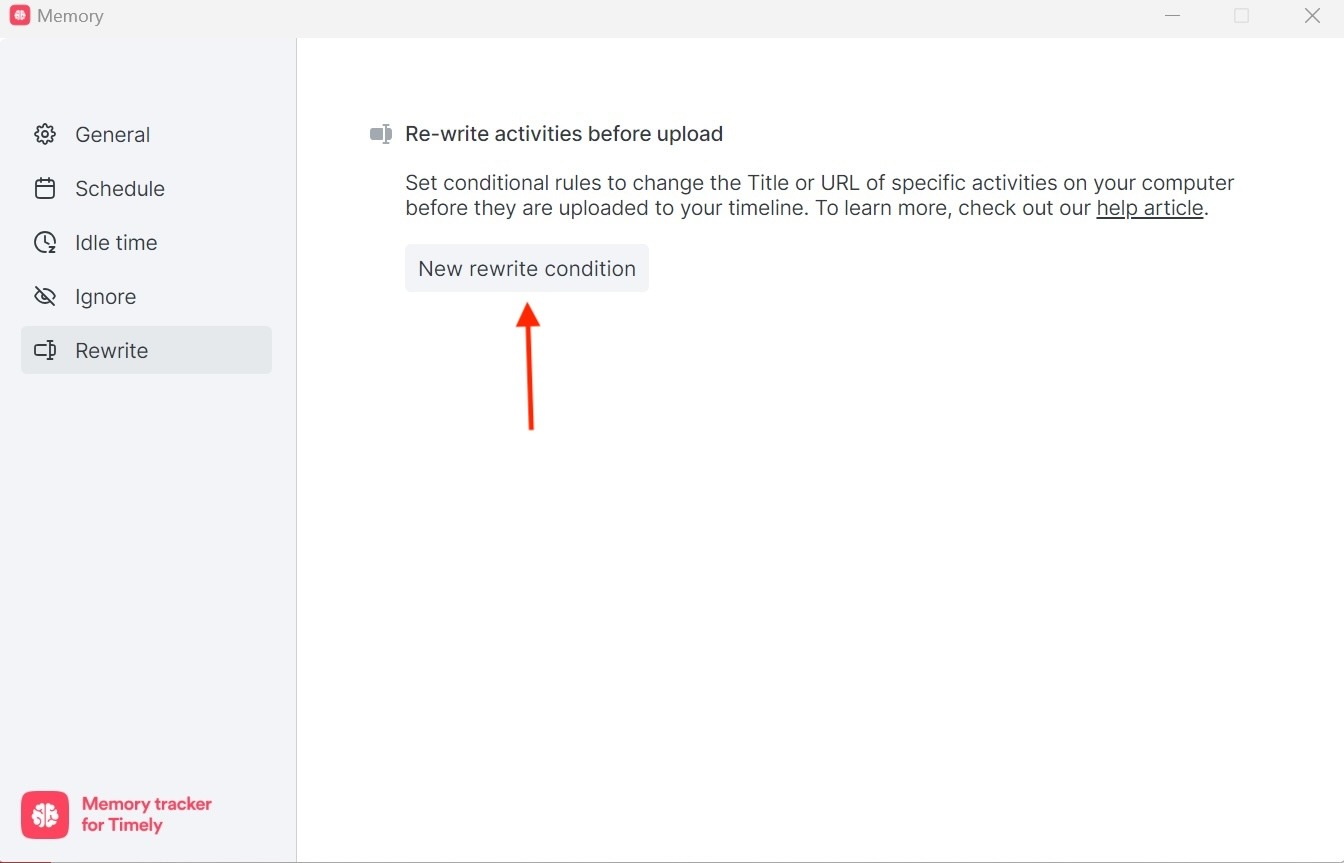
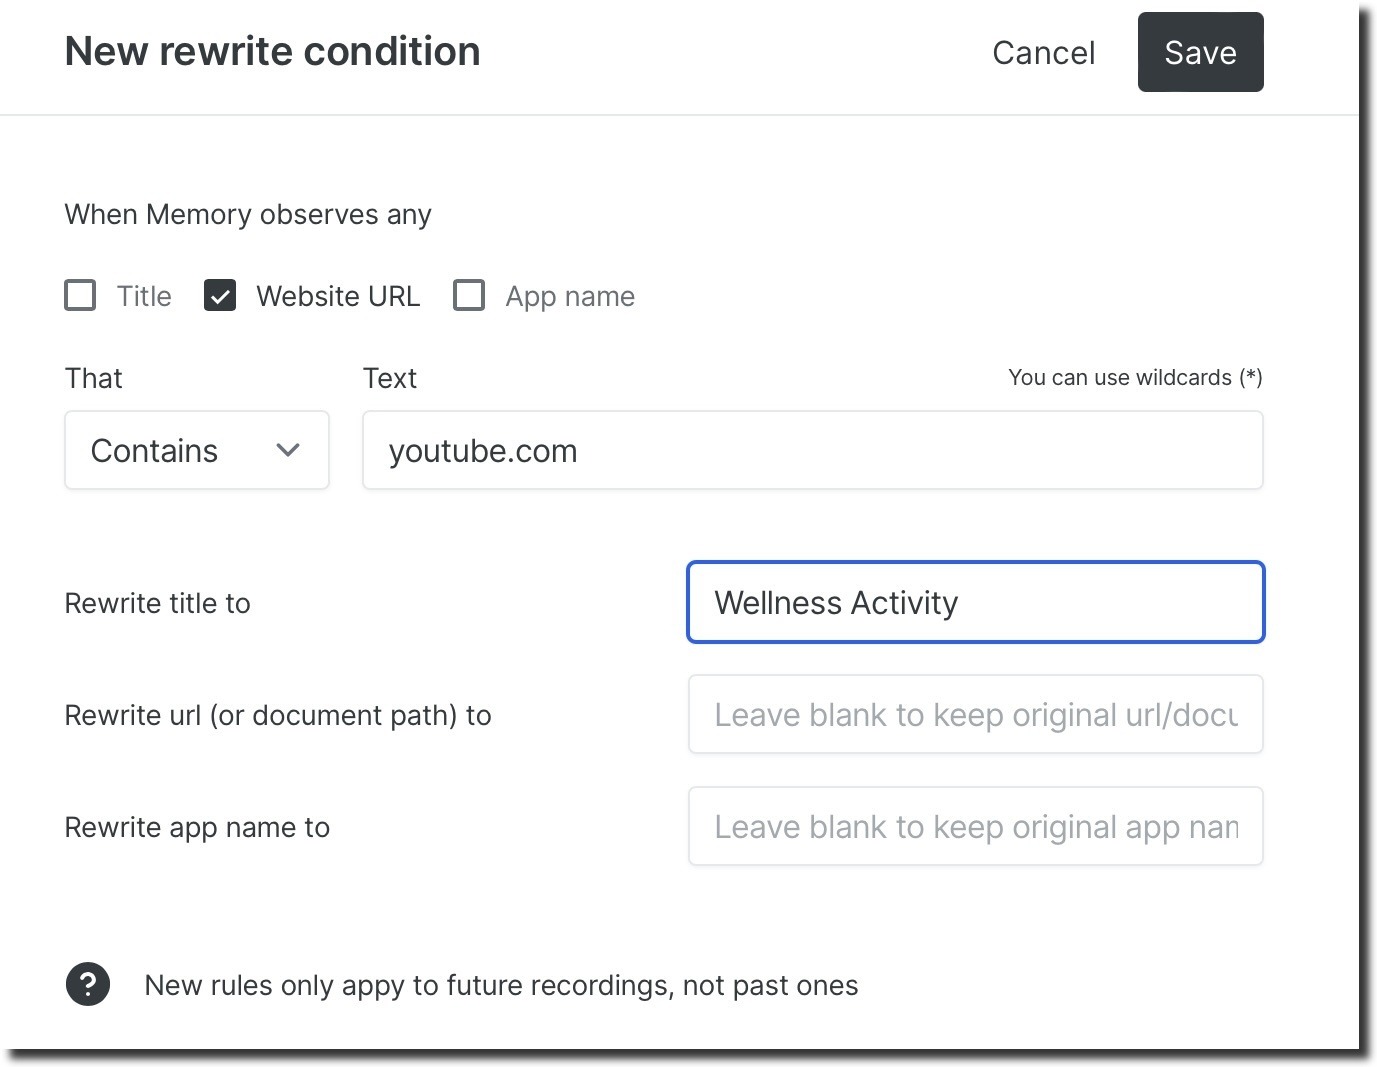
Like when creating criteria to ignore, input the Title, URL, or App name in question, along with the relevant text — then configure how you would like for that activity to then display on your timeline.
Need technical support?
While we might wish otherwise, we know folks may run into technical issues from time to time. If you notice the Memory app isn’t capturing your activity or has encountered an error of some kind, we have a few handy steps to help get things back on track.
Ensure Memory is running on your computer
It’s always best practice to make sure that the Memory for Windows app is running on your computer. It’s designed to run silently in the background, but you should see the Memory (Brain) icon in the system tray area of your Start Menu at all times while it’s operational — though you may need to expand the system tray to see all available icons. If you don’t see it present, go ahead and open up the Memory application from your Start Menu to ensure it’s running.
Ensure you are logged into the Memory app, tracking is turned “on”, and that you are using the same email address for both Timely and Memory.
First, open the Memory app and you should see the “Tracking” controls along the top of the “General” tab. Ensure the toggle is in the on position as shown here:
![]()
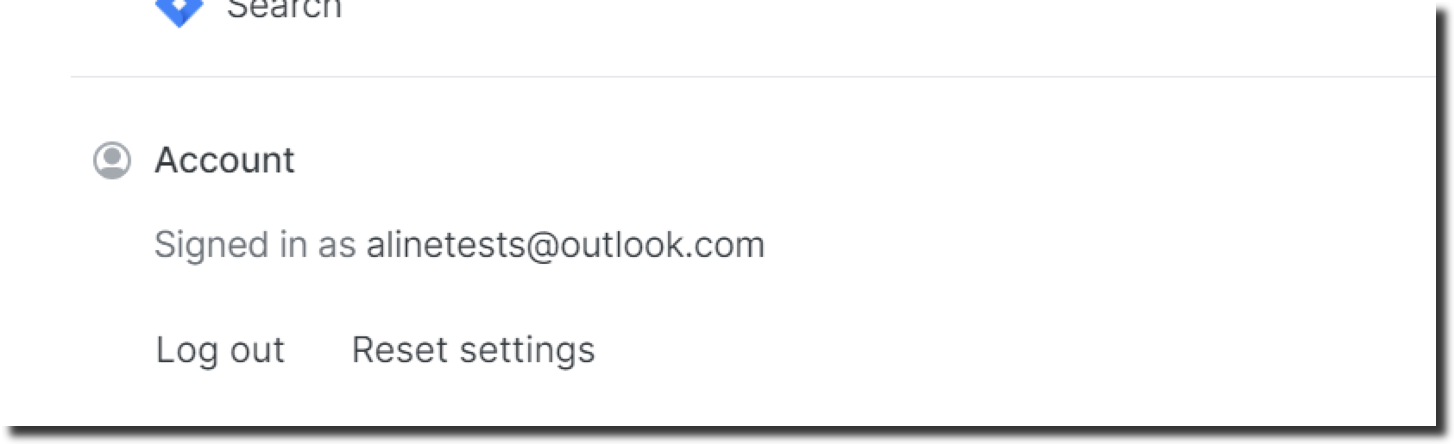
It’s also a good idea to double check that you are logged into the Memory for Windows app using the same email address linked to your Timely account. You can see your connected account by opening the Memory app, under the “Account” header as shown here:
Reboot your device
Finally, just to cover all the basics — have you tried turning your computer off and back on again? Is it a cliché? Yes. Does it magically fix issues some of the time? Also, yes. Give it a try!
Creating a Support Package and receiving further support
If you have continued difficulties after reviewing the steps above, we’d ask that you send us what we call a support package, which contains diagnostics and error information directly from the Memory app. This support package does not contain your memory activity or other sensitive information and is only used for troubleshooting purposes.
The following information is collected in a Memory Support Package:
- Memory application logs
- Non-sensitive app state and settings
- General platform and operating system information
- App performance metrics
- Last seen upload and capture
You can generate the support package by opening the Memory app and under the “General” section scroll down until you see the “Support” section, then click the “Create Support Package” button:
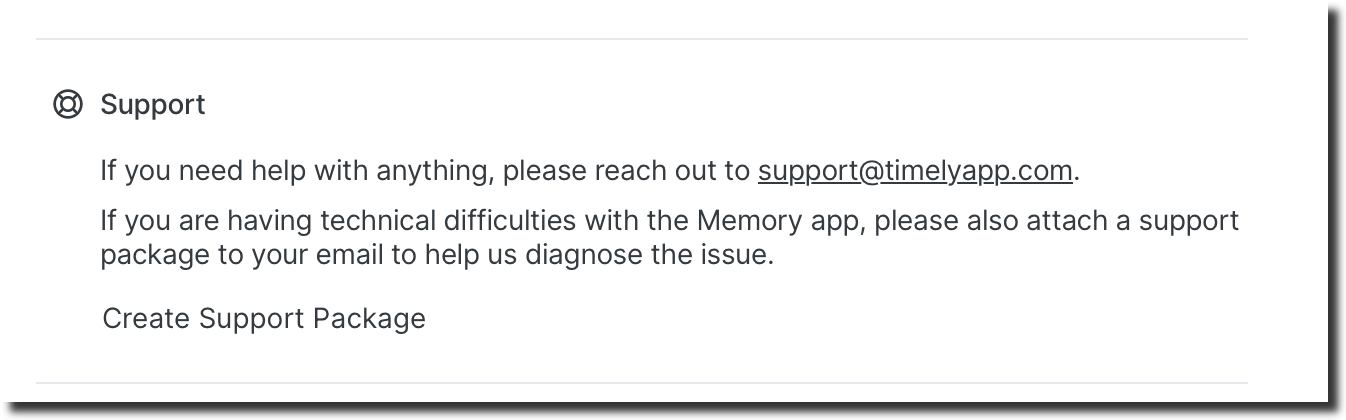
This will generate the support package in the .ZIP archive file format and you can choose which folder to download that file to.
Once the support package has been created please reach out to us via email at [email protected] with a brief description of your issue and the support package attached. We’ll review and get back to you ASAP with next steps!
Uninstalling Memory for Windows
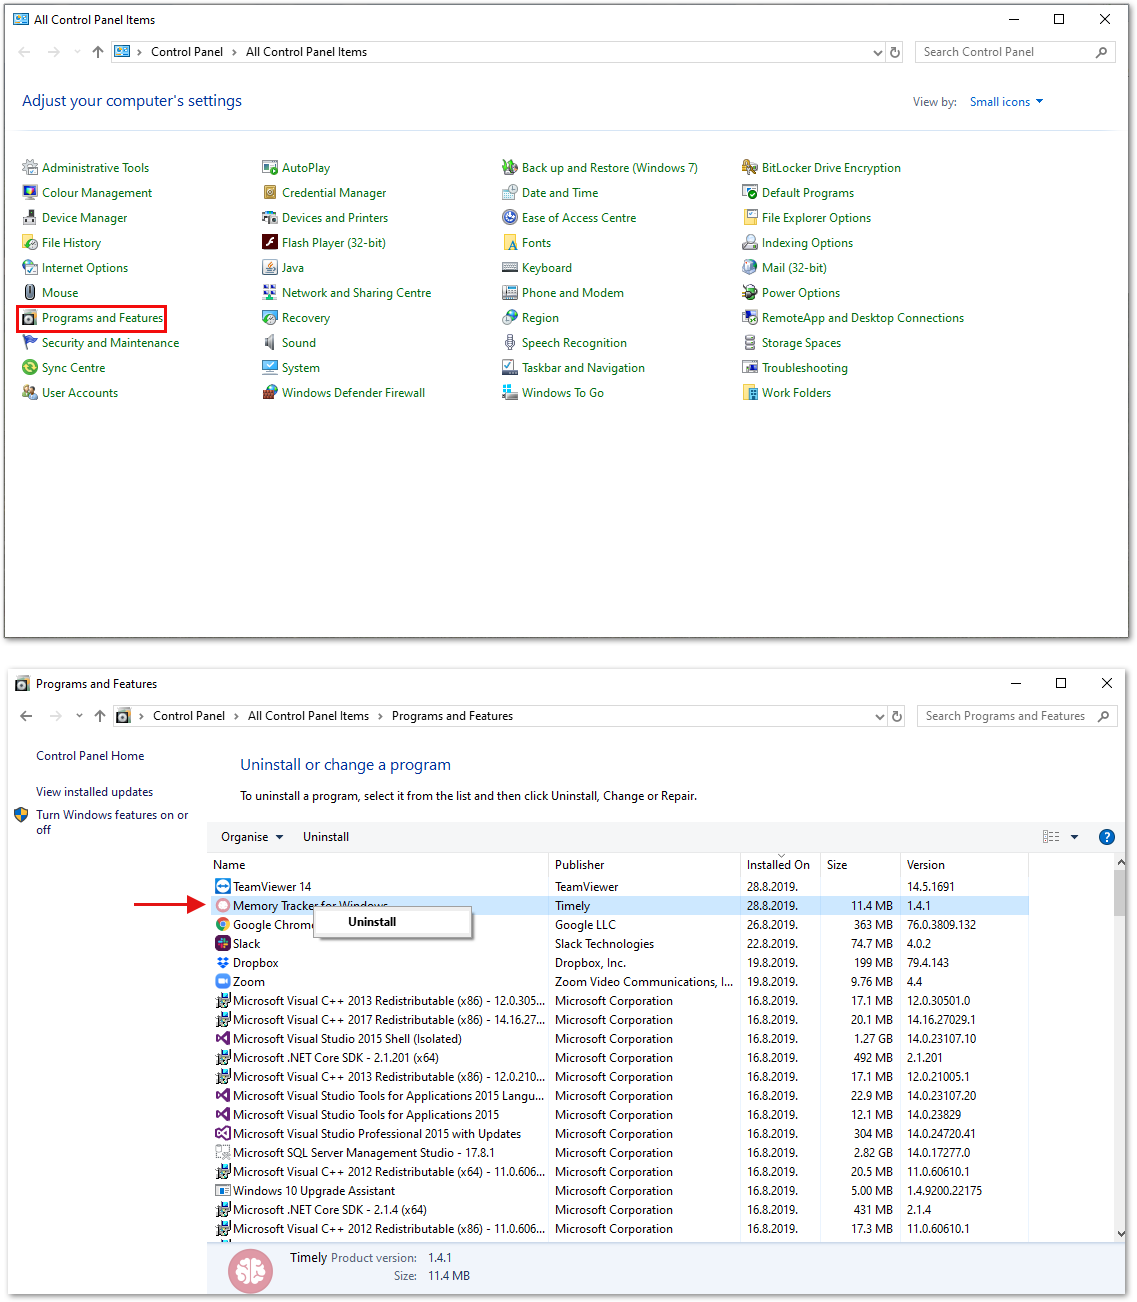
If you’re sure you want to uninstall it completely, first head over to your Control Panel. If need be, select View by Small Icons, to see all the items within the Control Panel. Then, select Programs and Features from the list of Control Panel items. From there, find Memory, right-click on it and click Uninstall.
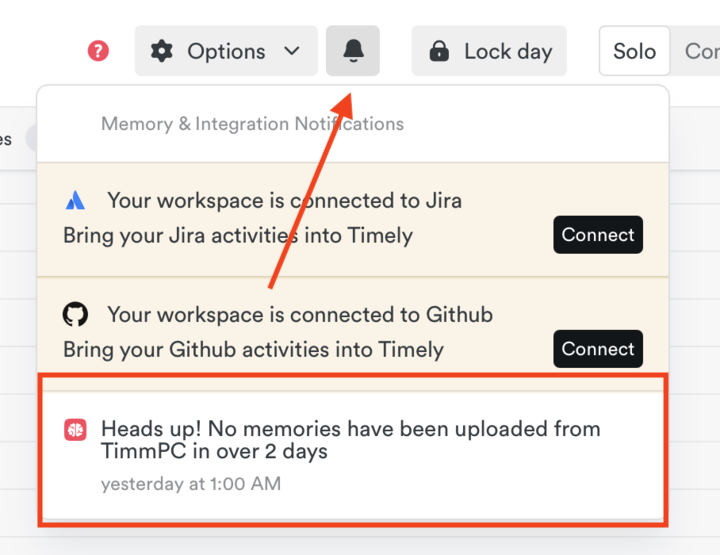
Missing Memory notifications
If you’re using the Classic Timeline Experience, Timely will notify you via an in-app bell icon if Memory uploads are missing for a set number of days. These notifications are designed to prompt you to check your Memory tracker and will stop after 30 days if no uploads are received. Stay on top of your timeline by ensuring your tracker is active and synced!
FAQs
What are the OS requirements?
Memory for Windows requires Windows 11 and above.
Which browsers does the Memory app support on Windows, and how does it handle incognito mode?
The Memory app supports several popular browsers on Windows:
| Browser | Incognito Compatibility |
|---|---|
| Google Chrome & Chrome Canary | Fully supported. Incognito or private browser activity will not be captured when the appropriate setting is enabled. |
| Microsoft Edge | Fully supported. Incognito or private browser activity will not be captured when the appropriate setting is enabled. |
| Mozilla Firefox | Fully supported. Incognito or private browser activity will not be captured when the appropriate setting is enabled. |
| Brave | Fully supported. Incognito or private browser activity will not be captured when the appropriate setting is enabled. |
If you’re using incognito mode in a supported browser, you can tell the Memory app to ignore that activity by enabling the “Don’t record incognito browser activity” option in settings.
I’m in a large company and I’m having trouble downloading Memory for Windows. What should I do?
If you get a message saying you need admin rights to your server/network to install the app, please reach out to your IT Department to ensure you have permission to install Memory. For larger enterprise environments an .MSI installer file may be available upon request, please just reach out to [email protected] for further assistance.
Are there any specific apps or software which are incompatible with Memory?
If you’re currently using Avast as your anti-virus software, you may need to whitelist or create exceptions in order to install and run Memory in the background:
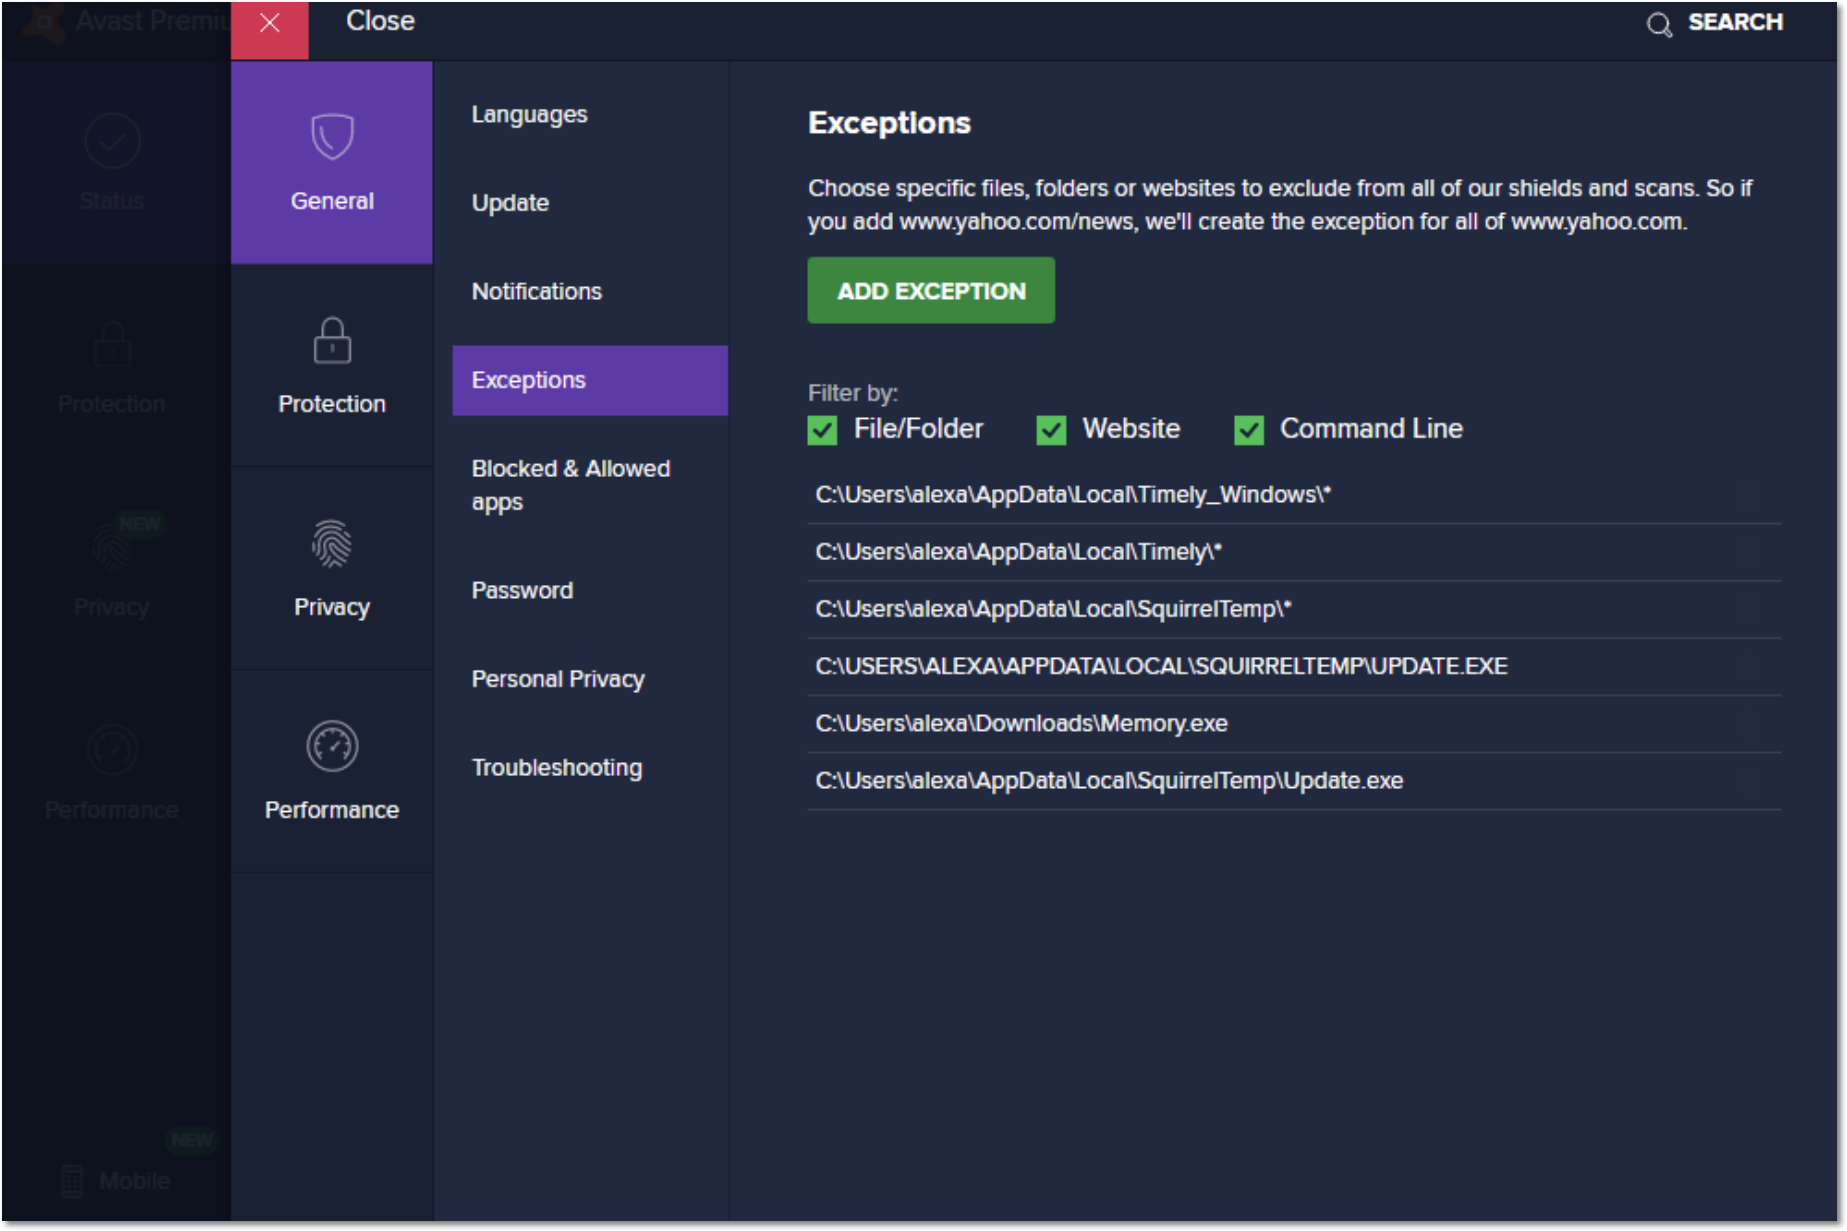
Additionally, you can go to your Settings within Avast and disable the Potentially Unwanted Program feature (PUP).
I have a robust firewall in place, what should I configure in order to allow the Memory app to work normally?
You can whitelist these URLs to make sure data is flowing properly between your computer and Timely:
- https://api.timelyapp.com/
- https://app.timelyapp.com/
- memory.timelyapp.com
- icons.timelyapp.com
Is my data safe/private?
Data from Memory is private to you and only you! We take privacy very seriously so click to read more about what data we capture, how we protect and process your data and how that data is incorporated into your Timely experience.
Last updated June 19, 2026
Have feedback for this article or need more help? Contact us now.