Sync Time Entries to Google Sheets using Zapier
IntegrationsZapier & AutomationHandbookContinuously sync new and updated time entries from Timely to Google Sheets.If you are newer to Zapier, check out our introductory article for an overview, as well as some sample Zaps for inspiration.
In this article we’ll walk through syncing all time entries from Timely to Google Sheets using Zapier, covering everything from preparing your sheet to configuring Zaps for both new and updated entries.
Preparing your Google Sheet
Before configuring your Zap, create a new blank Google Sheet with these column headers:
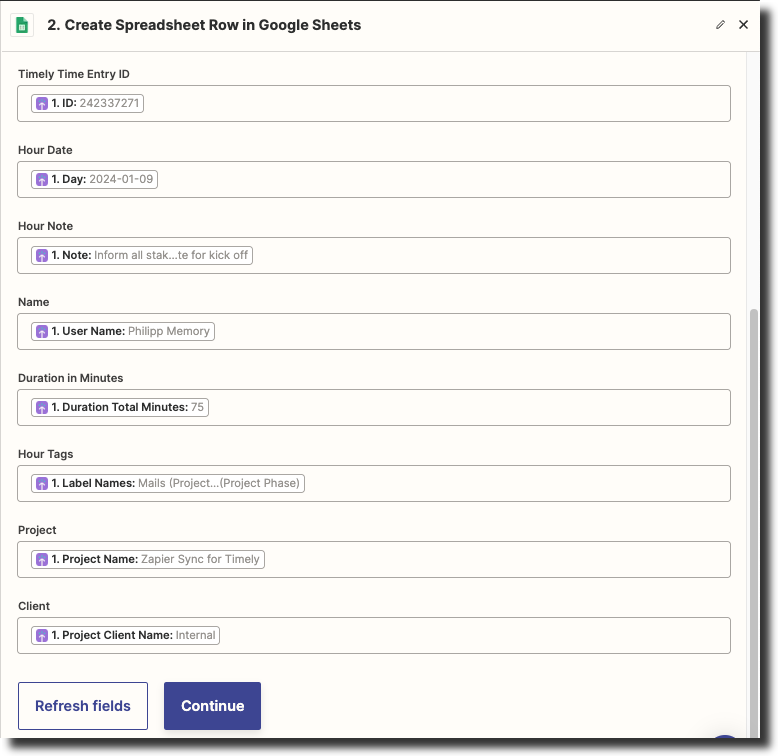
| Timely Time Entry ID | Hour Date | Hour Note | Name | Duration in Minutes | Hour Tags | Project | Client |

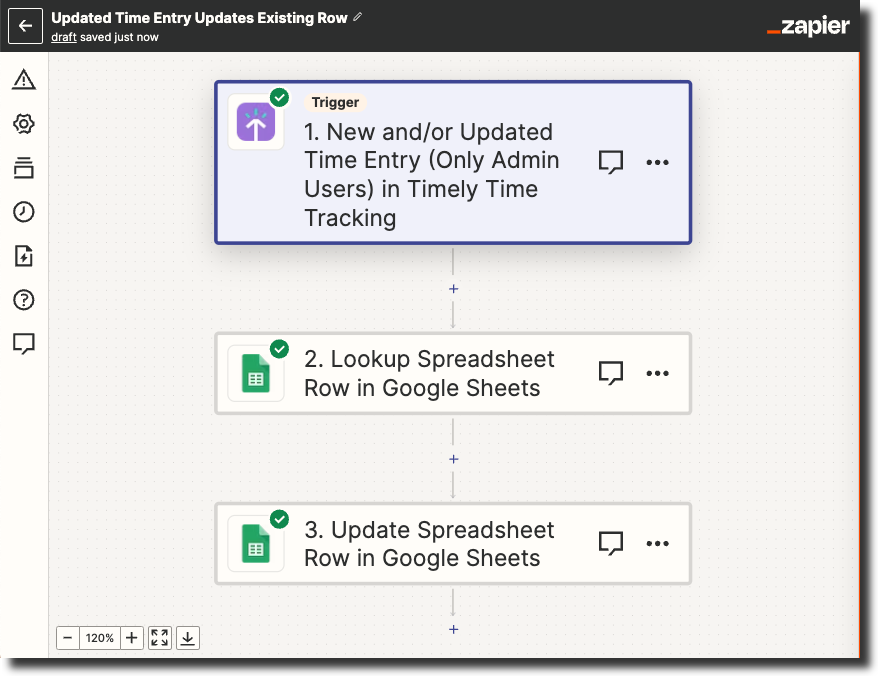
Zap 1 — Sync new Time Entries
This Zap handles newly added entries and consists of two steps:
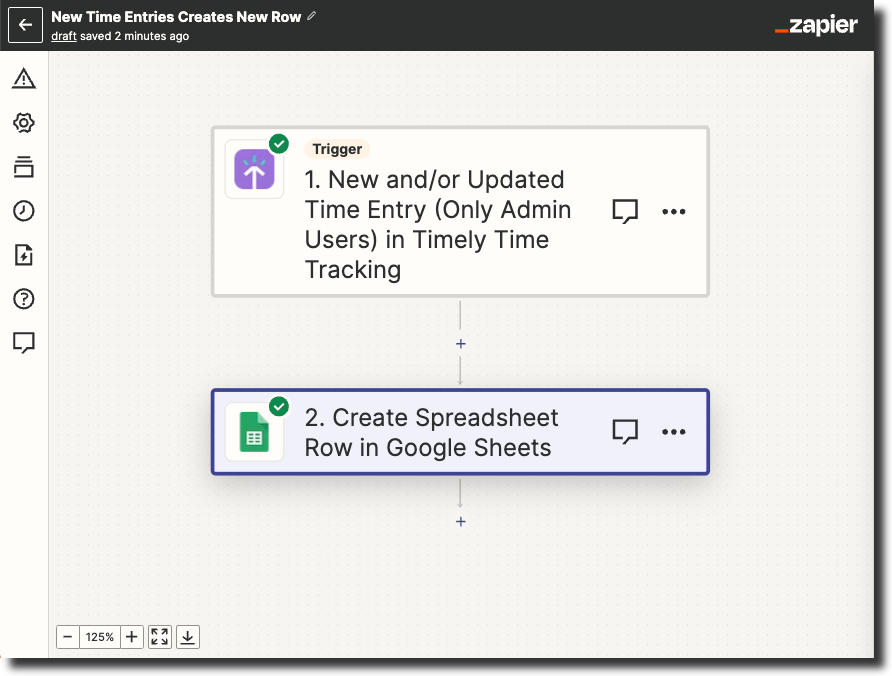
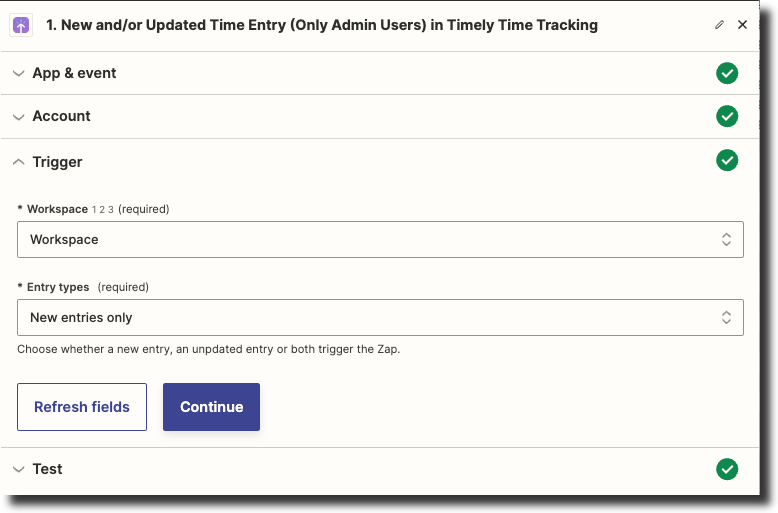
Step 1: Select “Timely Time Tracking” as the trigger with “New and/or Updated Time Entry (Only Admin Users)”. Set Entry type to “New entries only”.
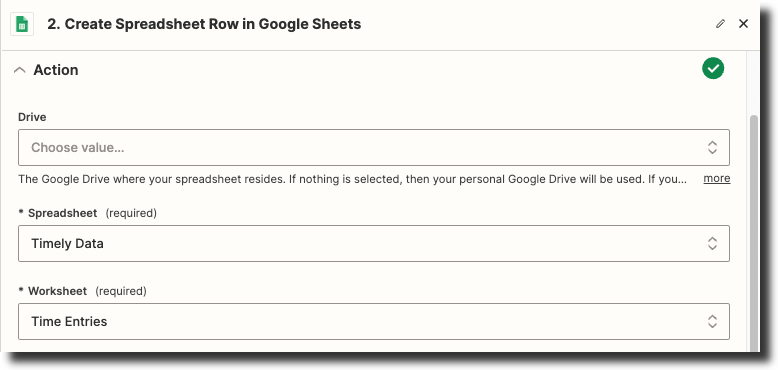
Step 2: Select “Google Sheets” with action “Create Spreadsheet Row”. Connect your sheet and map the Timely fields to columns:
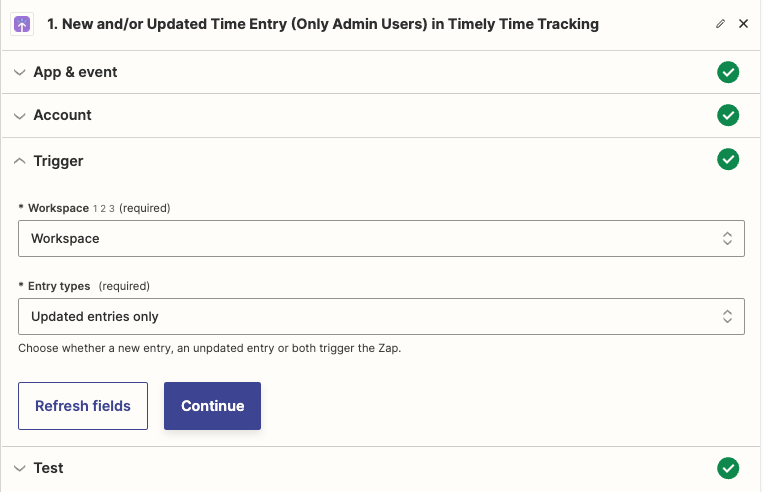
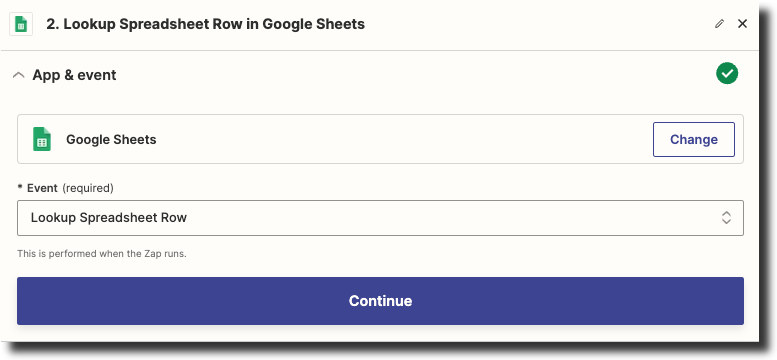
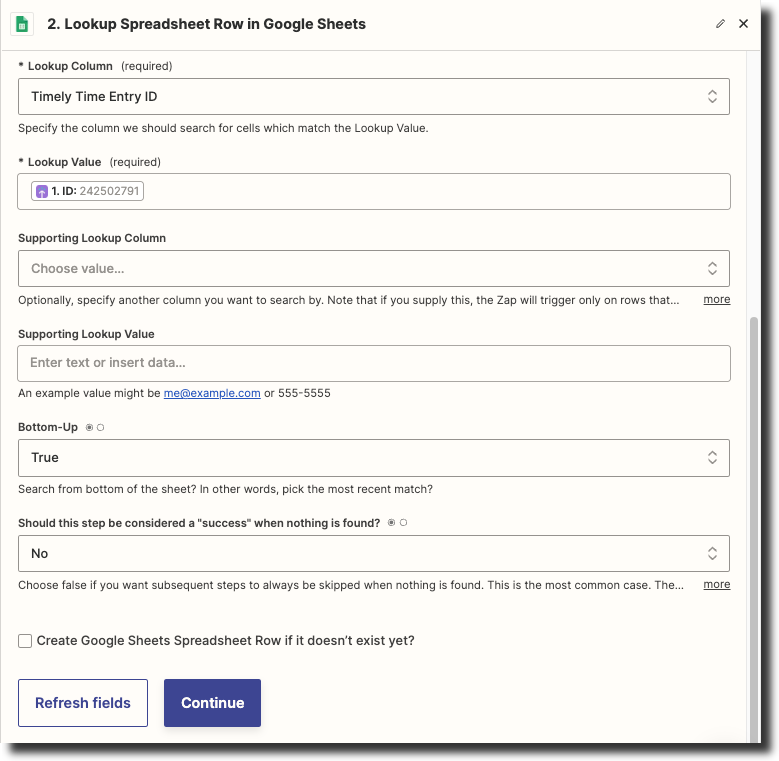
Zap 2 — Sync updated Time Entries
This Zap handles entries that have been updated, preventing duplicates. It consists of three steps:
Step 1: Use the same trigger but set Entry type to “Updated entries only”.
Step 2: Use “Lookup Spreadsheet Row” to find the existing row by Timely Time Entry ID.
Step 3: Use “Update Spreadsheet Row” with the row number from step 2 to overwrite with updated values.

All your time entries from Timely will now sync to Google Sheets — helping with invoicing, reports, and analytics!
Last updated April 1, 2026
Have feedback for this article or need more help? Contact us now.