Classic: Tasks
Time Tracking: ClassicHandbookCreating and tackling to-do lists in Timely.Big goals or milestones can seem like mountains at the start. Standing at the base, staring up at the peak, you wonder how you’ll make it to the top. The trick is to break that mountain into smaller, more manageable sections of the rock face to scale one at a time. By moving steadily bit by bit, you’ll have planted your flag at the summit before you know it.
The takeaway here is that breaking large tasks down into smaller ones can make your workload infinitely more manageable and actionable. The benefits here are numerous: you can really dive into each task and be thorough, you gain greater perspective when looking at all the small pieces in the context of the whole, and you can easily track your progress against abstract or macroscopic goals.
Using Timely, you and your team can now create tasks that sit between your projects and your time entries, allowing you to organize work into bite-sized pieces, and empower your team to manage their backlog as you work towards milestones, big and small.
Using the Tasks page
There are a few places you can create and view Tasks in Timely, but the best place to start is the Tasks page. On the left-hand side navigation bar, you will see the Tasks page.
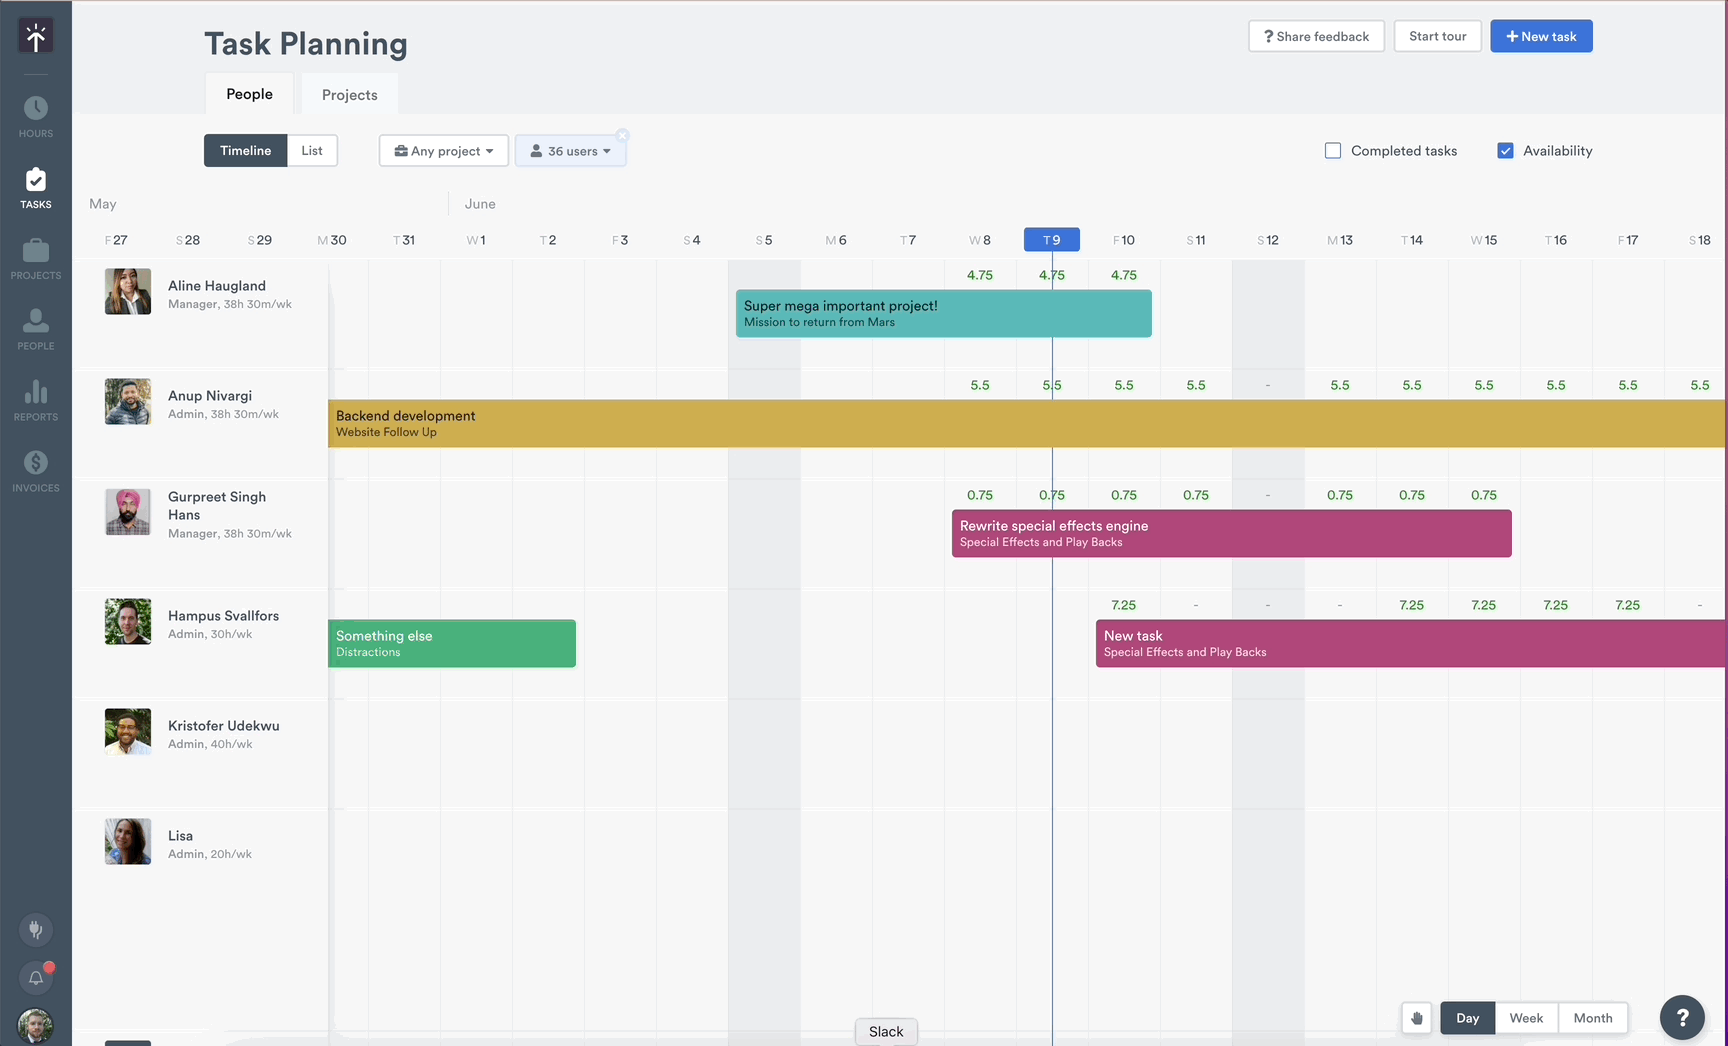
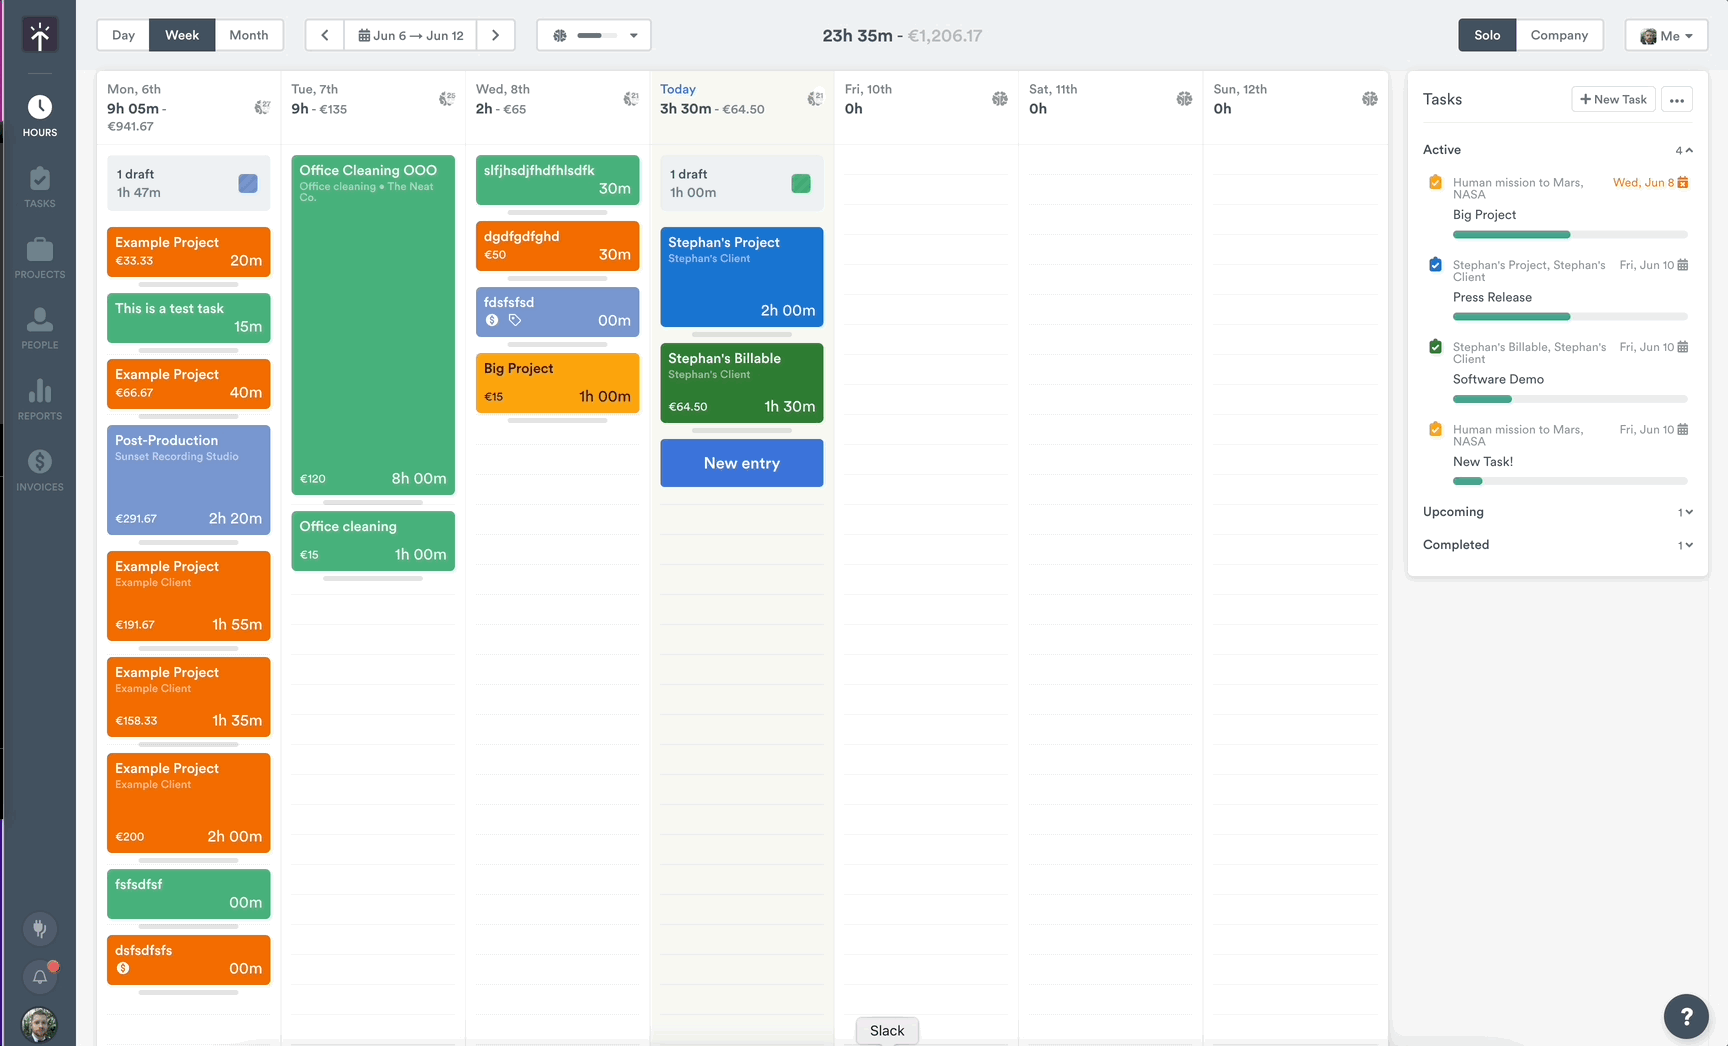
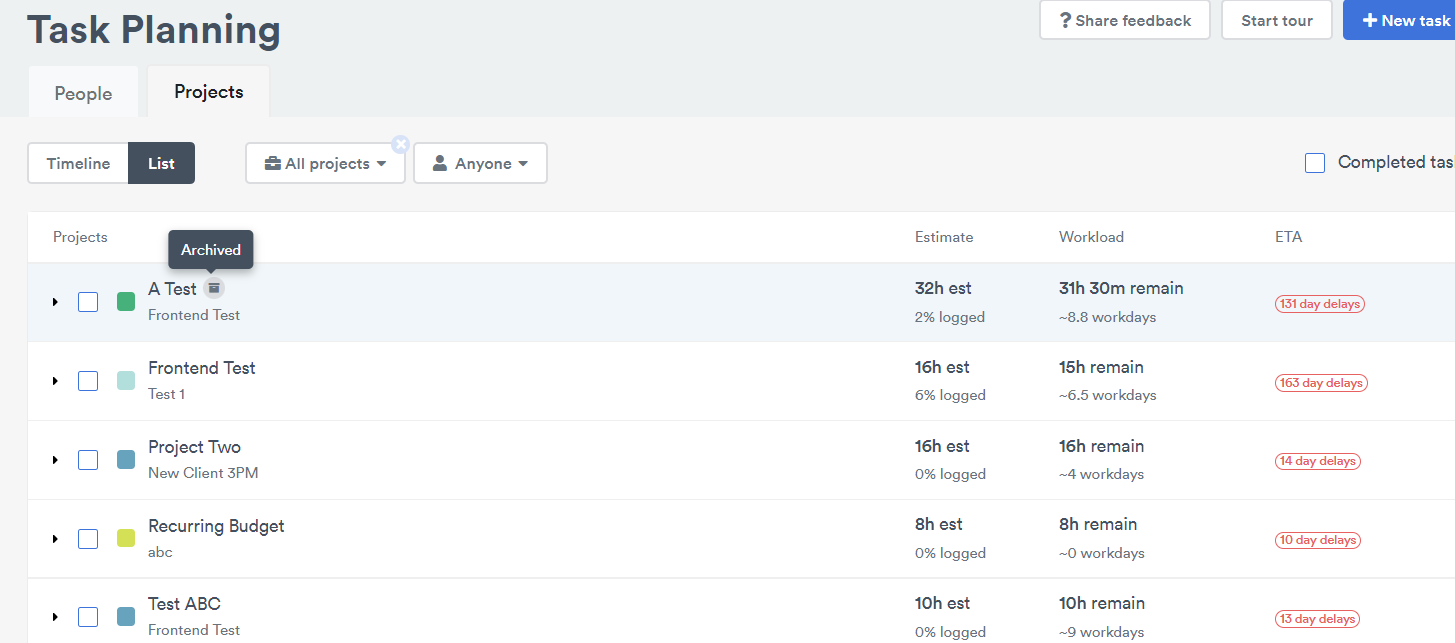
There you can choose to view your tasks in either the Timeline or List view. The Timeline view is a resourceful tool that offers you:
1. A holistic view of your tasks and the tasks your team has (if you have the level of access to them). You can use buttons or shortcuts to zoom in and out on important plans (by day, week, month).
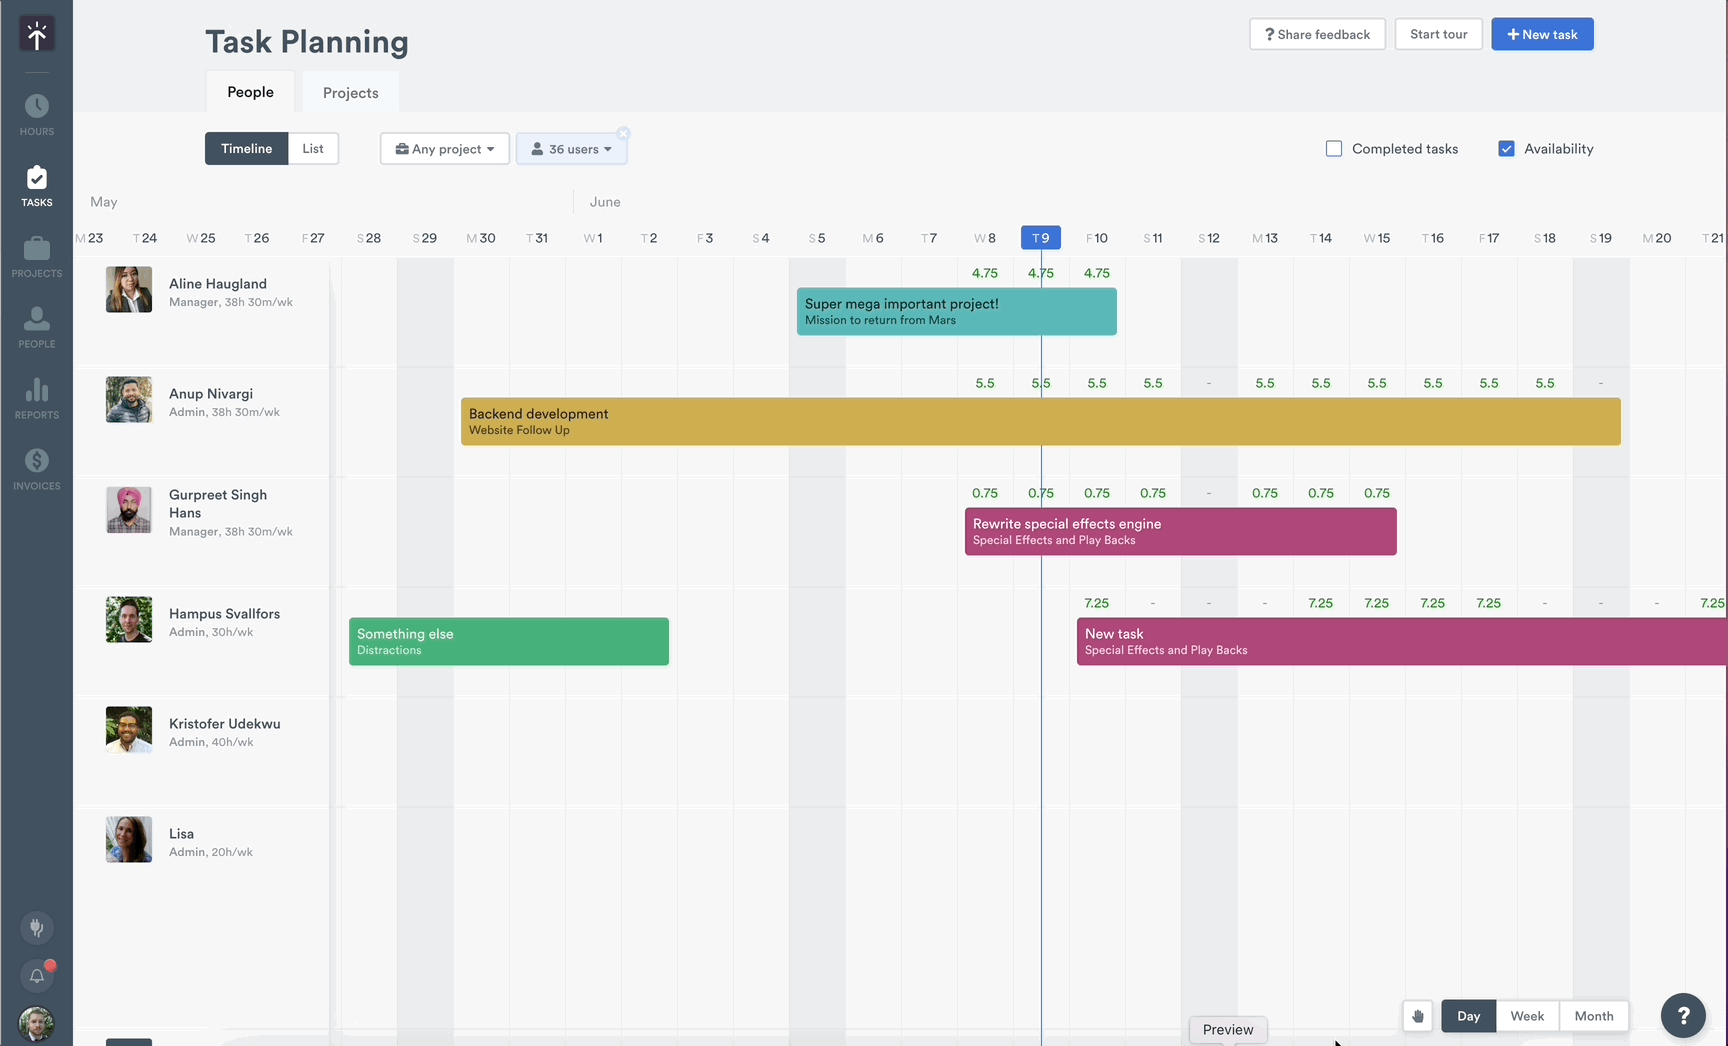
As you view your timeline, you’ll see each user’s individual capacity displayed parallel to each task. This lets you gauge your employees workload with just a glance! You can toggle this view on or off by clicking the “Availability” check box.
The Timeline offers an endless horizontal scroll with no limit to how far ahead or behind you can look:
2. Easy drag-and-drop task management. Simply click and drag to create a task. The tasks will automatically be assigned a lane based on the start date and the length. Drag-and-drop to move, re-assign and resize tasks on a timeline:
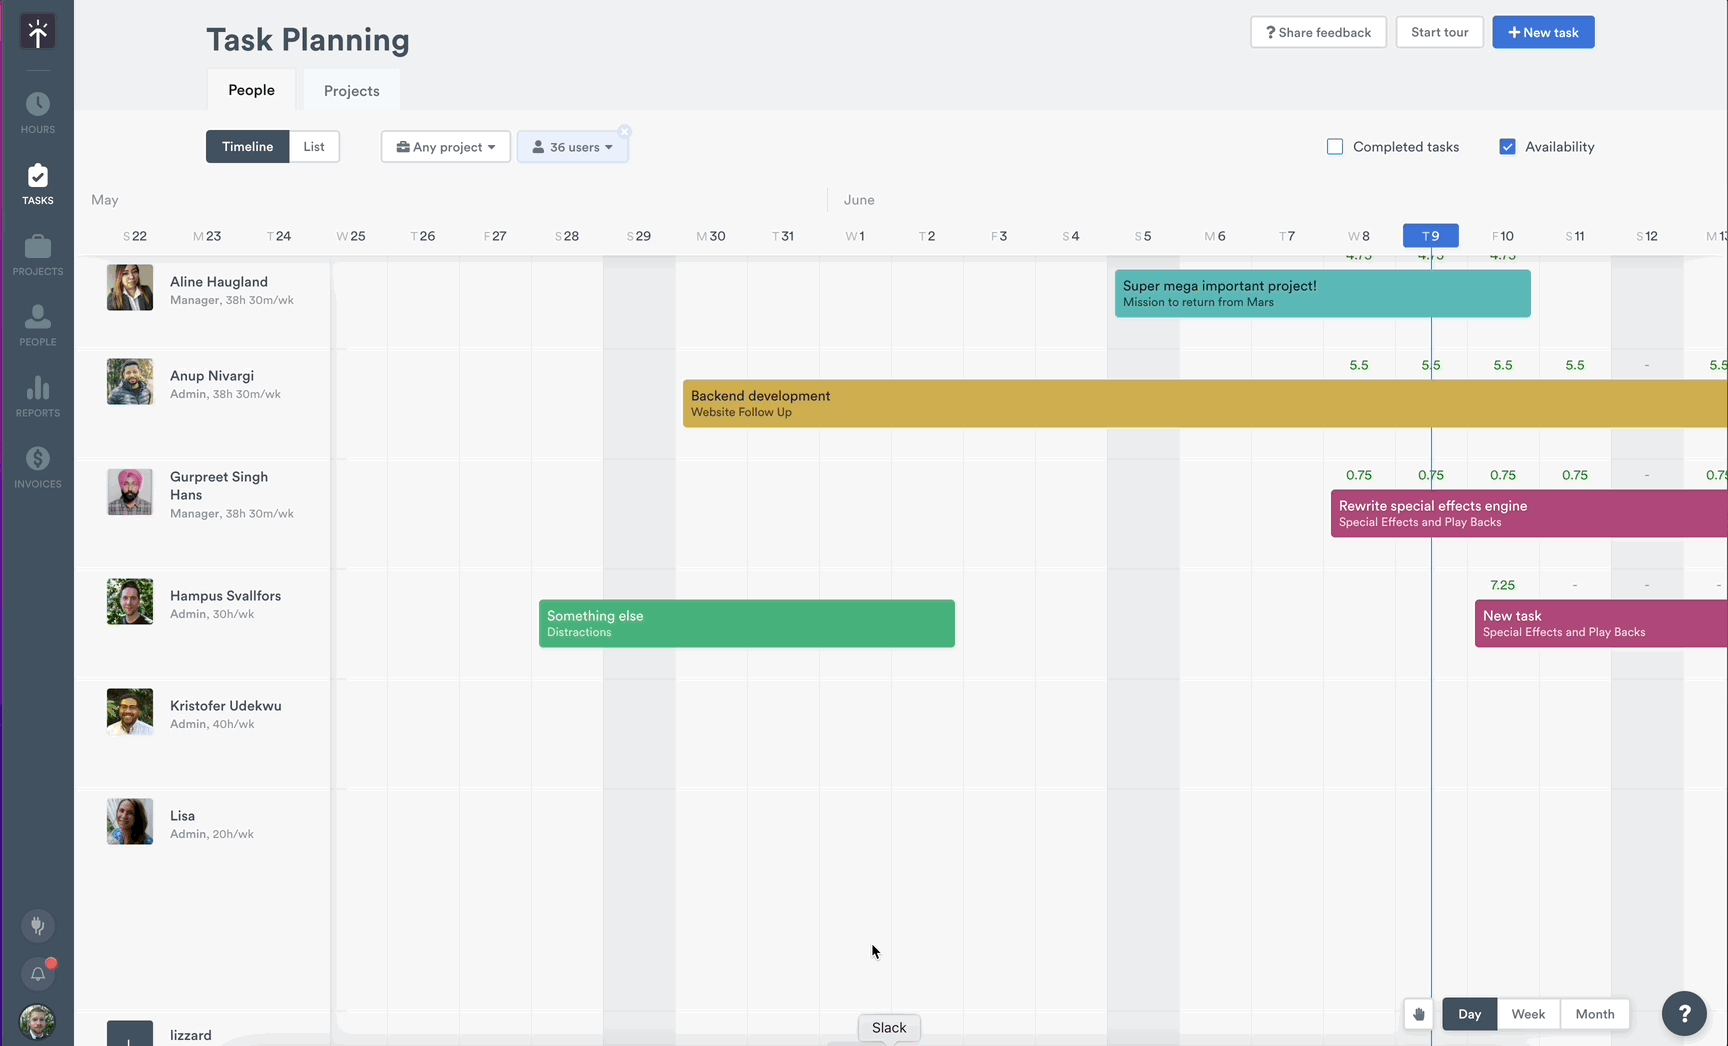
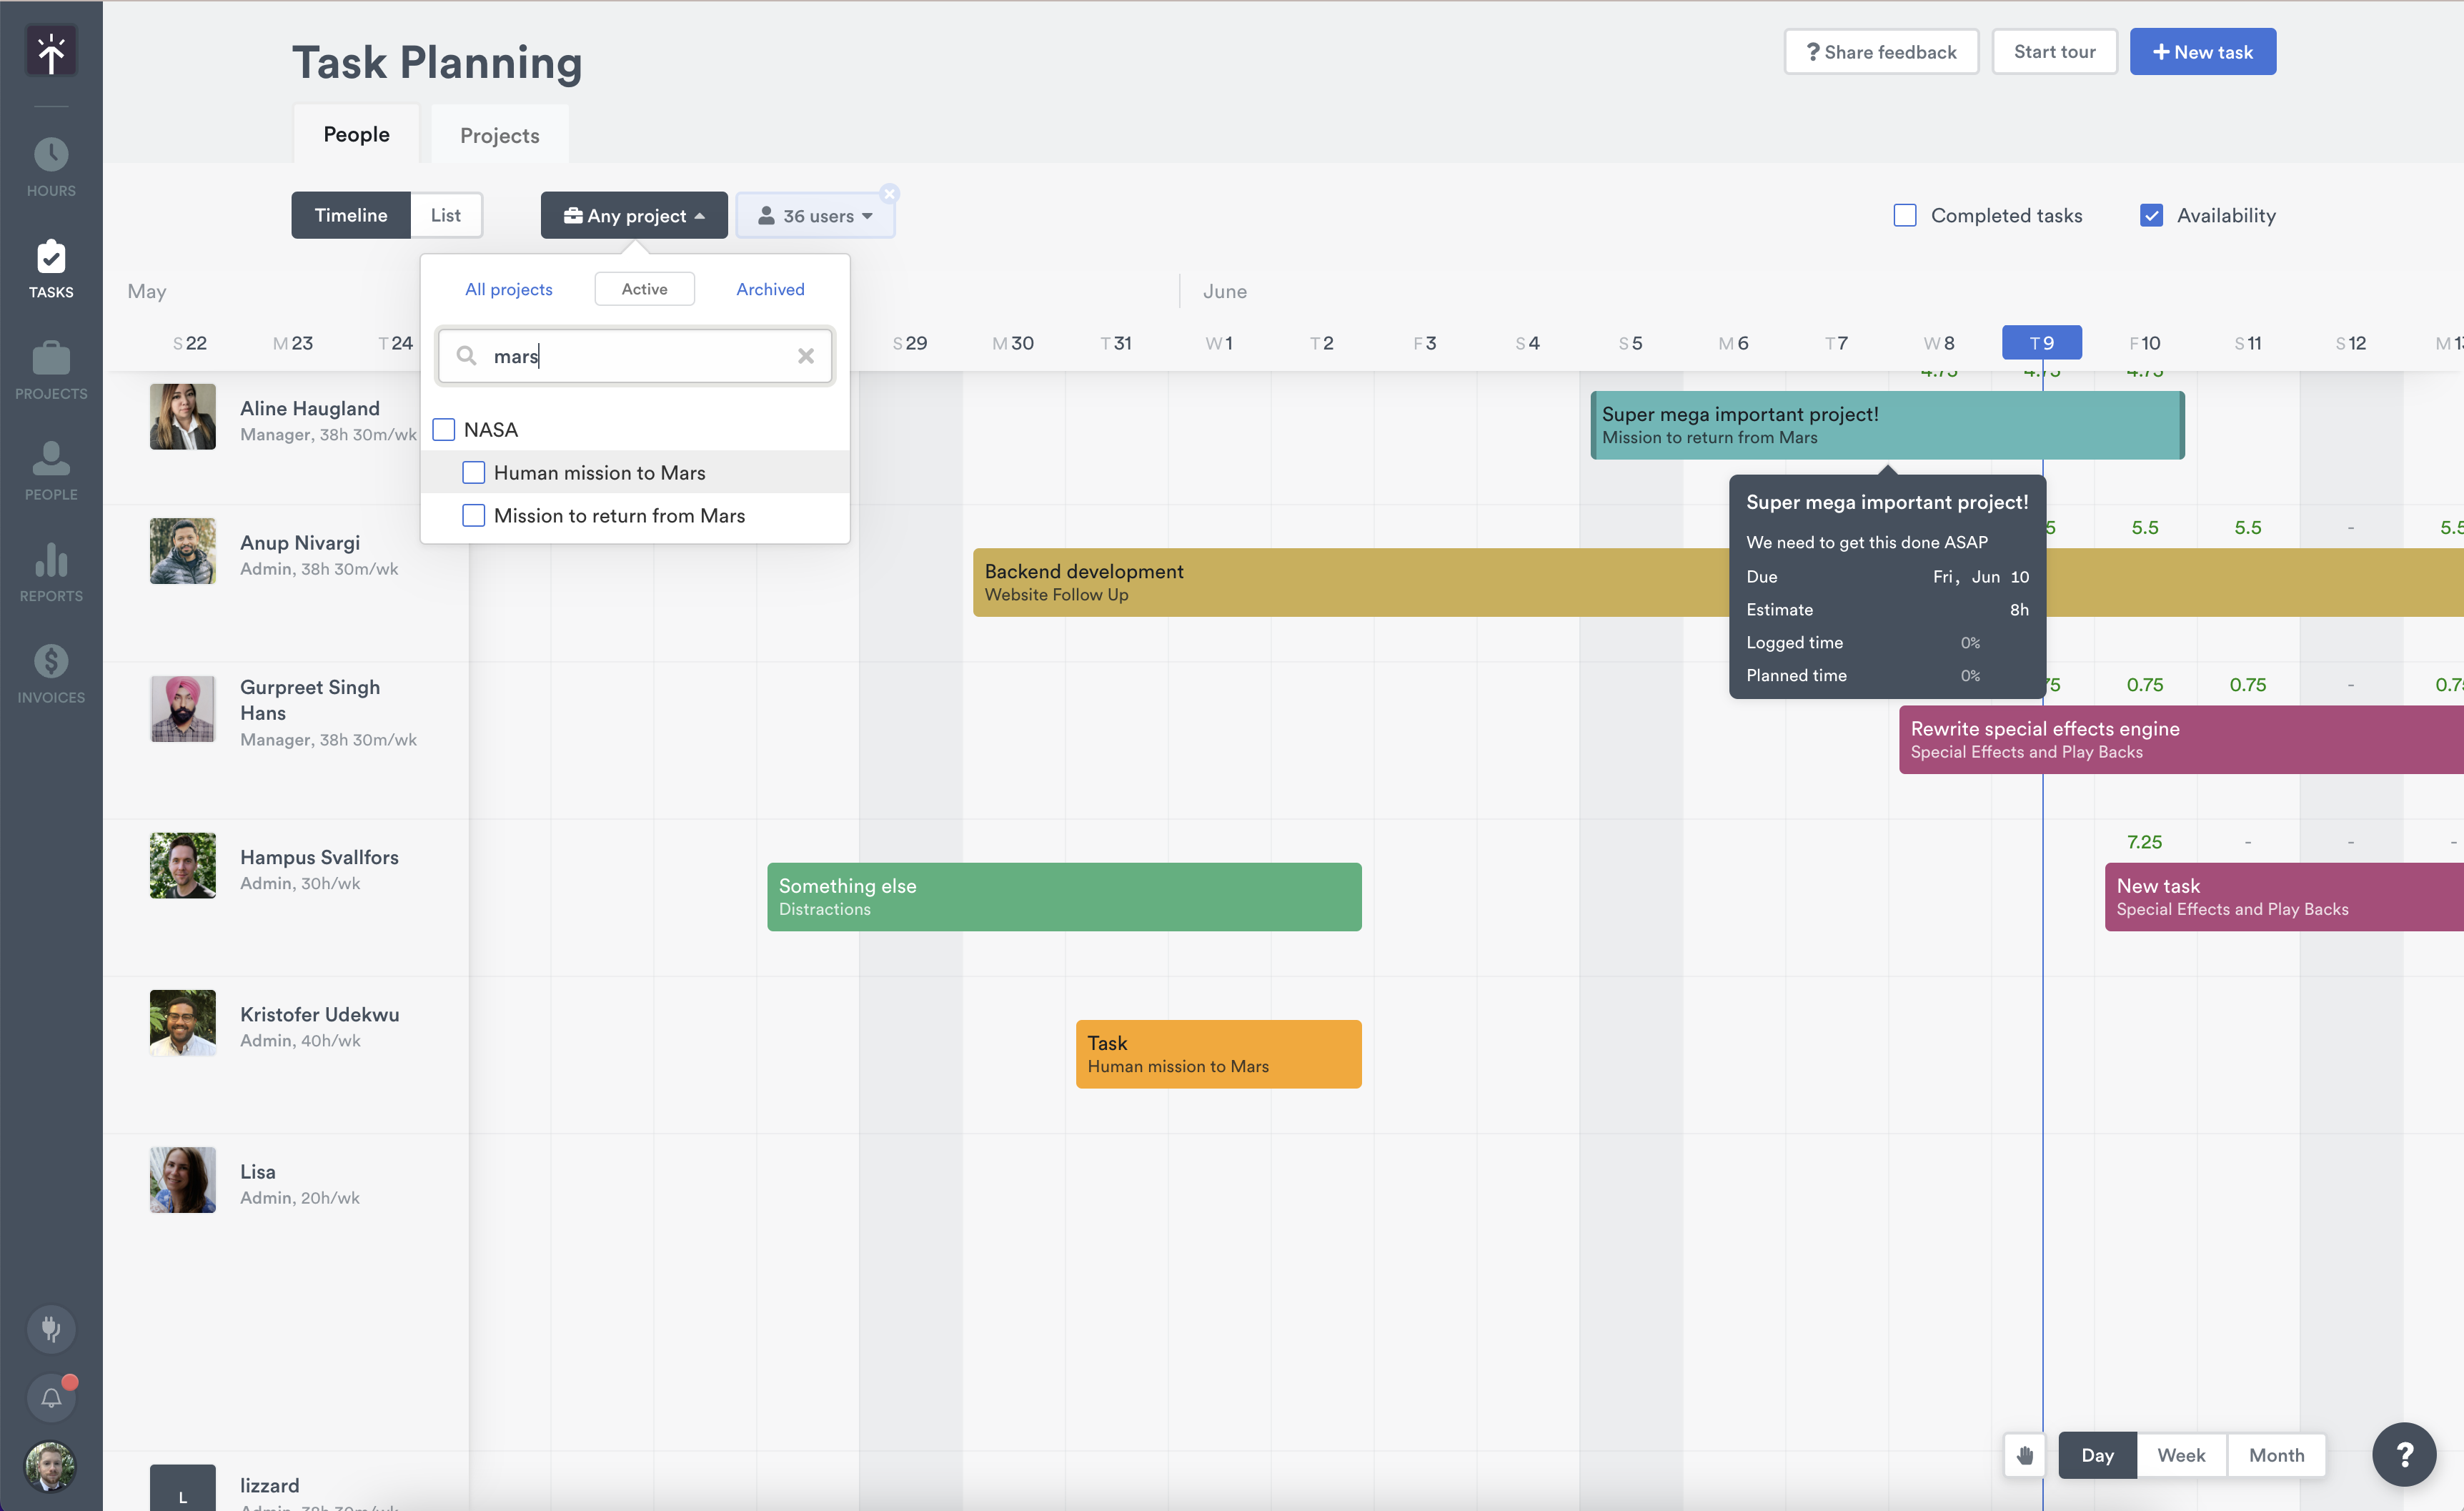
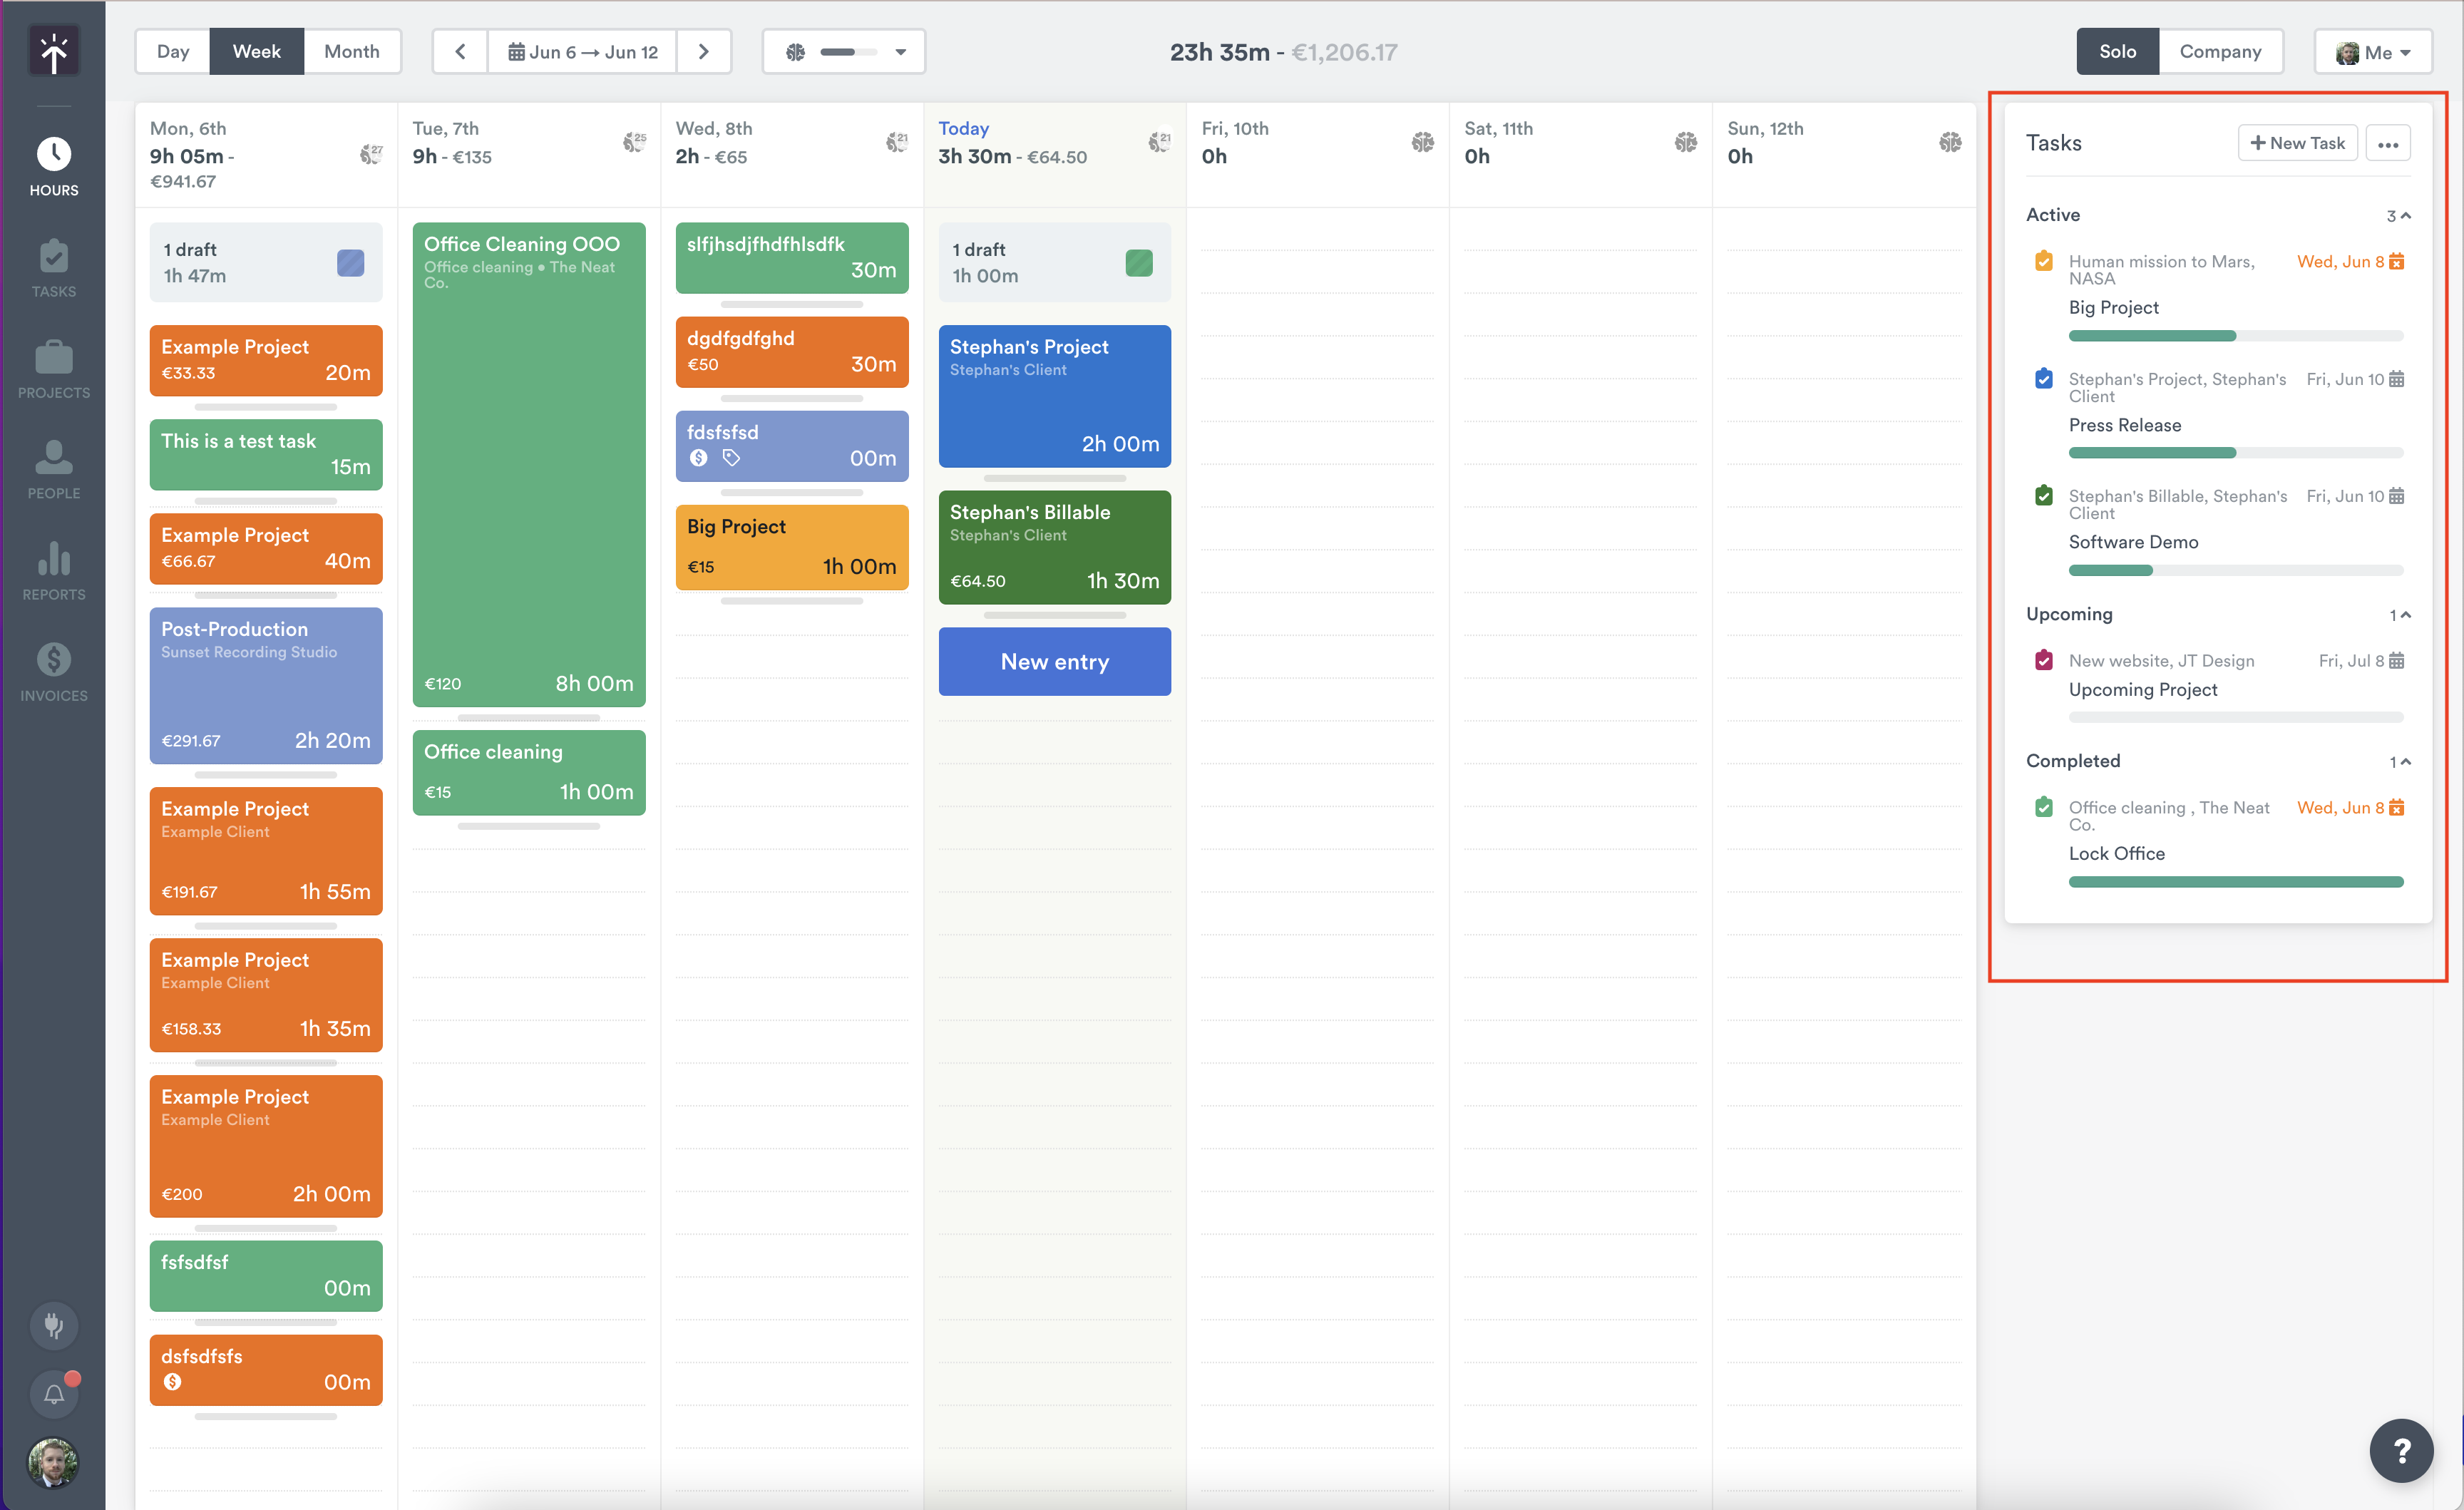
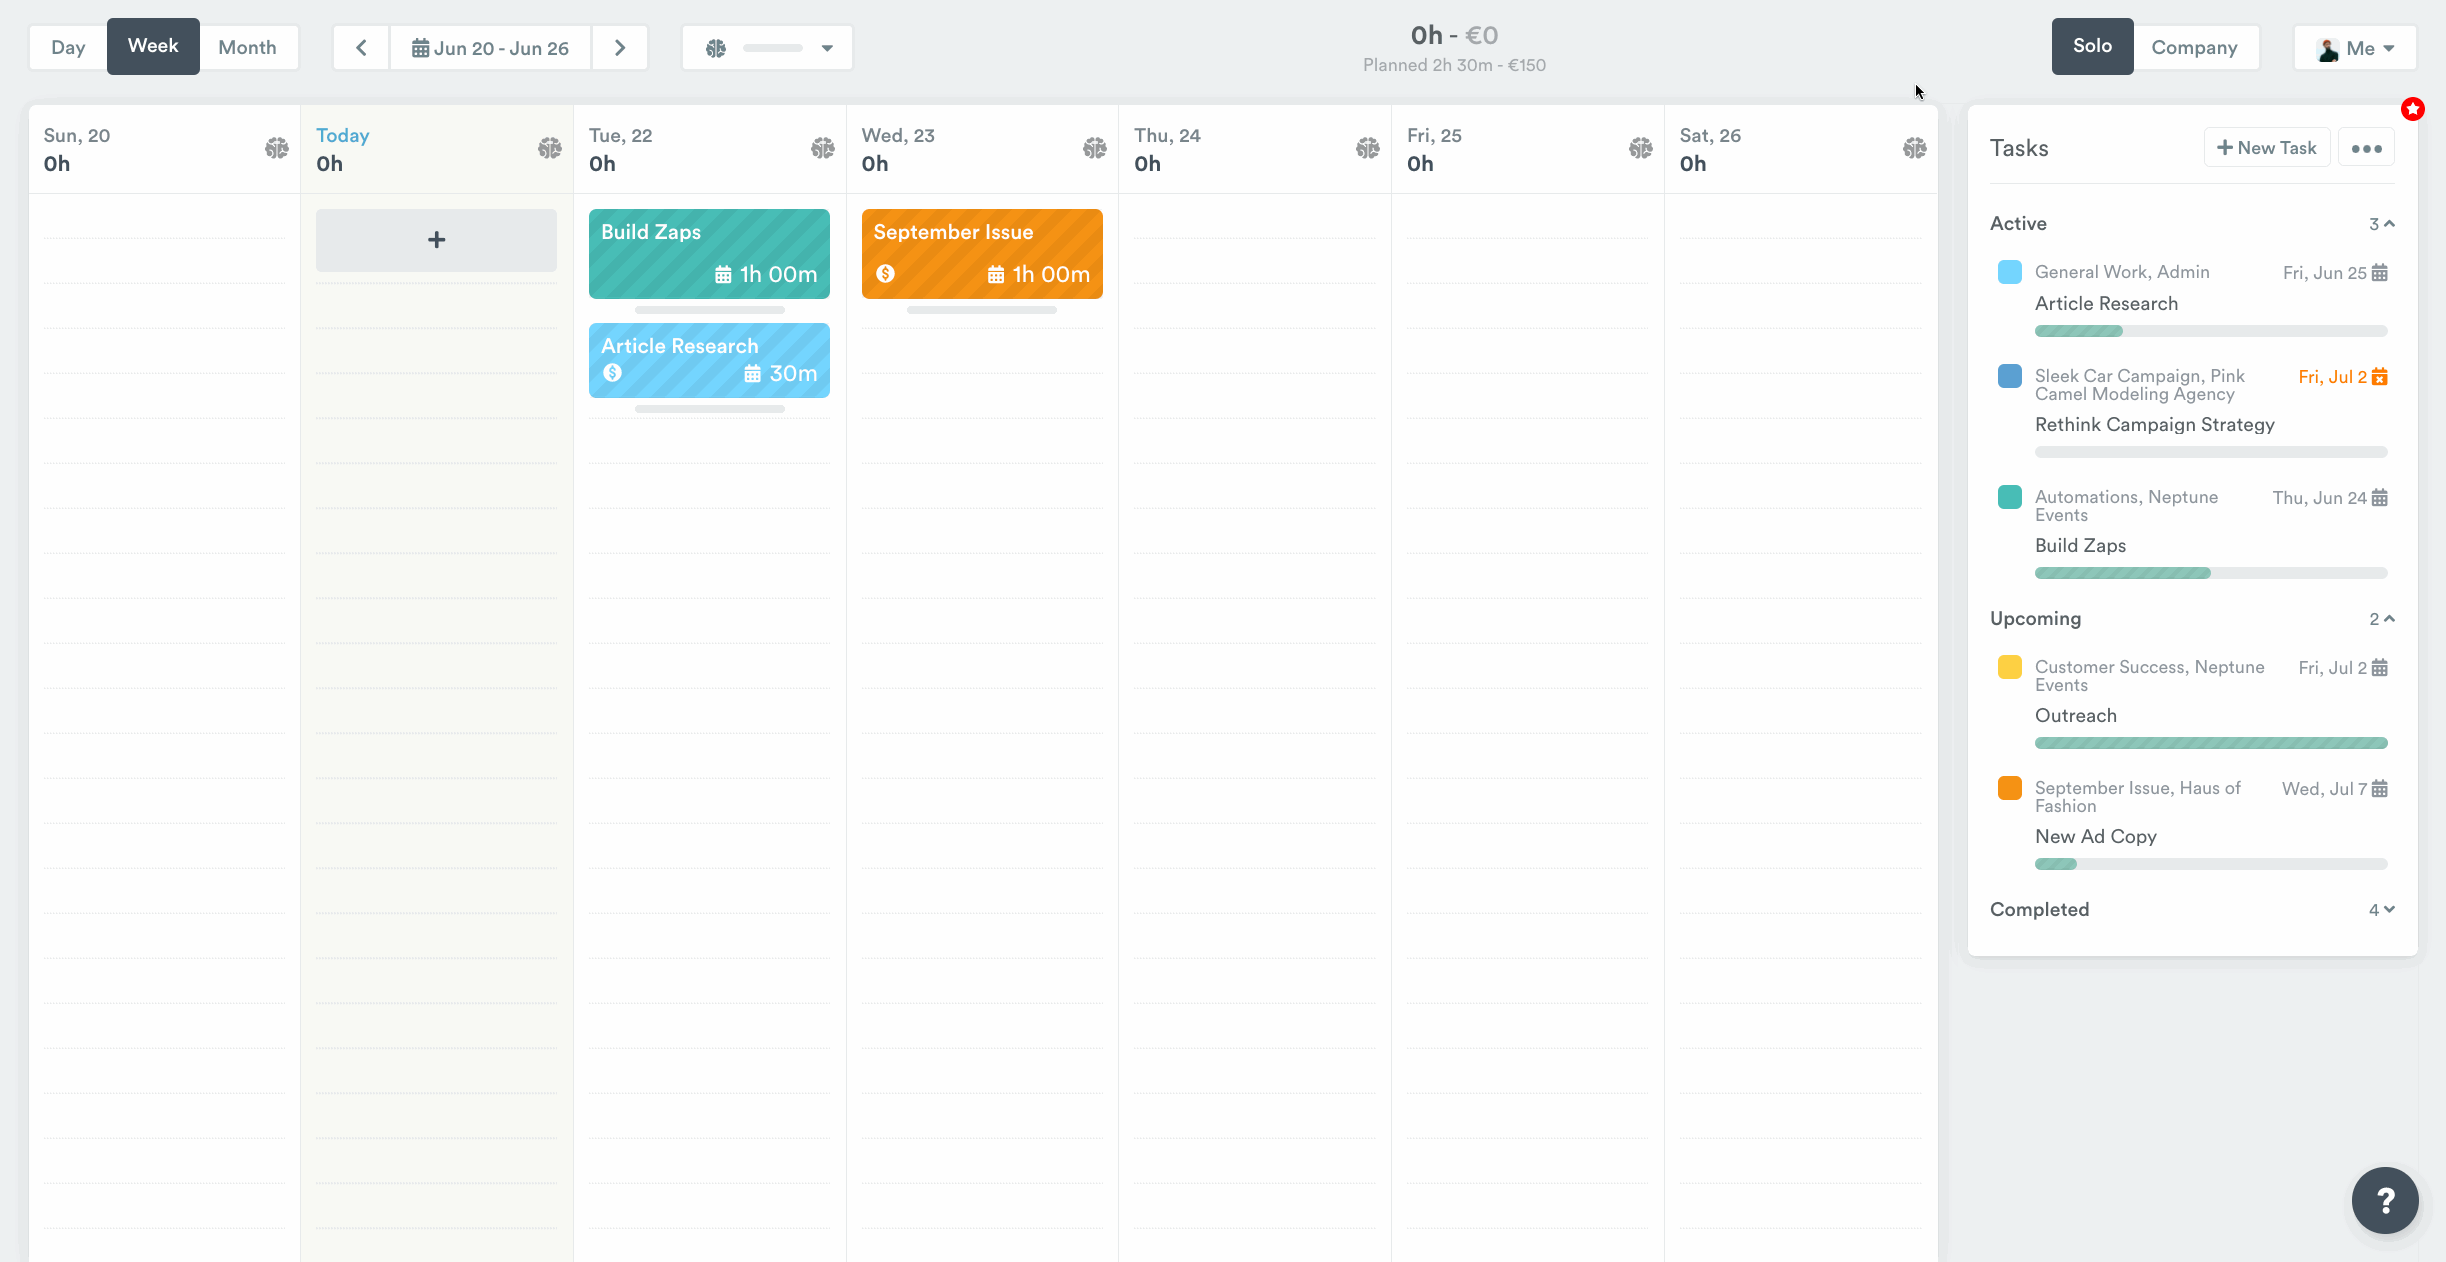
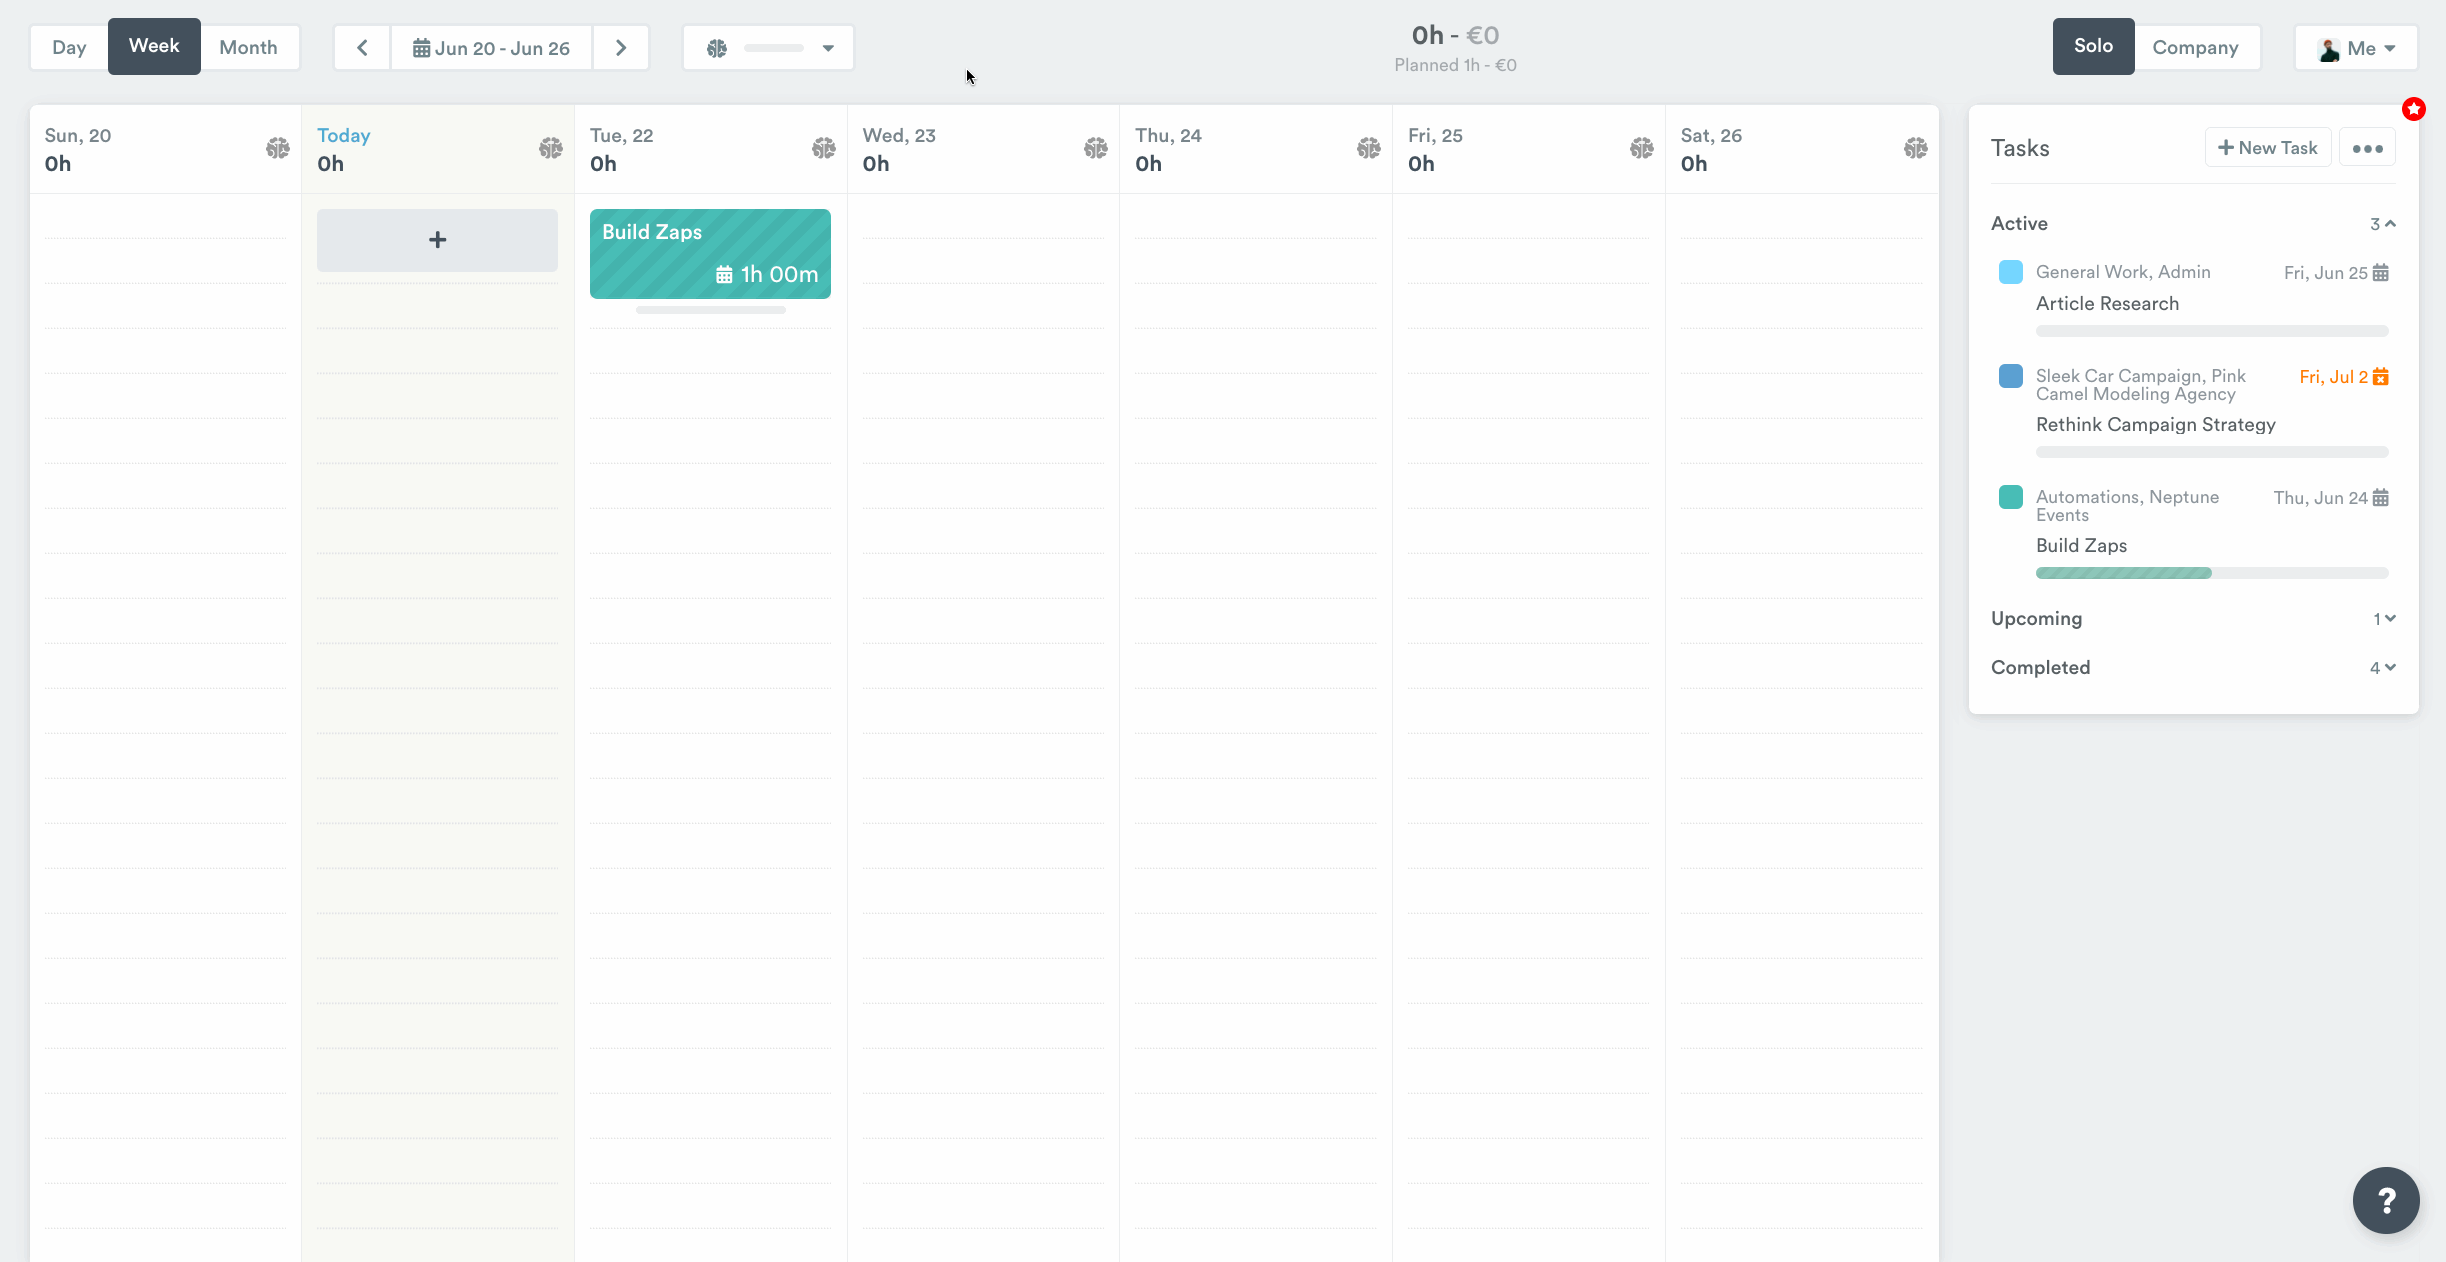
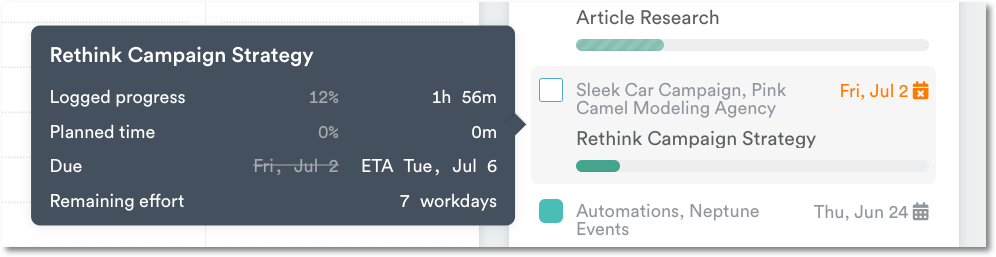
3. Important task details at-a-glance. Each task is identifiable by a title description. It includes the due date, capacity, and any time planned or logged against the task. You can also filter tasks by project, person, task status, and availability:
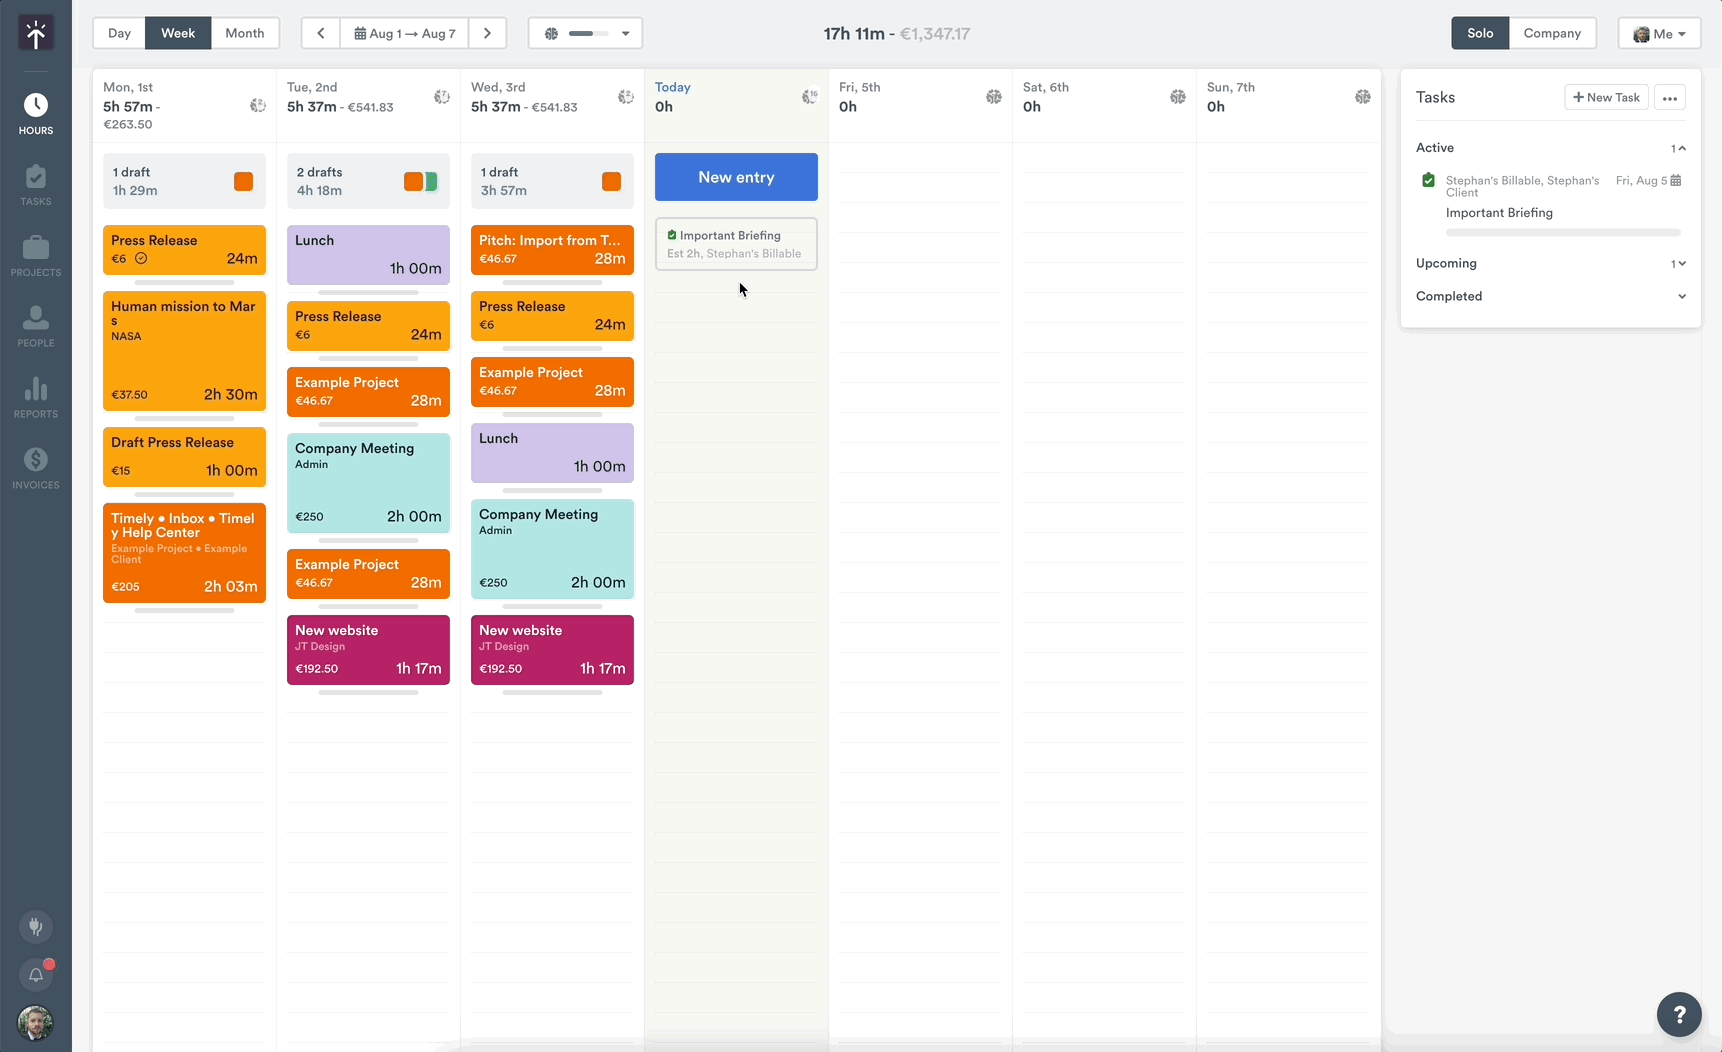
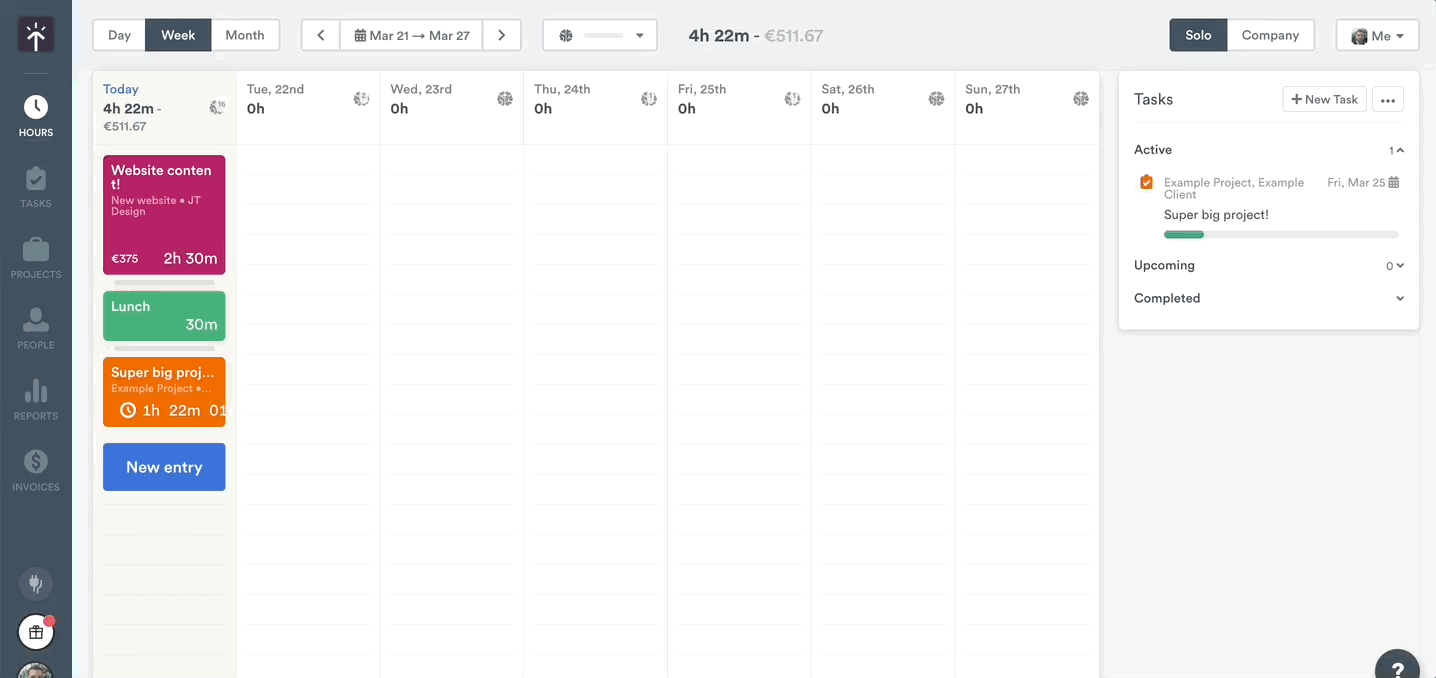
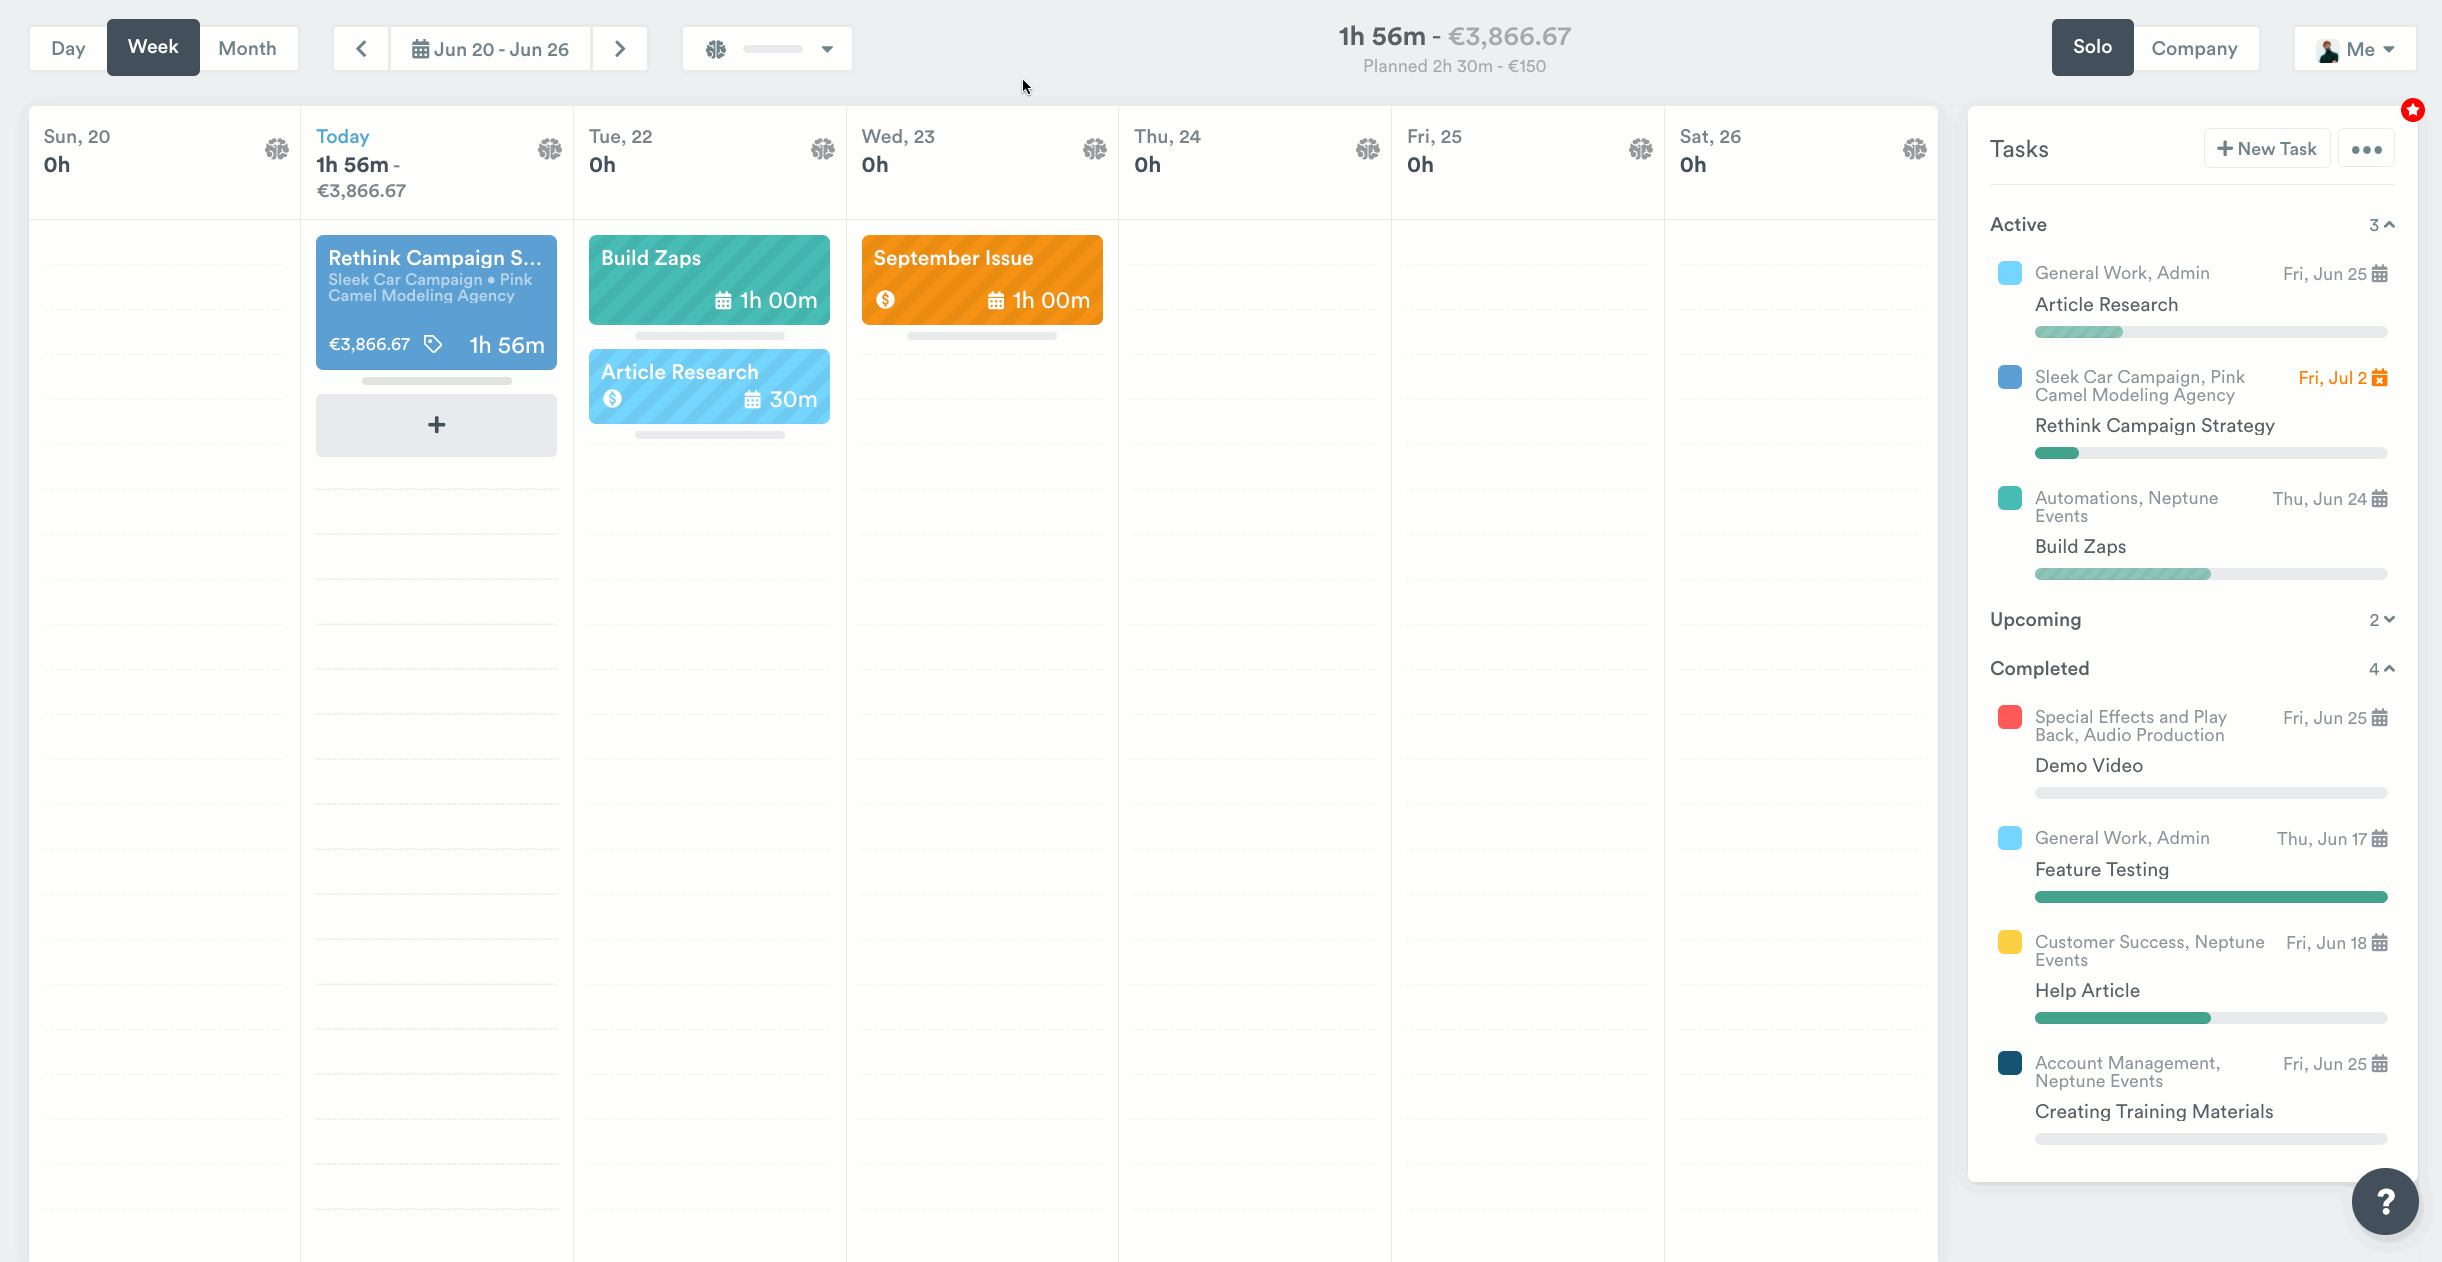
The Hours page
You can also create and view tasks on the Hours page. Simply click on the Tasks panel to the right-hand side of Hours; if you can’t, you just need to increase the size of your Timely window — or click the new checkbox dropdown icon in the right-most corner of your view.
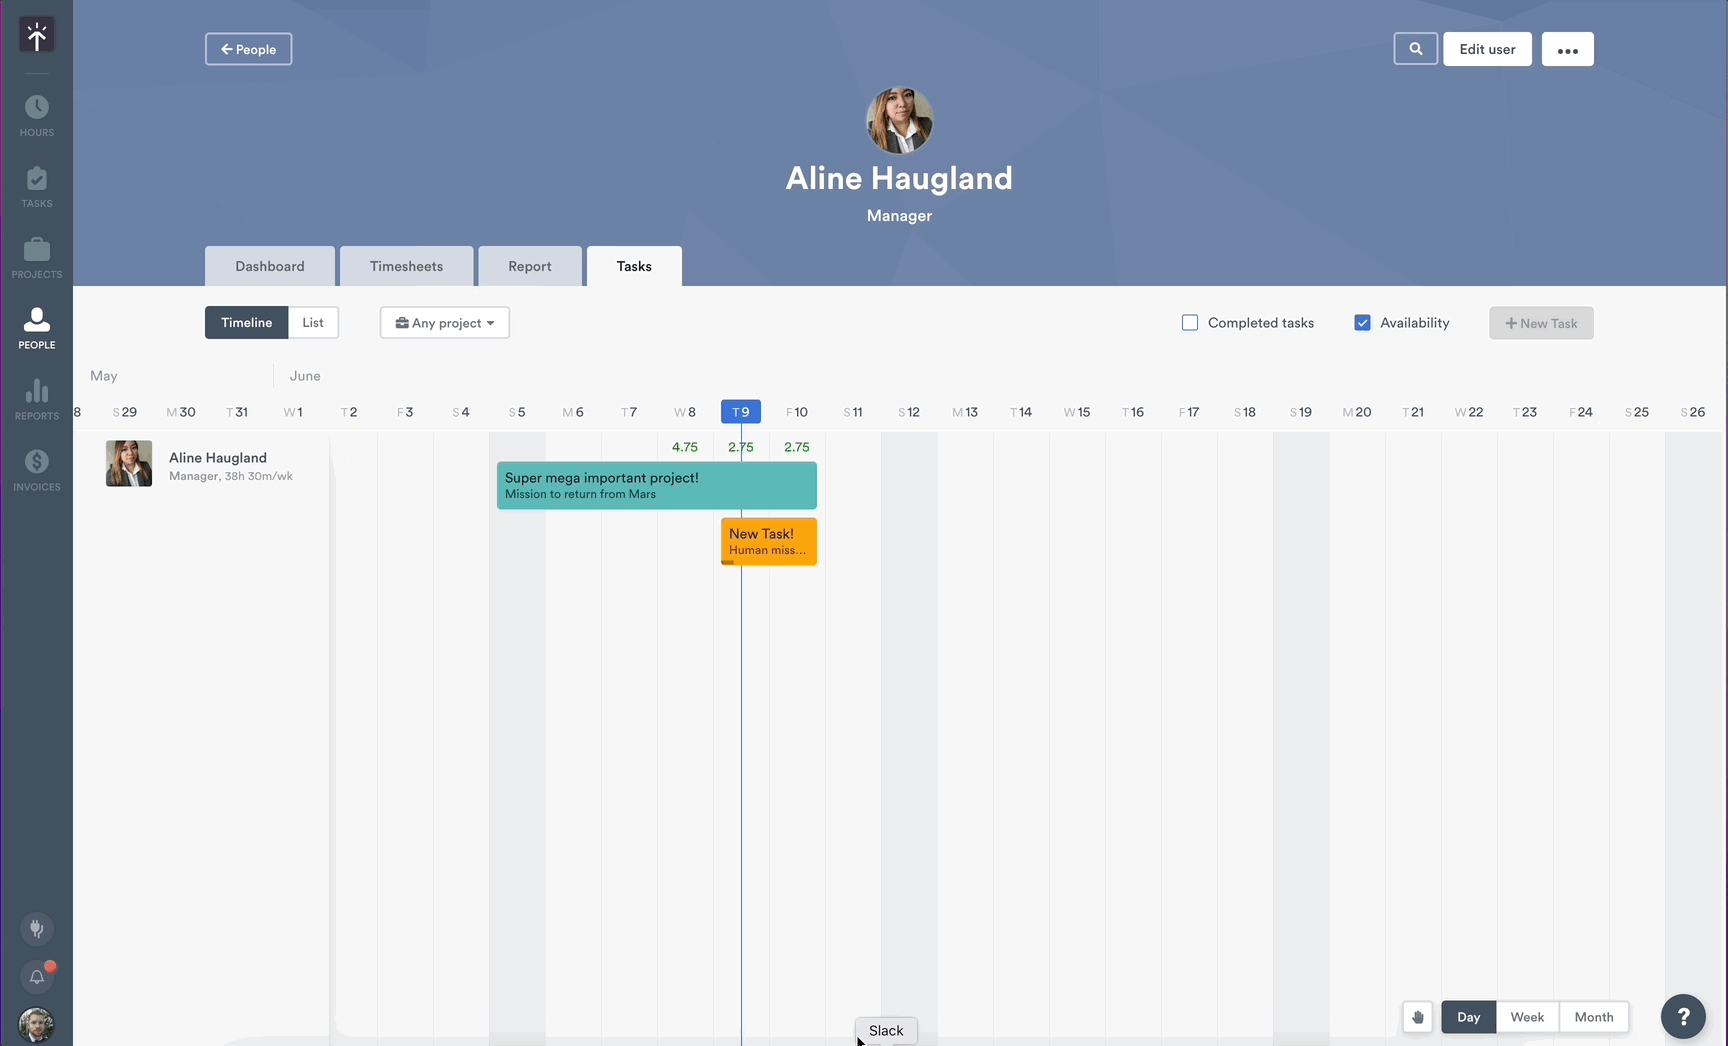
In the sidebar or the dropdown, tasks are organized as:
- Active — Tasks that were scheduled to be completed in the past or in the current week you have open on the Hours page
- Upcoming — Tasks that are scheduled for the next week or those that follow from what you have open on the Hours page
- Completed — Tasks that have been completed
Creating and viewing tasks
To create a new task, just click + New Task as easily as you would pick up a pen or pencil to write a to-do for yourself. Add the name of your task, the project it belongs to, and who it’s assigned to. Then, add an estimate for how many days or hours the task should take to complete, as well as what dates you want work to begin and when the work should be completed. When you’re done, click Create:

For the project managers of the world, you can choose to assign tasks to multiple users or, while in solo view, select a colleague from the top-right corner to see all their tasks and create new ones, if need be:
Equally, you can view their tasks and create new ones by opening their individual user page:
Scheduling tasks
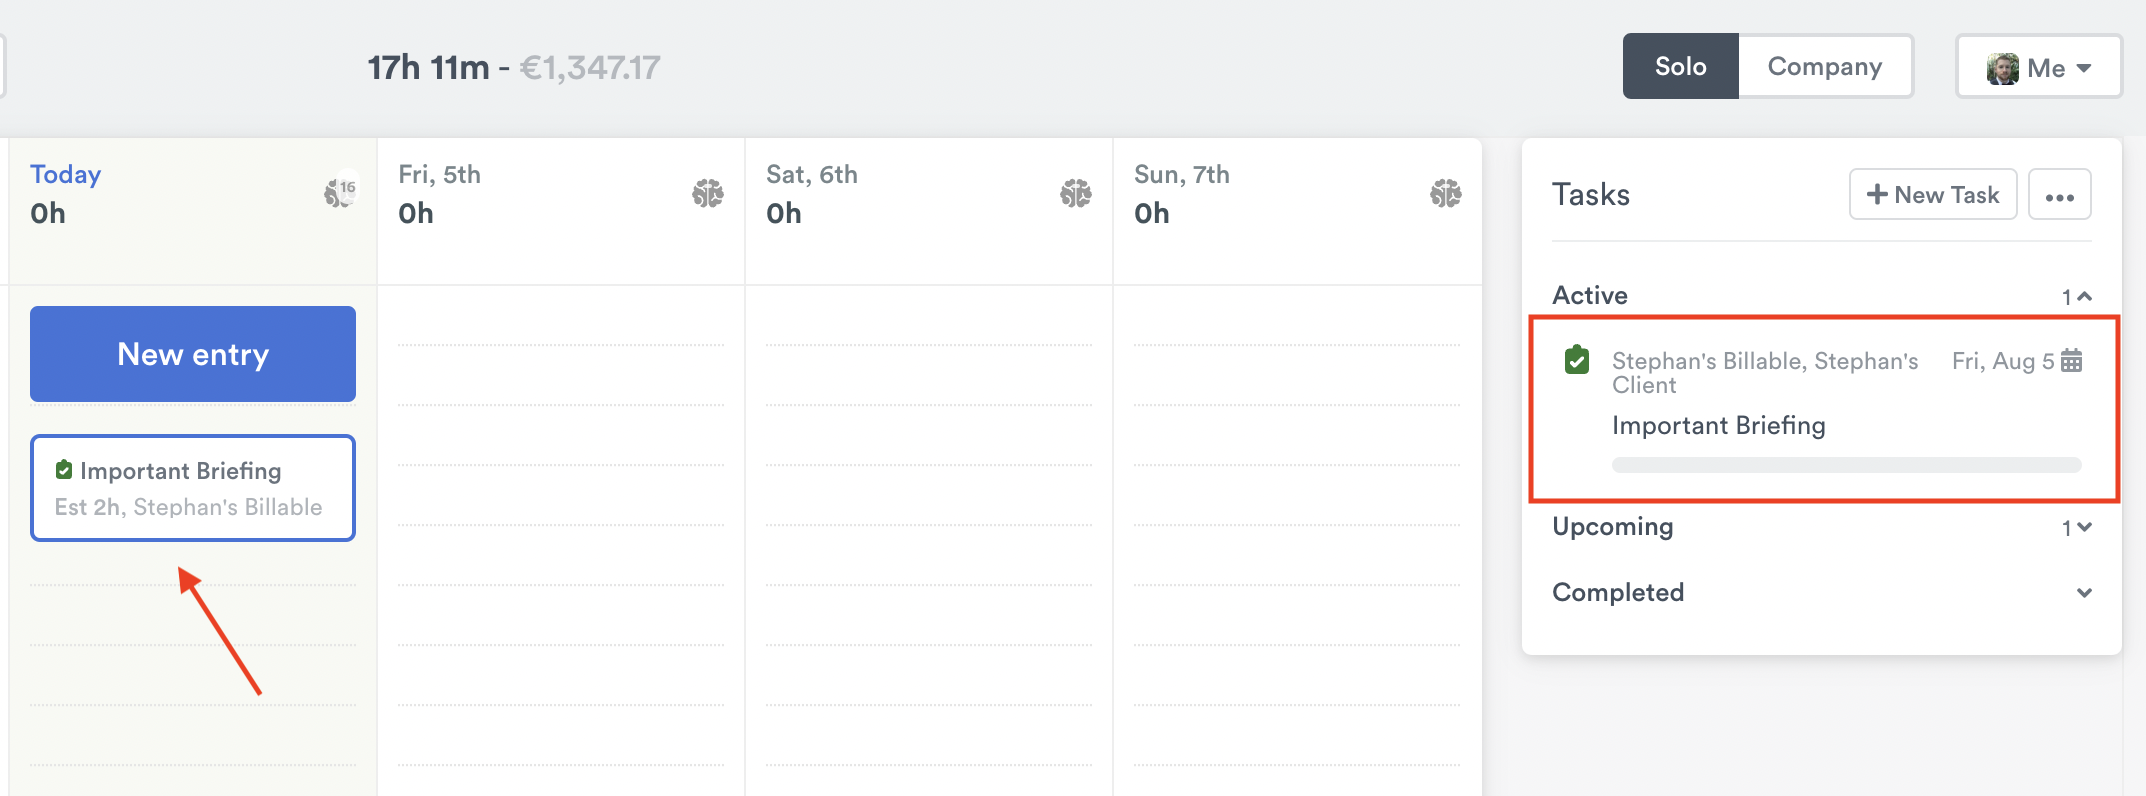
Once you’ve added tasks, head to your Hours page to log or plan time against them! Timely will prioritize your list of upcoming work in the right-hand panel according to due dates. Simply drag and drop tasks onto your calendar to start setting up your schedule:

To speed things up further, just click the ’+’ button and select a task from your most recent history as you would when logging time to a project:

For larger tasks that need to be broken up over a longer period, you can adjust the amount of time budgeted for one day then use Timely’s keyboard shortcuts to drag and copy the tasks across other days on your work week:
Provided you have the appropriate permissions and access to the same projects, Managers and Admins can schedule tasks for other users in the same way.
Logging time to tasks
To log time to a task, simply drag it to your calendar and fill in the details for the time you worked on it, as you would with a normal time entry. If there’s still work to be done, just click Submit — your task progress bar will update to show how much work you still have to do on your task. You can drag and drop the task to your calendar across multiple days until you’re finished working on it, plugging in the time you put into it each day:
If you’ve already added a task to one of the views in the Hours page as planned time, you can simply click to edit the entry, add any logged time, and then click Submit.
You can also hover over any day in the Hours page while in Week or Month view to quickly log or plan that task on the fly:
Seen a warning sign against one of your tasks? That’s Timely telling you that you’re falling behind on a certain task. This occurs when you haven’t logged the estimated hours required to meet the task’s deadline. It’s a handy way to see how the rest of your work is affected whenever someone slips a new piece of work onto your desk, as well as manage others’ expectations around certain deliveries.
Inline Task Suggestions
Timely also offers helpful suggestions for logging your time against tasks. You’ll see those inline suggestions appear as you hover over specific days on your timeline.
Timely will provide a suggested duration for the entry and display them on the dates that correspond to that specific Task, and of course, you can edit that entry to suit your needs.
Admin and Manager users will also see these Task suggestions when logging time for other members of the team.
Using timers to log time to tasks
Using a timer is another handy way to keep track of time spent on a particular task. You can deep dive into a project and start or pause the timer as you progress. To get started, head over to the Hours page and hover over the Task in question, click on the symbol with three horizontal lines, and then click “Start Timer”.

You’ll see a new entry on your timeline based on the Task and a timer symbol indicating that the work is still in progress. You can click the entry on your timeline to adjust as needed and a “Pause” option will appear for an ongoing timer to start and stop.
Notifications
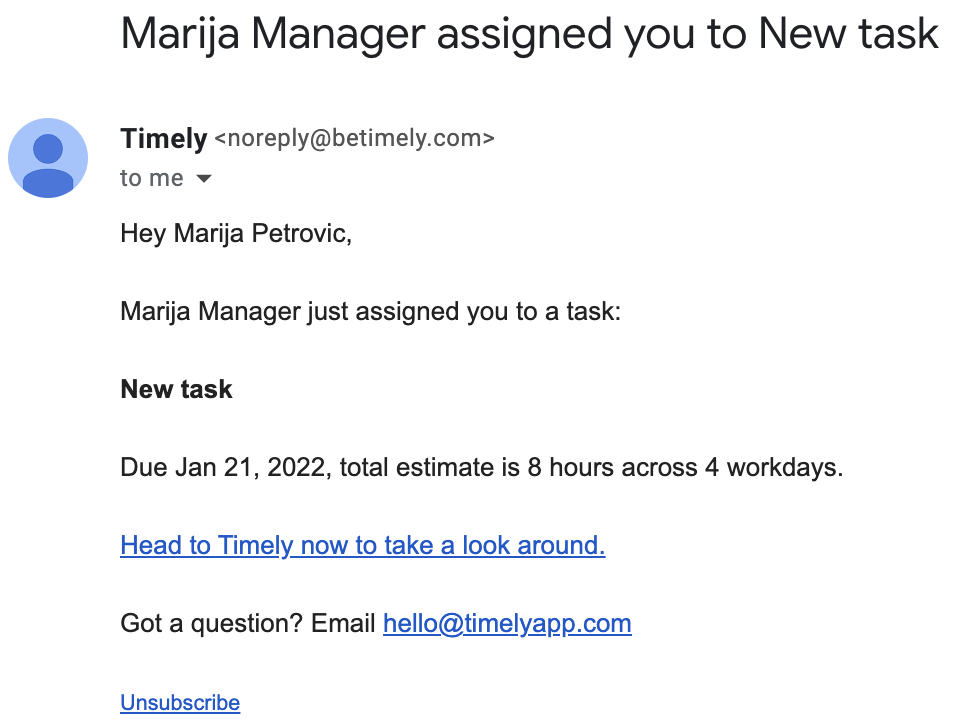
Staying on top of new tasks and communicating expectations has never been easier with task notifications! When notifications are enabled, your team will receive an in-app message and/or email whenever a new task is assigned to them.
Here’s an example of a new task notification on mobile:

As well as a new task notification via email:
Completing tasks
Once you’ve completed all work against a specific task, open the task in the sidebar, then click Mark as Complete to mark the task as finished. Nice work!
Exporting your Tasks data
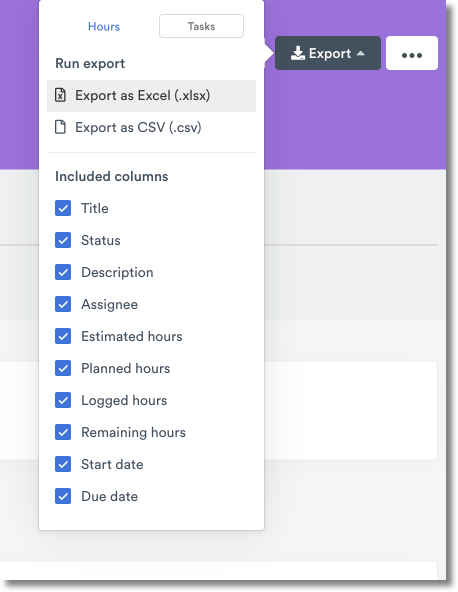
You can now perform an export of your Tasks data and customize your export file to suit most any needs. Great for those who need to deep dive into analytics or just prefer the simplicity of a spreadsheet.
To get started, head on over to the Reports Dashboard in Timely and edit or create a fresh report for the desired date range and filters. From there, click the “Export” button in top right hand corner and then click the “Tasks” option from the menu. You can select the different columns to include the corresponding data points and click either the “Export as Excel” or “Export as CSV” option to generate your file. The file will then download just like your regular Hours exports.
FAQs
Where else can I mark tasks as complete?
You can mark tasks as complete from anywhere you find a Tasks page in Timely! You can use the checkboxes to select then bulk update, open individual tasks or click the ’…’ next to any task to mark as complete.
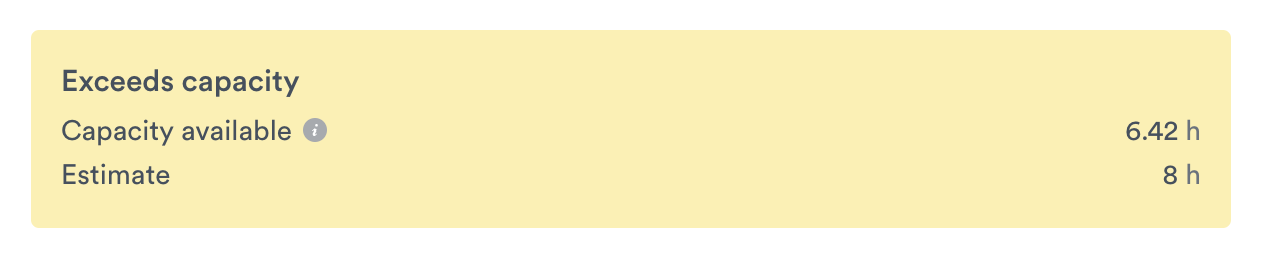
What does the Capacity information in a new task mean?
Broken down, the capacity information within a new task means the following:
- The capacity available is the time between starting and end dates or how long someone has to complete a task as scheduled.
- The estimate is how many hours you’ve elected to assign to this task.
How does Timely calculate the planned time per day when I drag and drop a task on the Hours page?
Timely uses the average daily capacity utilization numbers when you drag and drop a task to the timesheet as a suggestion.
What happens if I delete or archive the project a Task is assigned to?
When a project is deleted, any associated Tasks are permanently deleted as well. This action can’t be undone!
When a project is archived, any associated Tasks display with a special “Archived” symbol and can no longer be updated. After it’s been archived, you won’t be able to assign any new Tasks to that project unless you reactivate it.
Are there any keyboard shortcuts for creating tasks?
Indeed there are! You can use the following keyboard shortcuts to create and manage tasks:
- Create tasks: Control + “T” (Mac) / Alt + “T” (PC)
- Create and add a new task: Alt + Enter
- Autofill a task from the dropdown on Day/Week/Month view: Option + Click and drag (Mac) / Alt + Click and drag (PC)
- Edit tasks from preview: “E”
Last updated April 28, 2026
Have feedback for this article or need more help? Contact us now.