
Classic: The Hours Page
Time Tracking: ClassicHandbookNavigate the Hours tab to log your hours across Day, Week, and Month views in Timely.While Timely’s automatic time tracking is a standout feature, you also have the flexibility to log your hours manually when needed. All manual actions happen within the Hours section, which serves as your hub for planning, logging, and viewing time entries. Timely offers three unique views to make tracking your work effortless and customizable.
Whether you’re entering time for completed tasks or planning ahead, these views ensure you stay on top of your schedule with ease.
Day view
The Day view is an excellent way to isolate your logged and planned time for the day. If you’ve downloaded Memory to track your work automatically, this is where you’ll find your private Timeline of “memories”. It’s an accurate history of everything you did on a specific day.
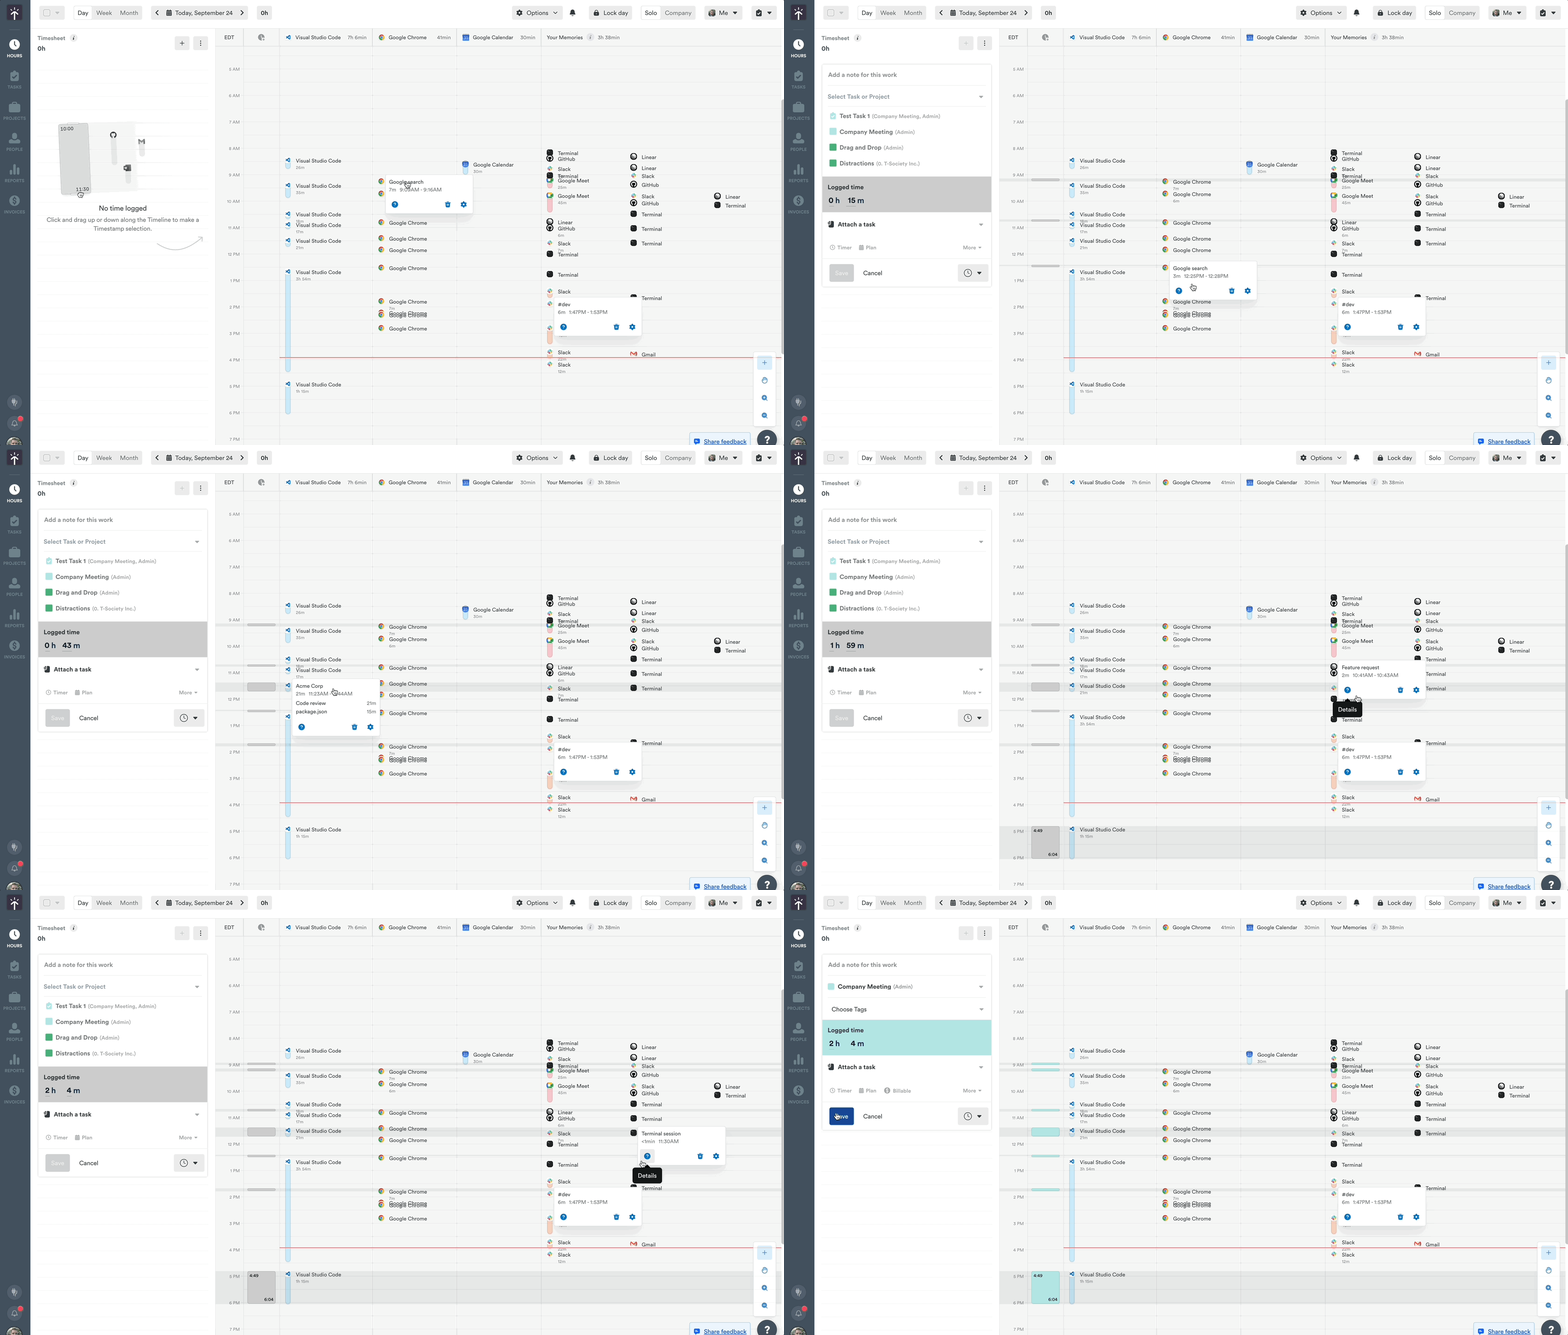
Since your Memory timeline is private to you, memories won’t appear in your entries unless you log them. Use the timeline to review and log them as you’d like.
Week view
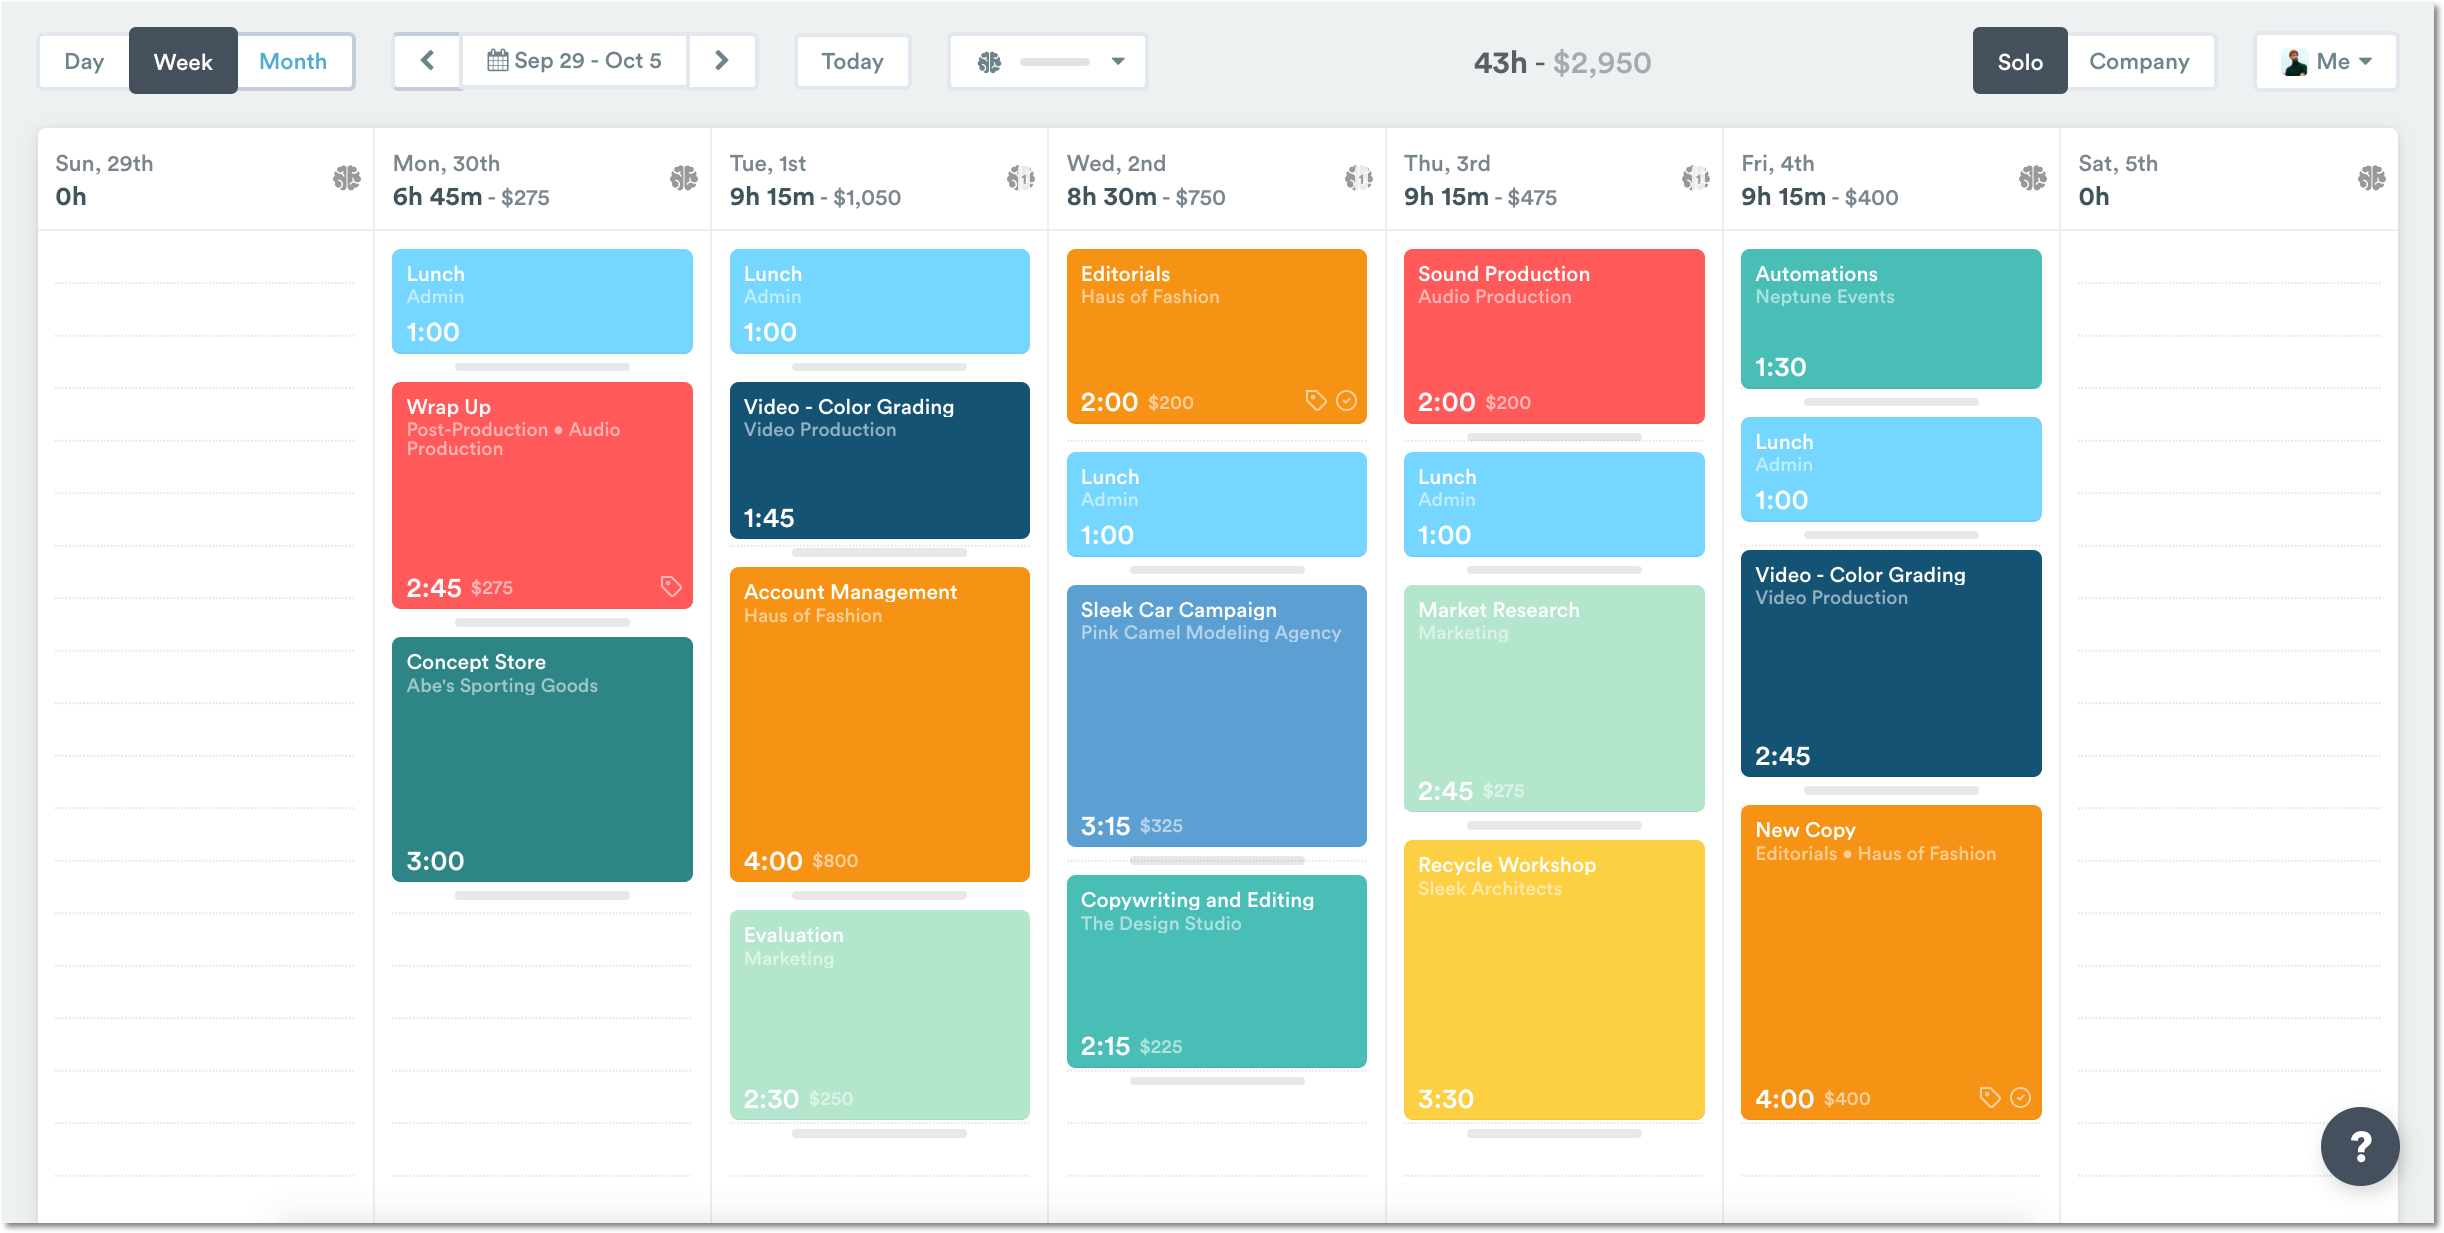
The Week view is probably the one you’ll use the most. It lets you see logged and planned hours for your current week. You can also use the date selector in the top left to jump to the previous week.
Month view
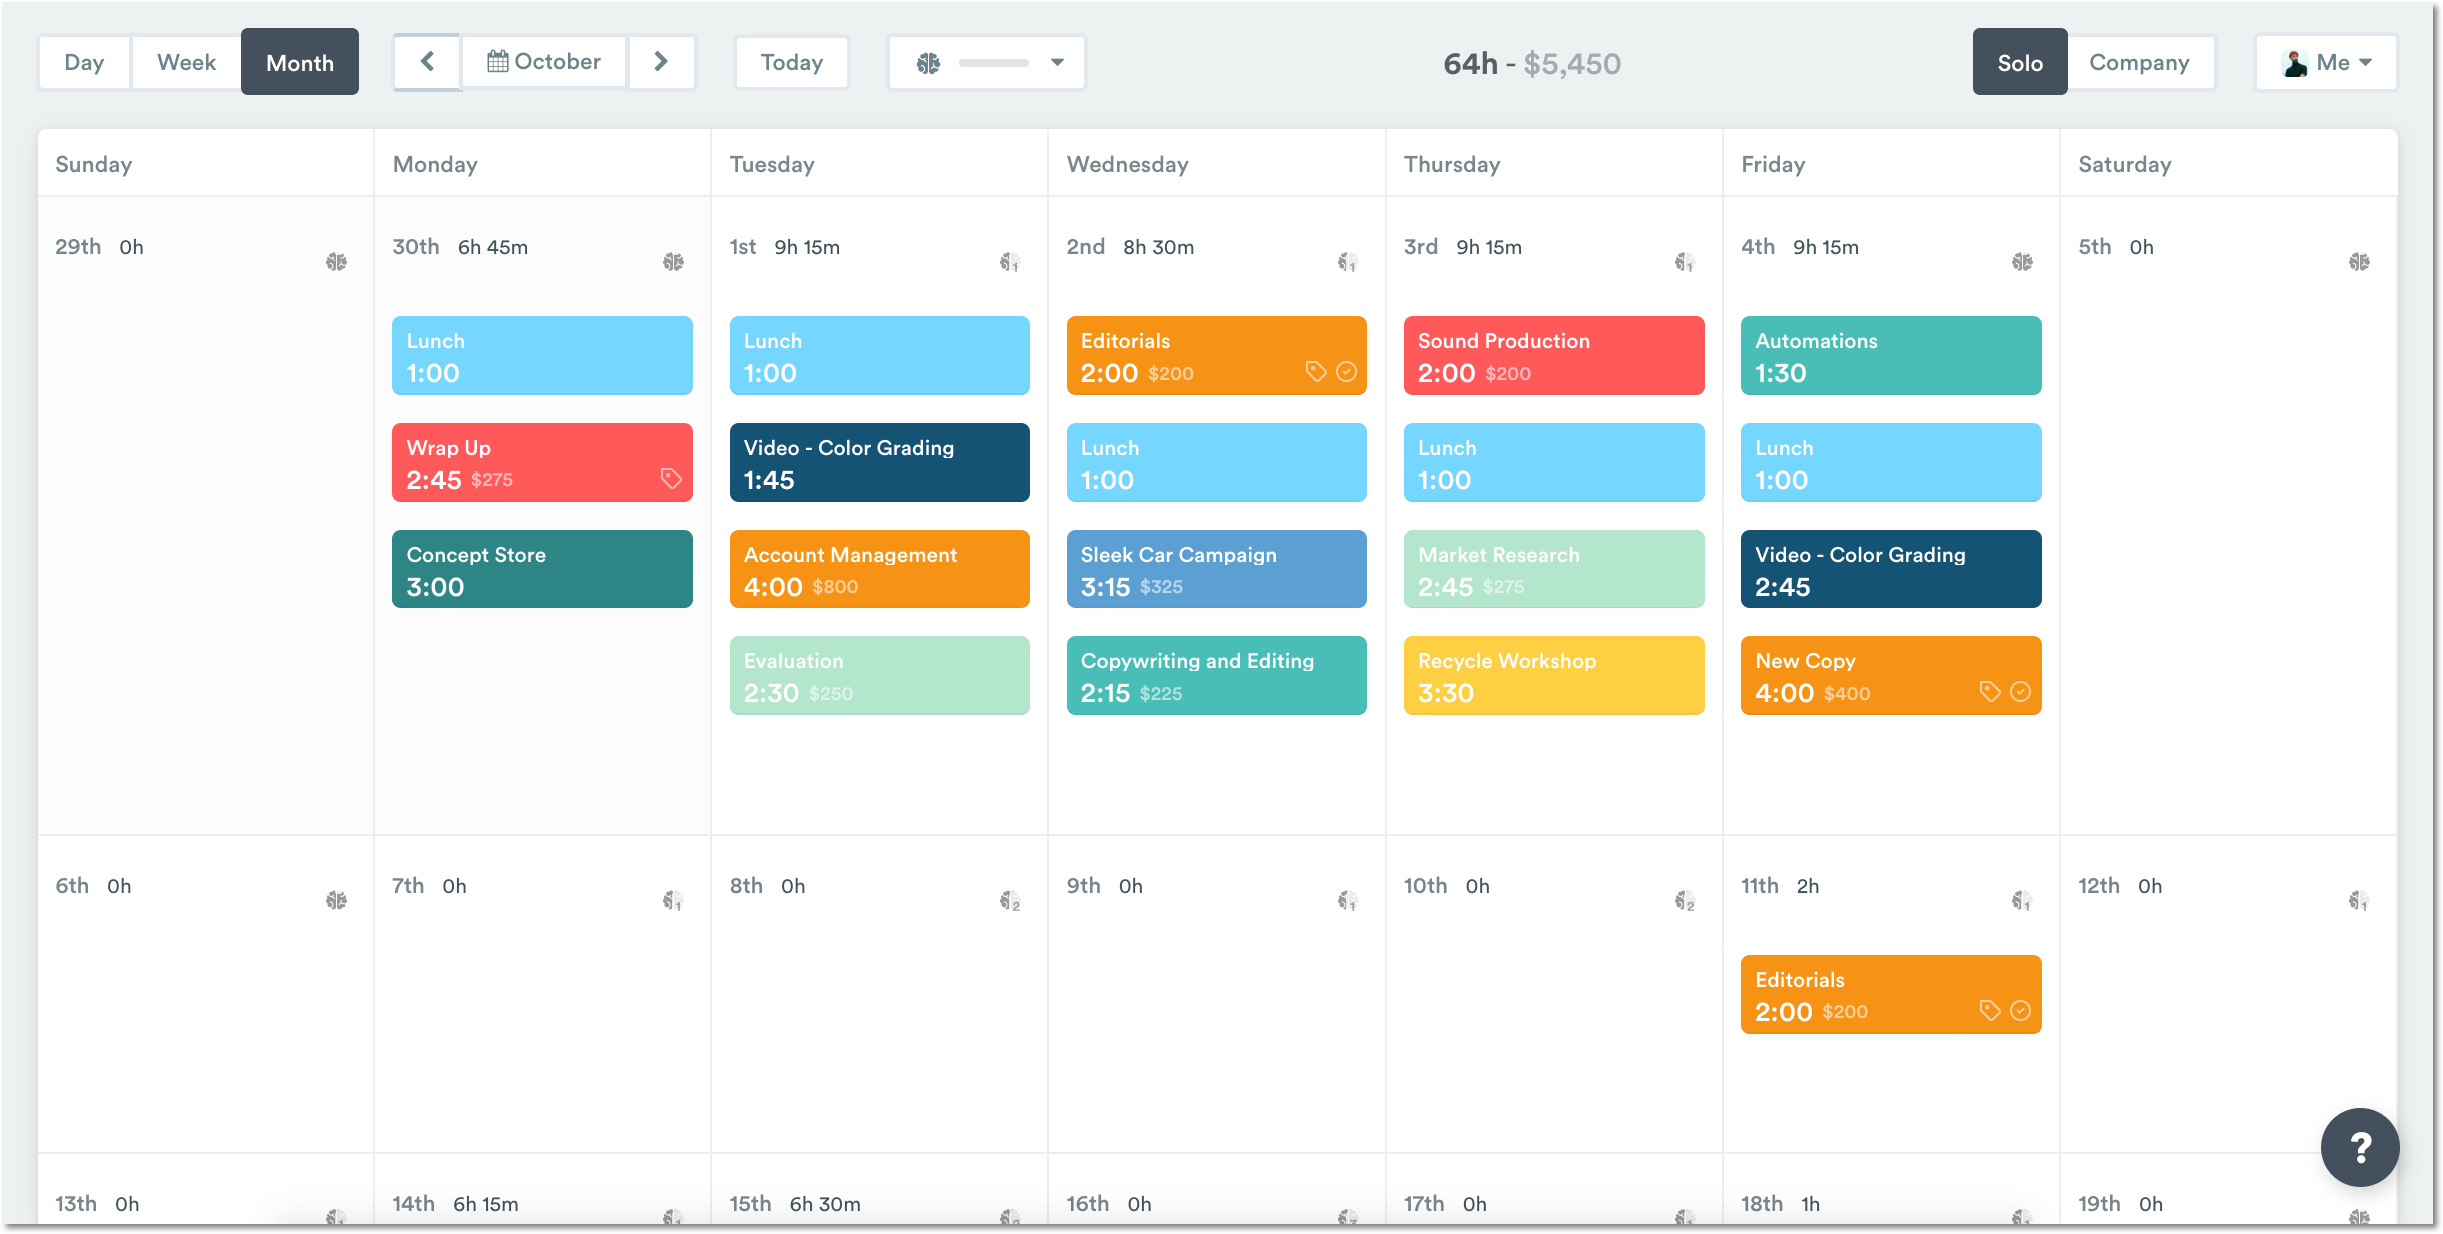
Month view is an excellent way to review your logging activity across several weeks. You’ll see your total logged and planned hours, and the money you’ve made for the month. It’s ideal for checking you’re on-track to hit your growth goals.
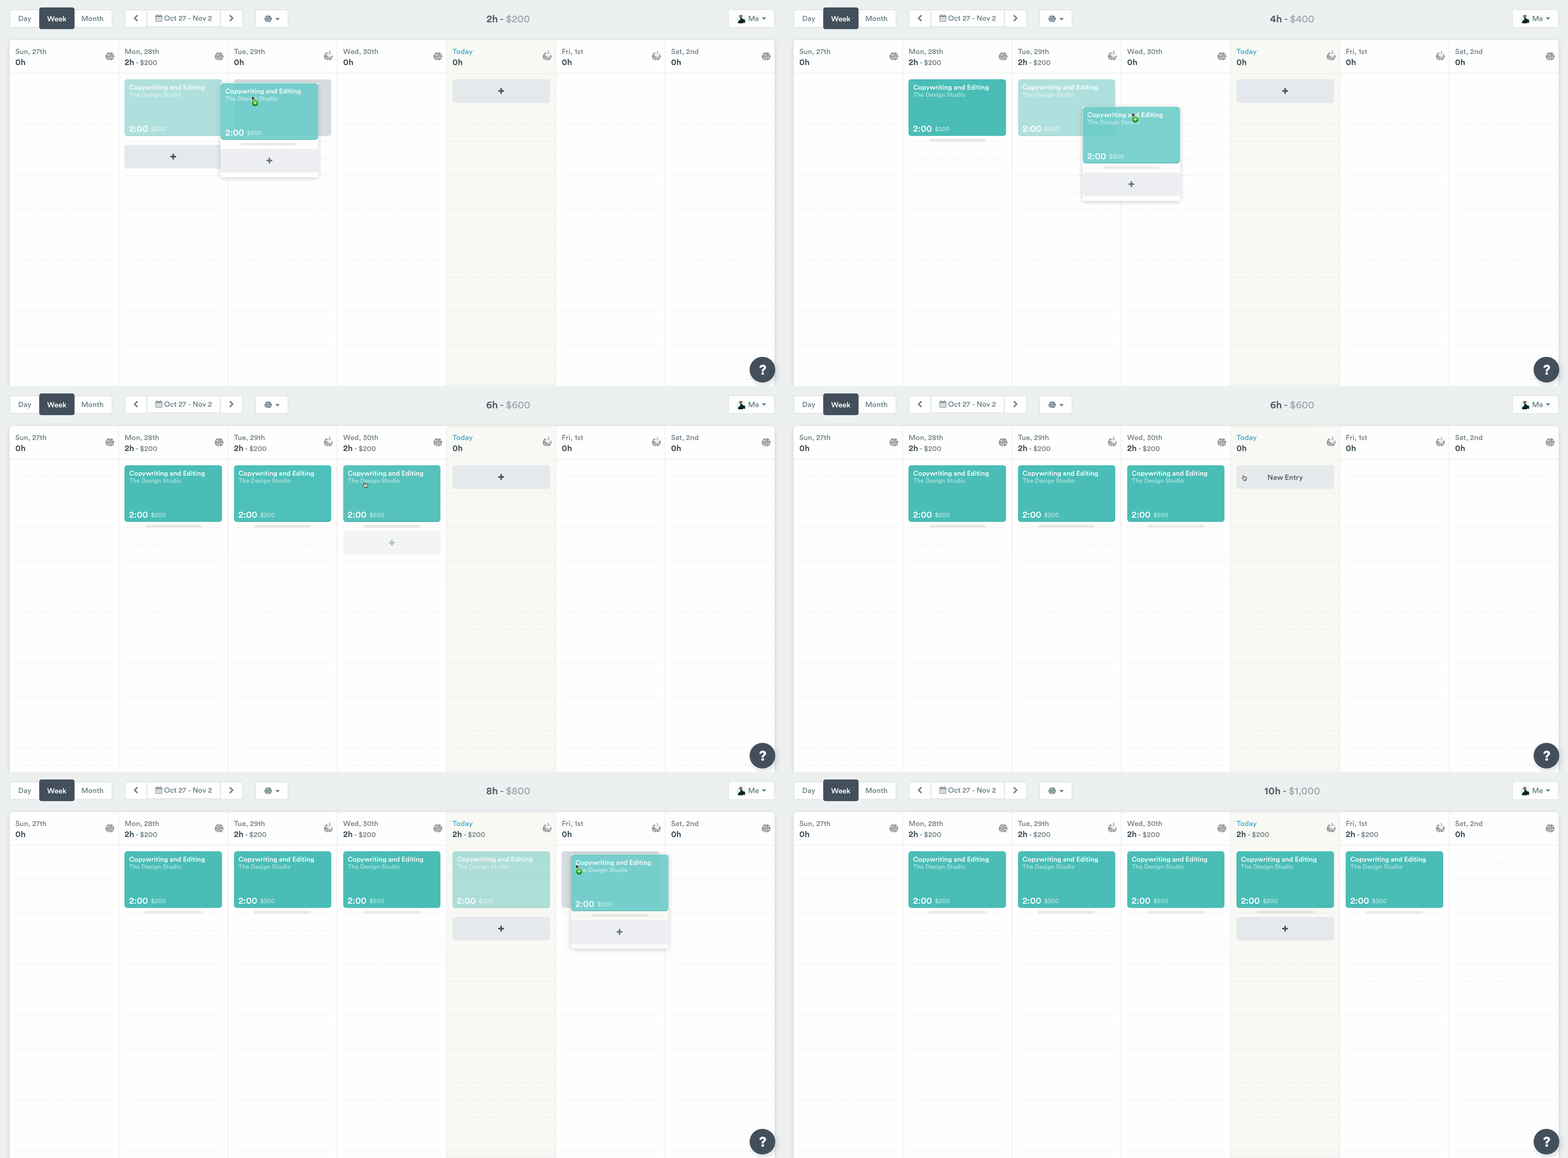
Week view and Month view also give you the ability to move or copy hours if needed. To move hours from one day to another, simply click and drag!
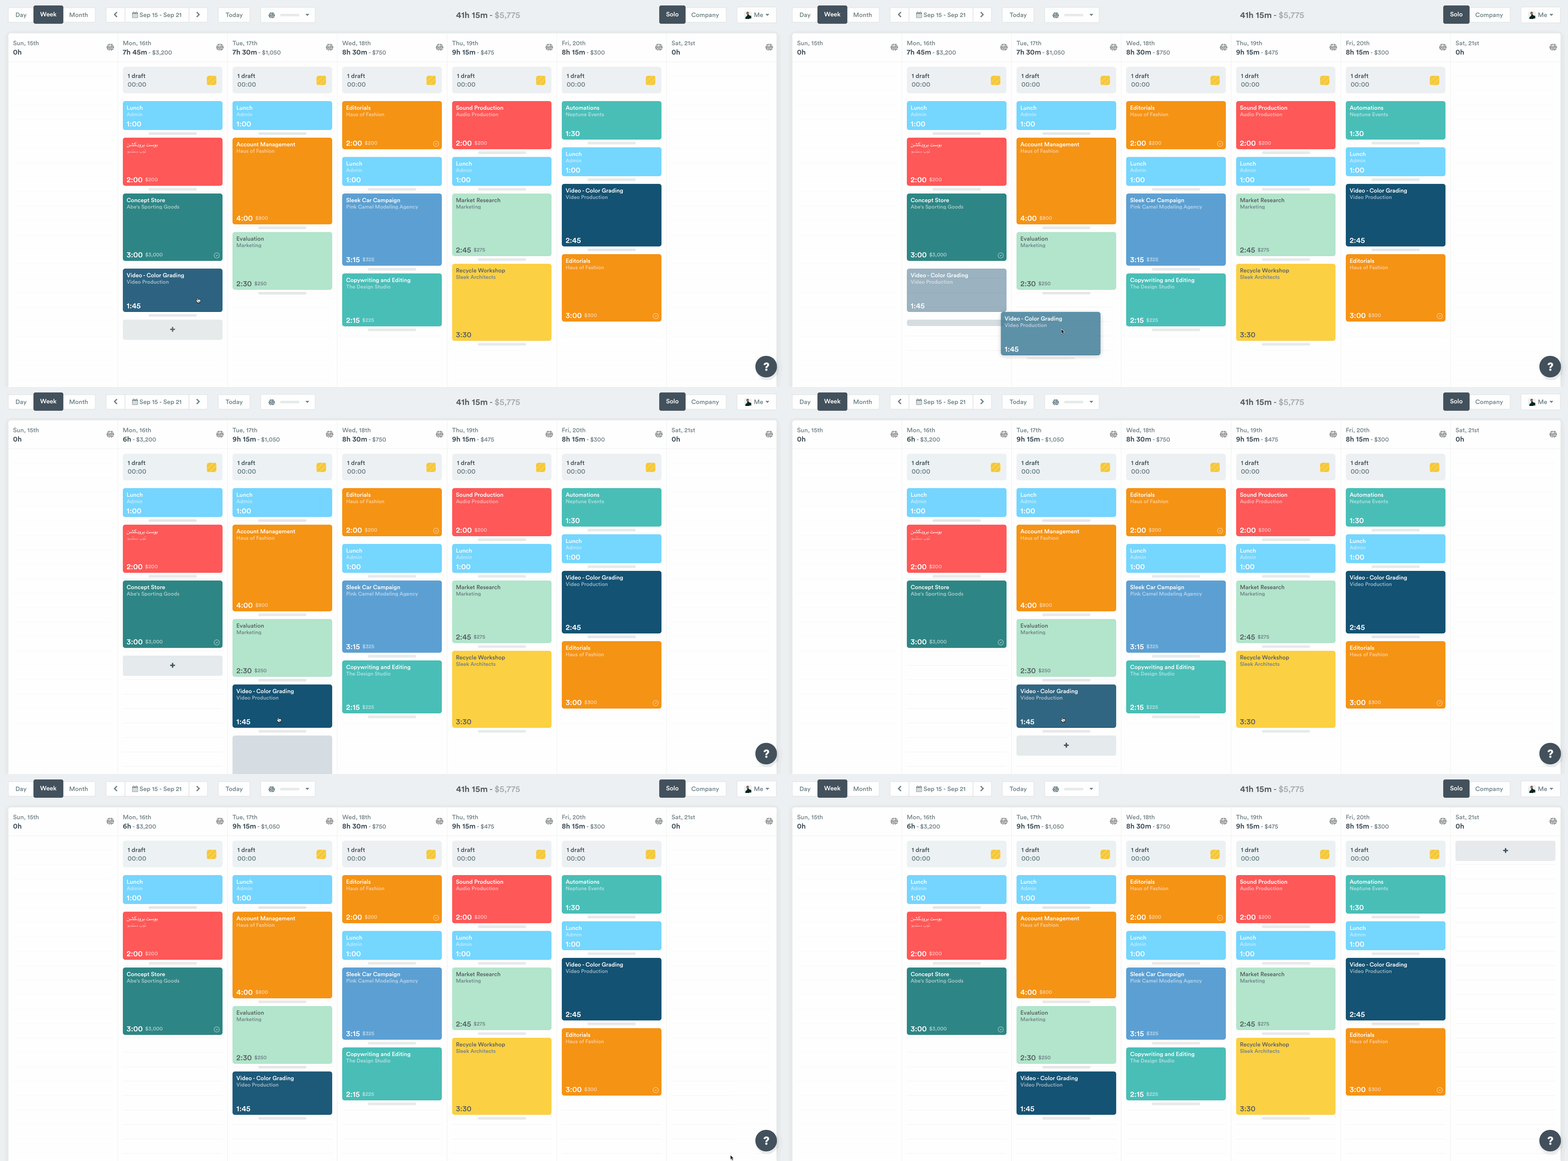
To copy individual hours, hold the Alt key on your keyboard and drag the entry to another day:
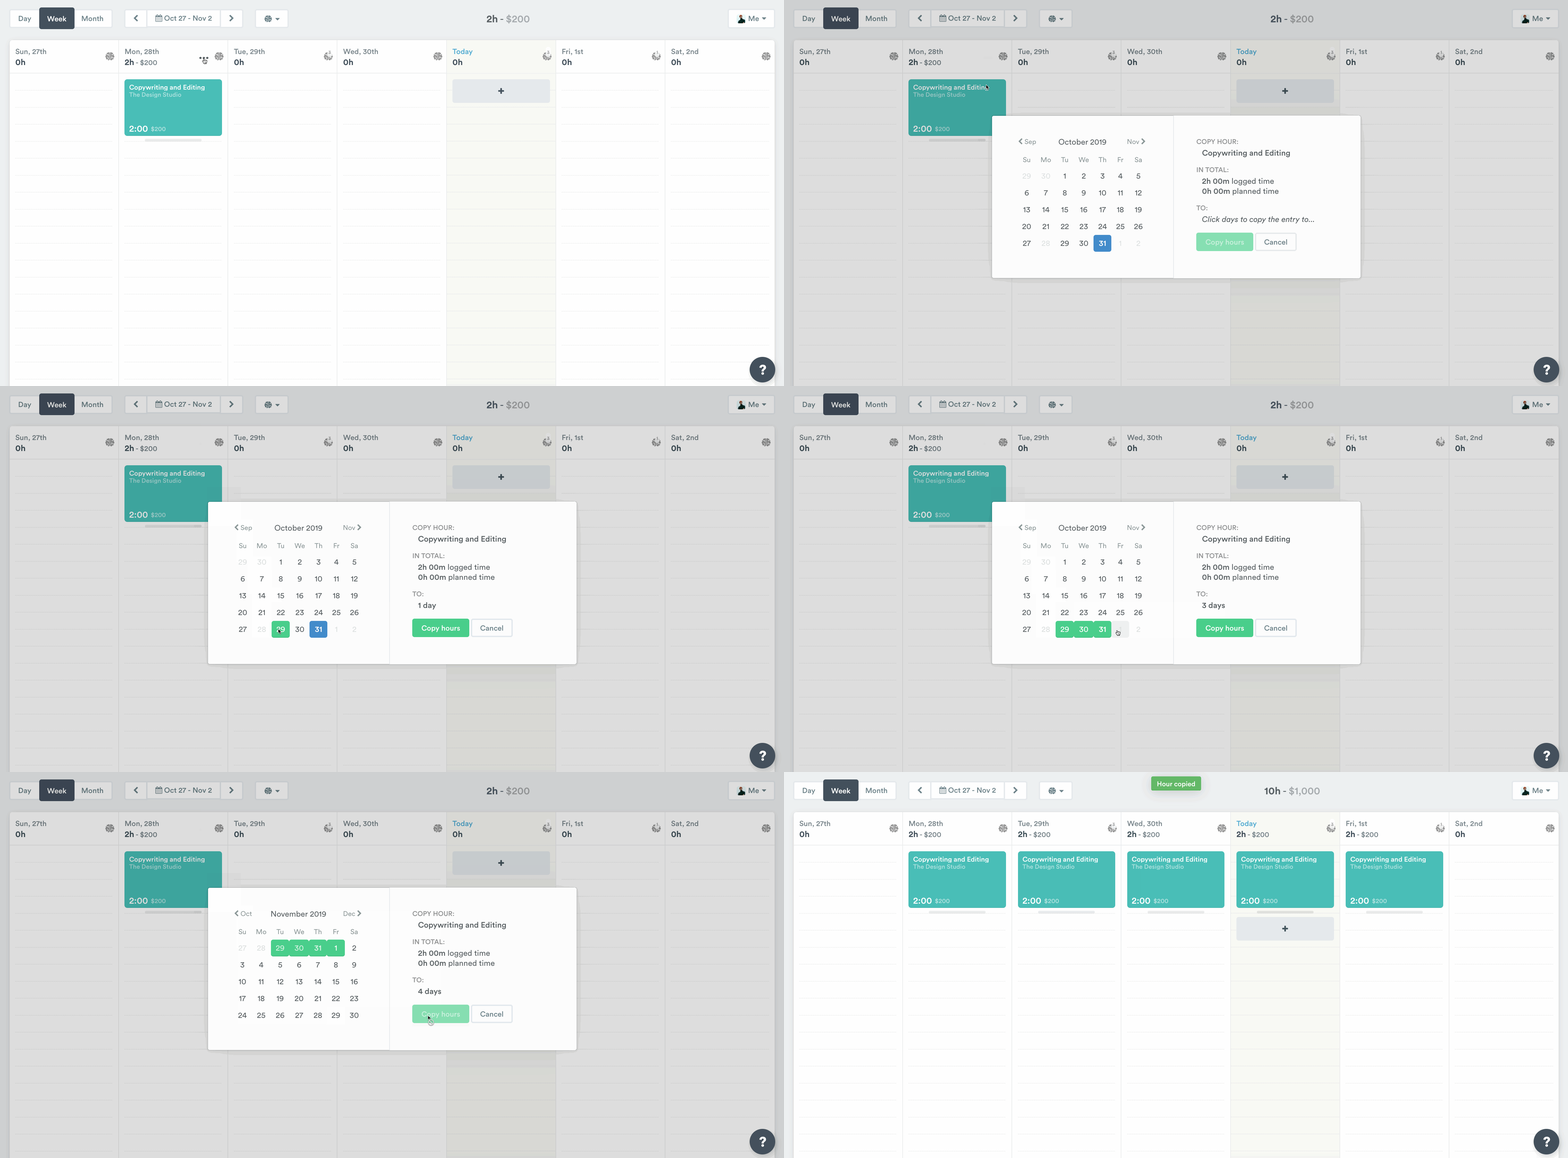
To copy an entire day’s worth of entries, click the ”…” in the header of the day then select “Copy hours”. Pick the day or days those hours are headed to then click “Save”:
Project selection in manual entries
When creating or editing time entries in any view, the project picker behavior depends on your workspace settings:
- Standard project picker: Shows only projects where you’re currently a member
- All projects logging (when enabled): Displays every active project in your workspace, allowing you to log time to any project regardless of membership
If your workspace has All projects logging enabled, you can search through and select from all active workspace projects when creating time entries. If you select a project you’re not currently a member of, you’ll automatically be added as a member when you save the time entry. This expanded functionality makes it easier to log time across different projects without needing to be pre-assigned to each one.
FAQs
What do the colors represent on my Timeline?
The color on your entry denotes the specific project a logged entry is tied to. It helps you understand what entries have been added in the Hours tab at a glance. It also immediately highlights where you might have missed or forgotten to log your hours. If something has been logged twice, you’ll notice that the colors overlap and appear darker.
What does the money on a time entry represent?
The monetary figure that appears next to logged hours on a time entry represents the amount of money you’ve earned for those hours against a particular project. The amount depends on the hourly rate you set for a project. If you set a project budget to be “Not Billable”, time entries will only show logged hours.
In the Hours tab, you’ll find your total logged and planned hours on the header of your Day, Week and Month views. This gives you an idea of what you’ve already earned, and what you can expect to make from upcoming work.
How do I view previously logged entries?
Just head to the Hours tab and select the timeframe you need to see:
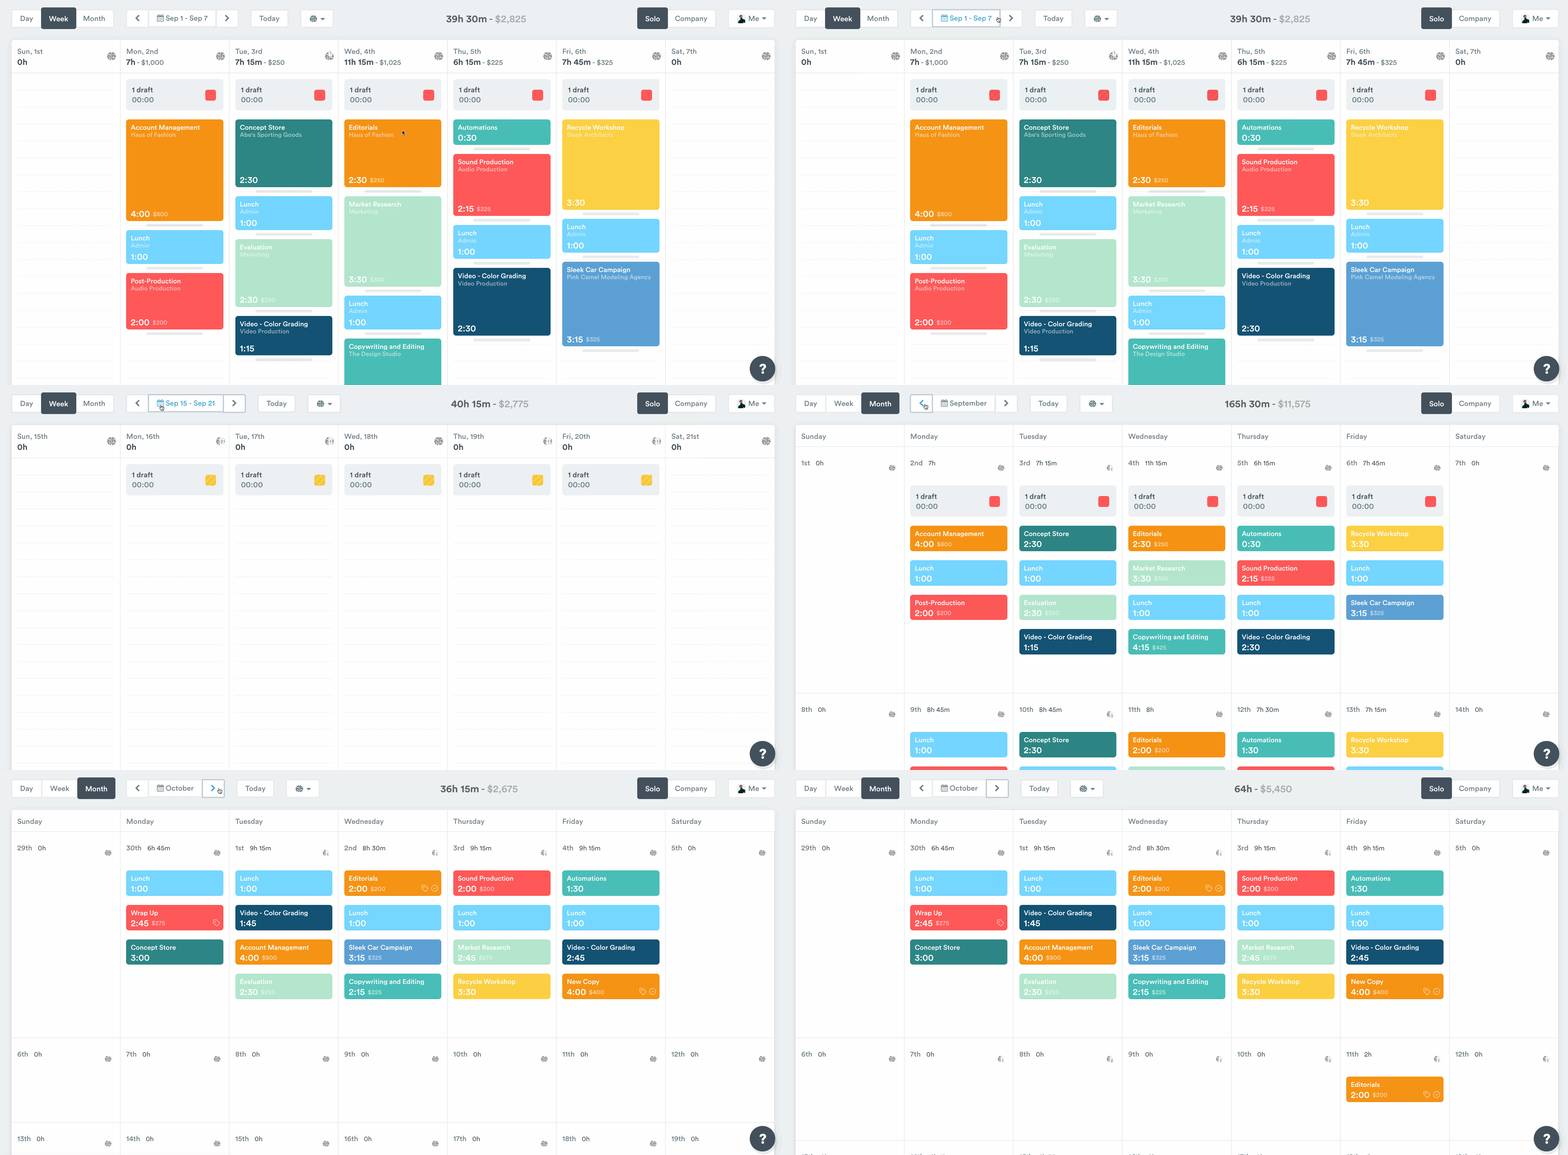
If you’re not sure where your logged hours gaps are, you can also click back between days, weeks or entire months to pin down the specific date or dates you’re looking for.
Last updated June 9, 2026
Have feedback for this article or need more help? Contact us now.