
Classic: Manual Time Tracking
Time Tracking: ClassicHandbookQuickly log hours from the web or desktop app using manual entries, timers, or timestamps.Timely is known for its powerful automatic time tracking, but we understand that everyone has their own style when it comes to managing time. Whether you prefer setting timers or marking specific timestamps, Timely offers a variety of manual tracking options to make it easy and flexible for you to log your hours.
Logged vs. planned time
First, it’s important to make the distinction between the types of time that can be recorded in Timely: logged and planned time.
- Planned Time (striped color) is the time you think you’ll need to complete a scheduled task
- Logged Time (solid color) is the actual amount of time you end up spending on the task
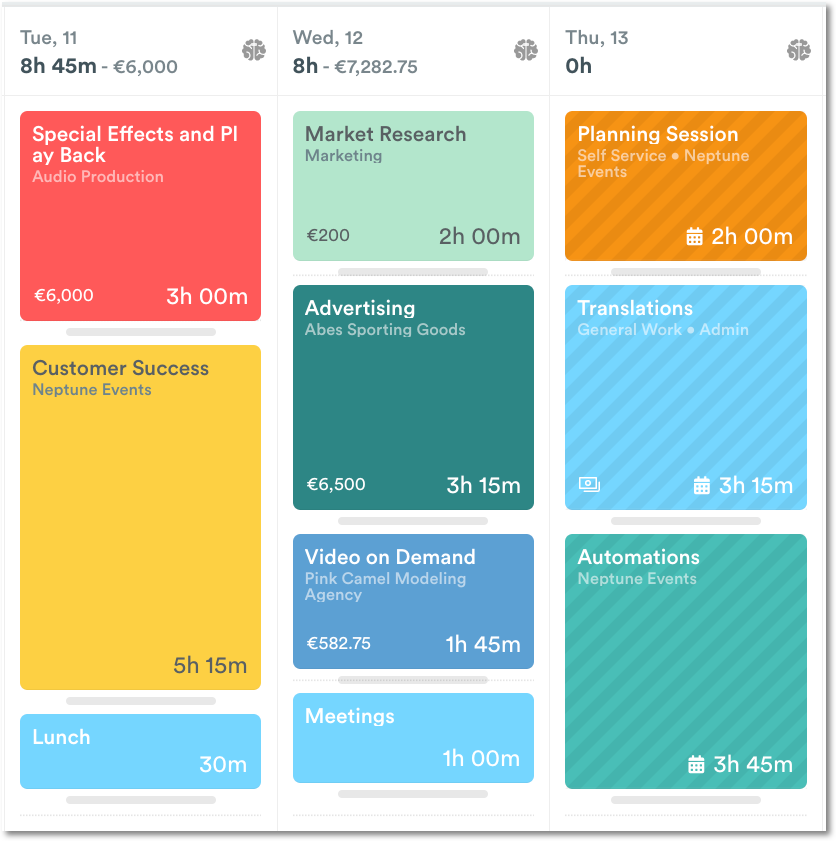
Using planned time can help you schedule your day or week, and anticipate how long it will take you to complete all your tasks.
Create a manual time entry
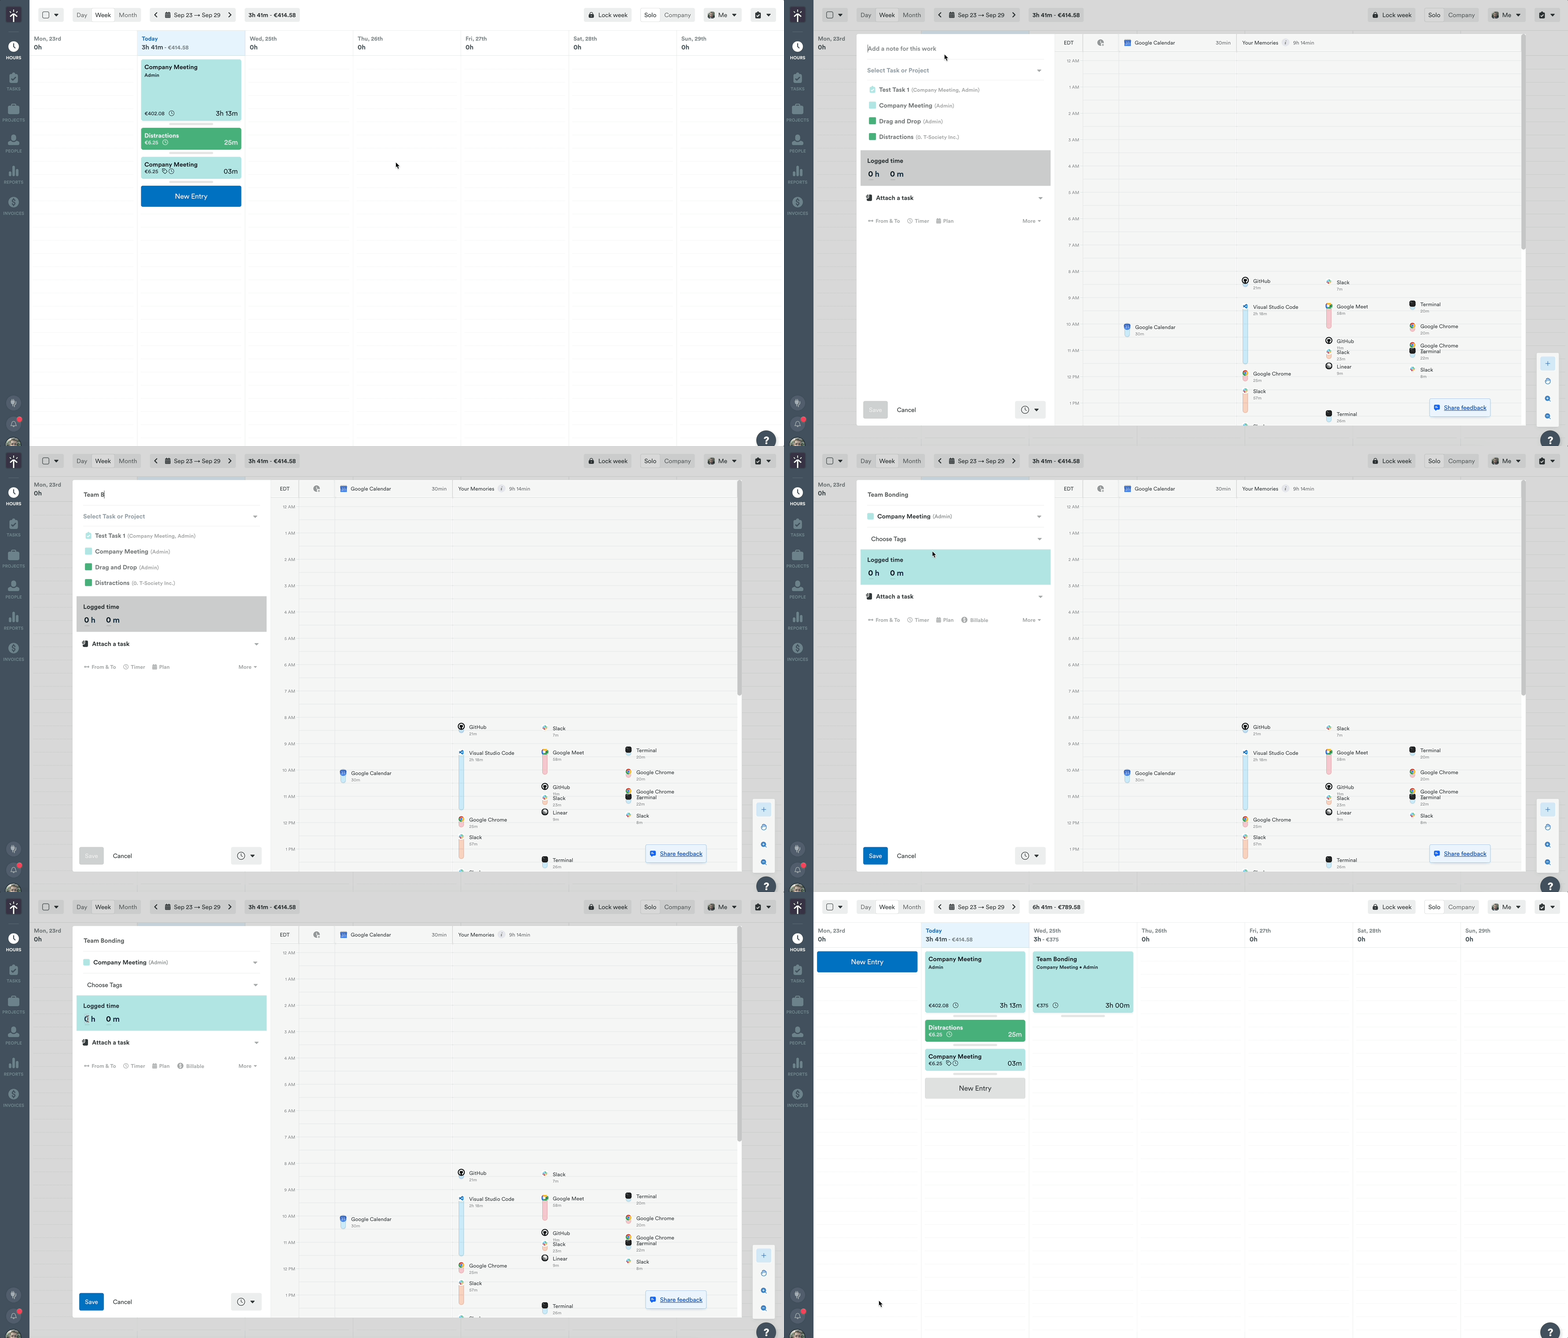
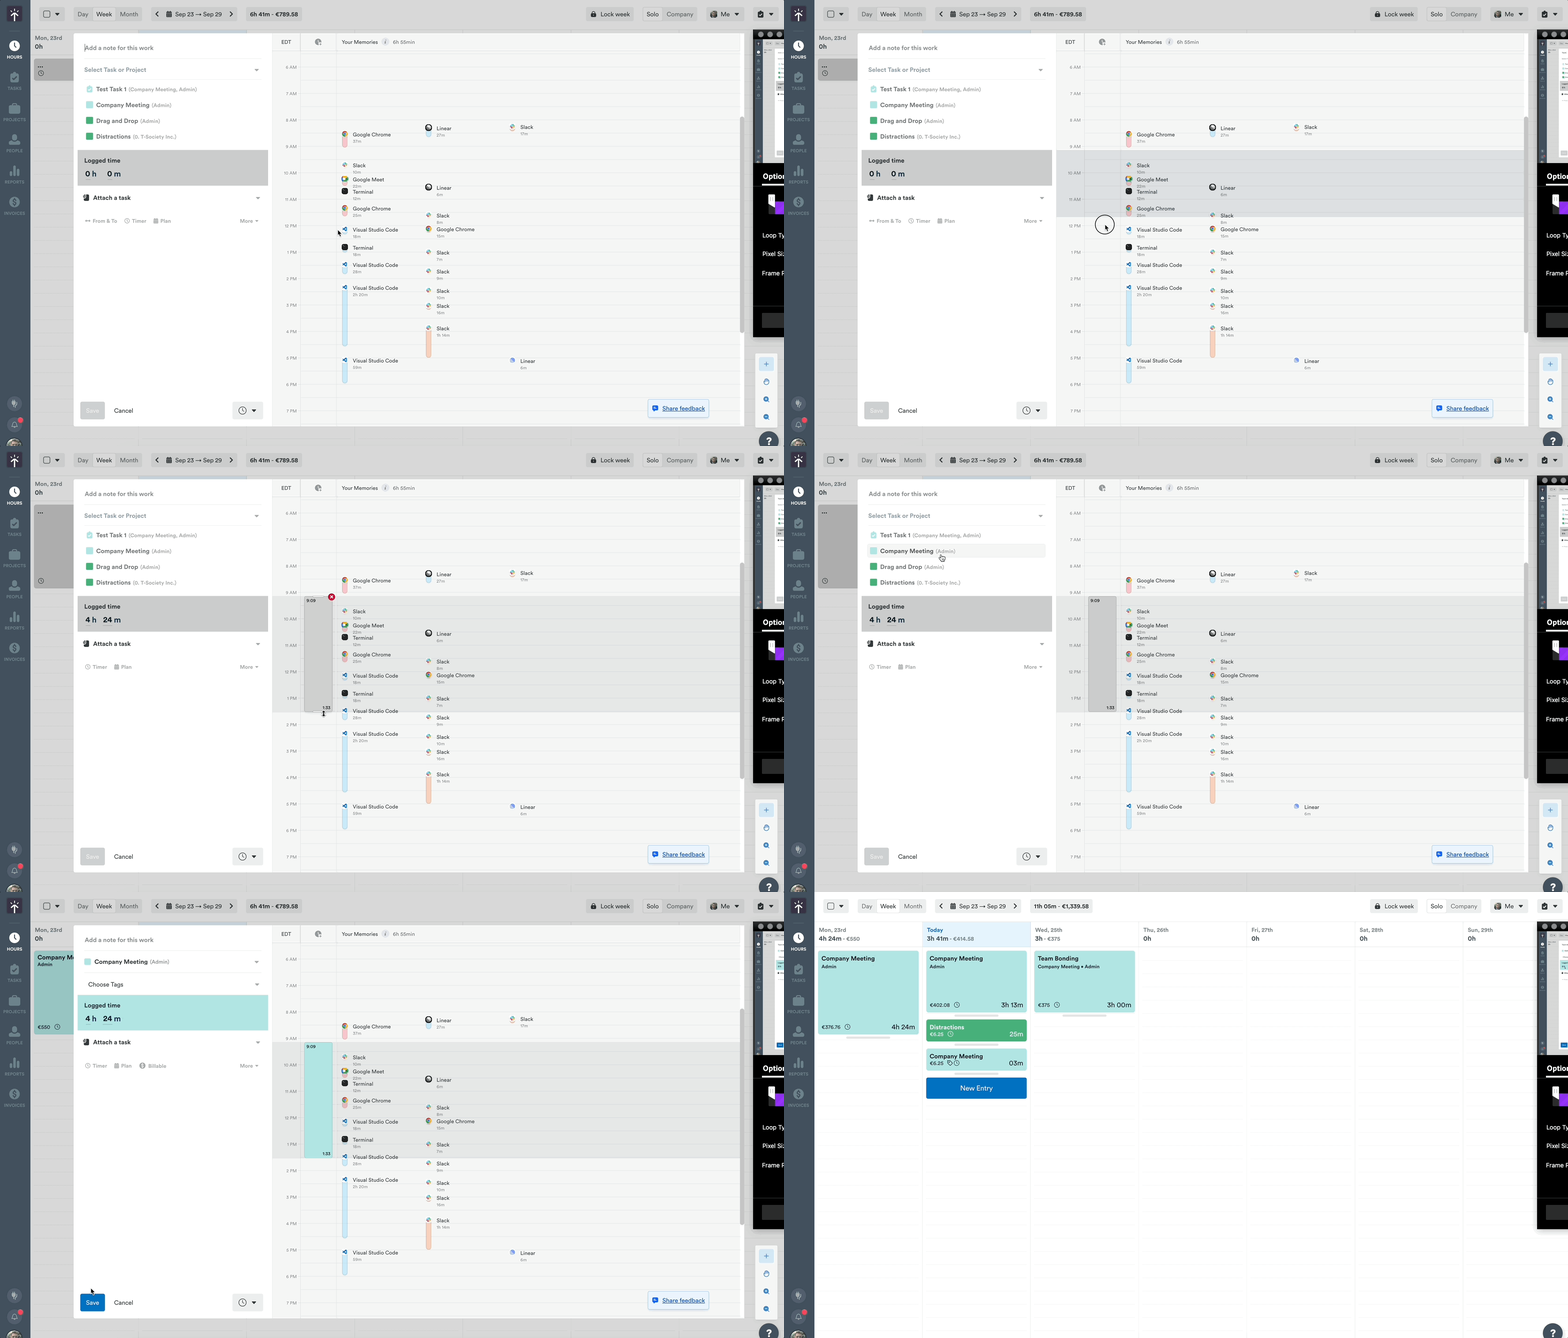
In the Hours tab, hover over the date you’d like and click the “New Entry” button to open the Hour Editor. Depending on your workspace configuration, the form fields may appear in different orders:
- Default field order: Note field appears first, followed by Project selection
- Enhanced field order: Linked Work Item appears first (when available), followed by Note, then Project selection
Regardless of field order, select a project or task, add your notes, and choose any necessary tags. In the “Logged time” field, add the hours and minutes of your entry then click “Submit” and you’re done!
Linked Work Item field
The Linked Work Item picker appears in the hour editor when your workspace has a task integration connected (such as Jira or ClickUp) or uses Timely linked work items — work items managed in Timely itself, for example through the Timely API.
Both sources appear in one list, each with its own icon. You can search across both from the same field. If you expect to see the picker but don’t, check with your admin or contact [email protected].
Use the filter menu in the picker to narrow the list:
- Filter results: show everything, only items from the selected project, or everything from the selected project’s integration. The project-based options take effect once you’ve chosen a project.
- Show work with status: switch Open and Done items on or off.
Active filters appear as chips that you can remove with one click.
Project selection options
When selecting a project for your time entry, you’ll see different options depending on your workspace settings:
- Standard mode: The project picker shows projects you’re currently assigned to as a member.
- All projects logging (when enabled): The project picker shows only your member projects by default. A “Show all projects” toggle at the bottom of the dropdown expands the list to include every active project in the workspace, letting you log time to any project regardless of membership. The toggle resets each time you open the hour editor, so your own projects are always shown first.
Project membership dialog
If your workspace has All projects logging enabled and you select a project you’re not currently a member of, a dialog will appear offering two choices:
- Add as member: You’ll be added as a permanent project member and can continue logging time to this project in the future
- Log once: Your time entry will be saved, but you won’t be added as a permanent member of the project. You can still edit this specific entry later, but won’t see the project in your regular project list
This gives you flexibility to log occasional work without cluttering your project list with projects you rarely use.
Using the timer
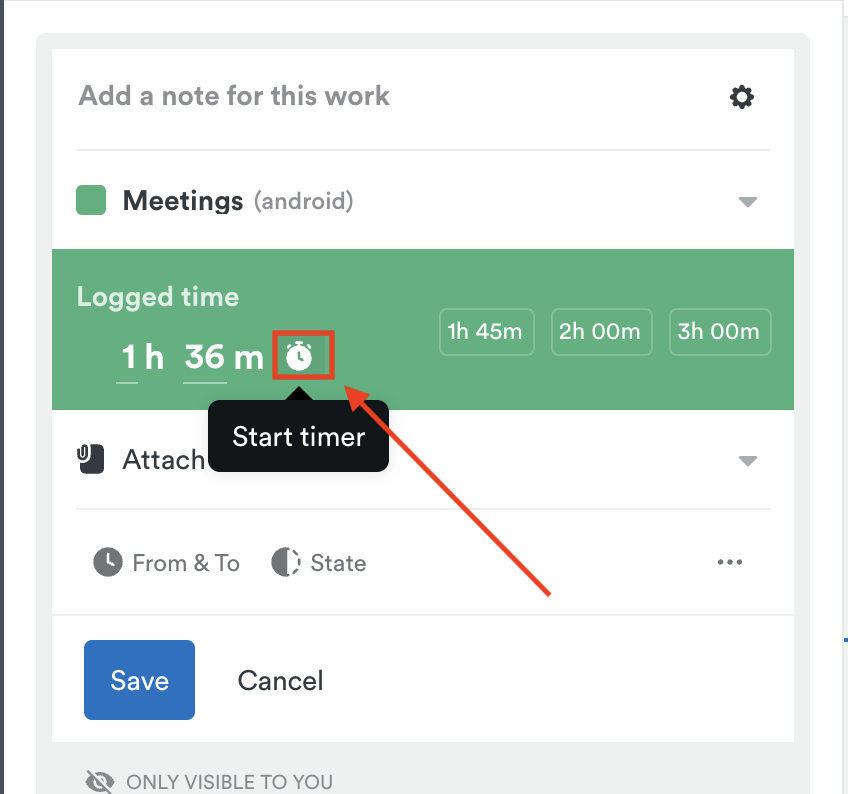
When using the timer, you’ll set up your entries the same as you would if you were to create a manual entry by selecting a project and adding notes and tags. From there, click the ⏰ clock shaped timer button, within the duration section, to start counting. Hit ⏸️ when you need a break and “Save” when you’re finished.
Using timestamps
You can add timestamps to an entry by clicking the two-way arrow in the Hour Editor. Just punch in your start and end times, and we’ll do the math!
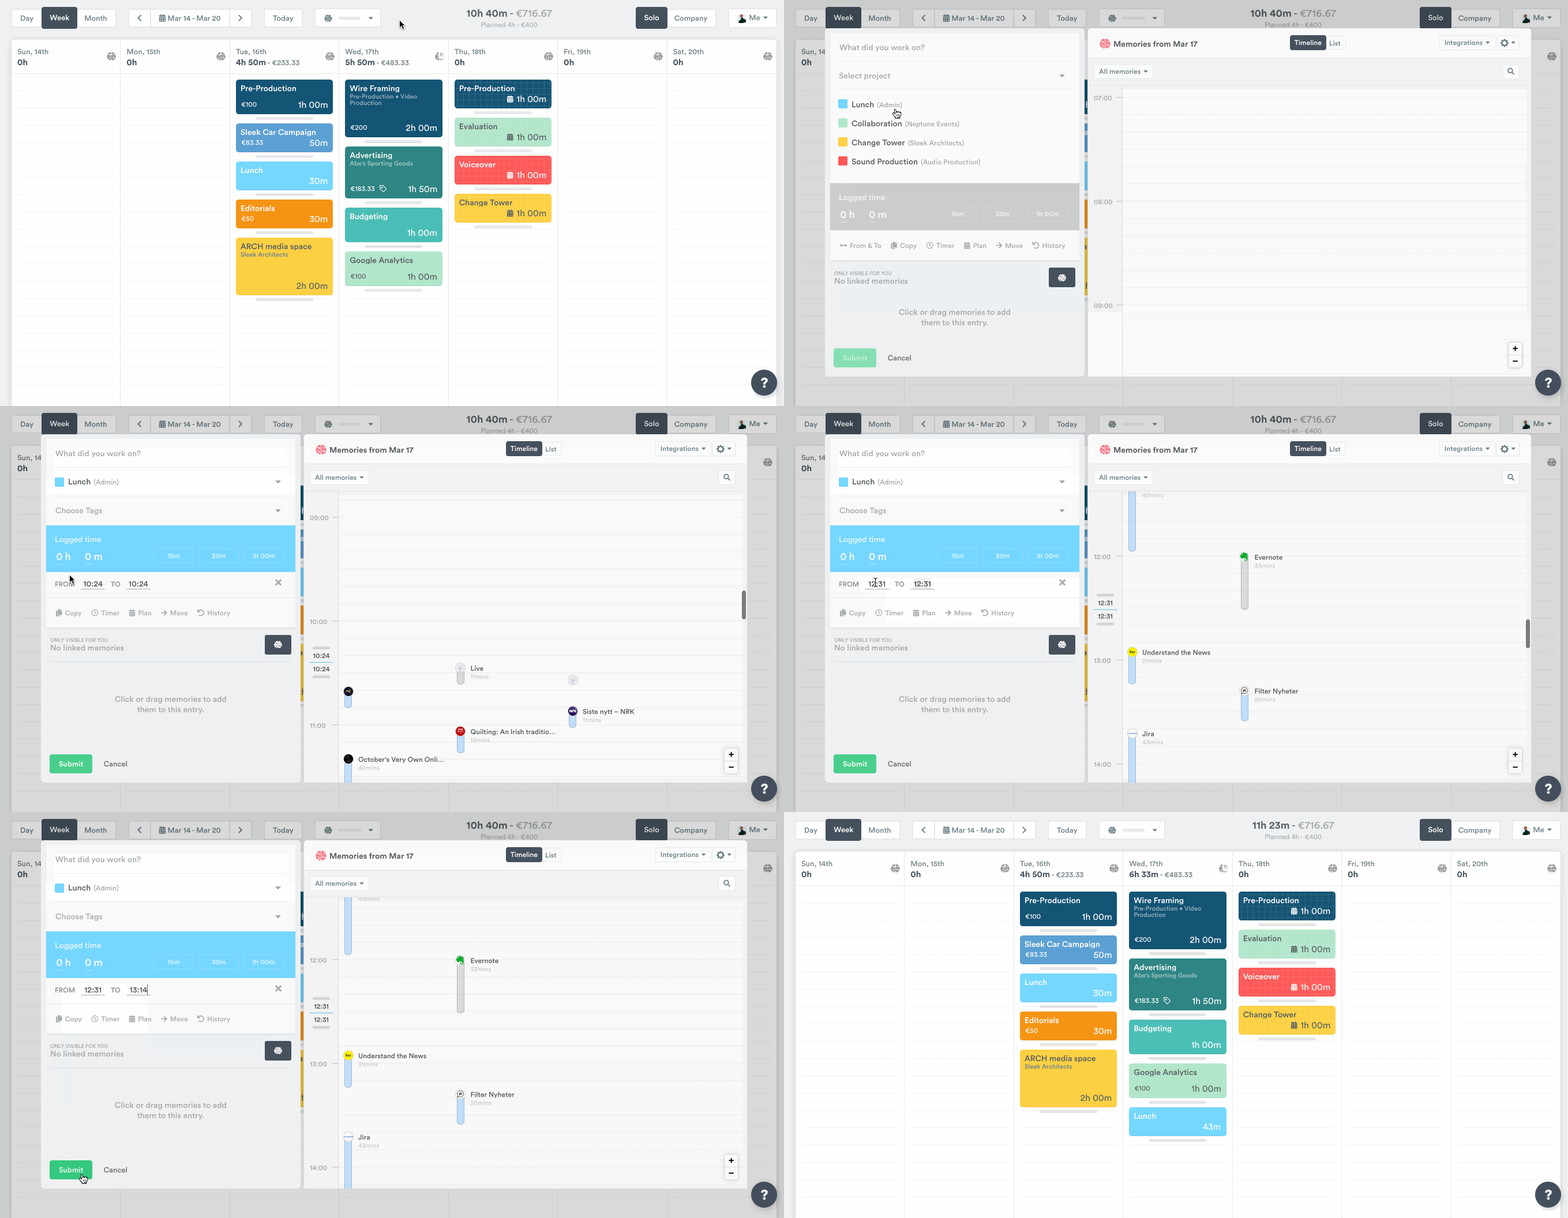
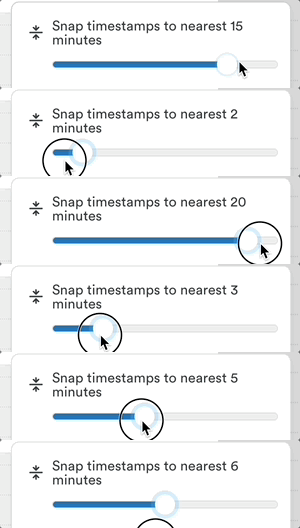
This is super helpful for folks who might bill their time in specific discrete units, allowing you to enforce this for each time entry you create.
Editing entries
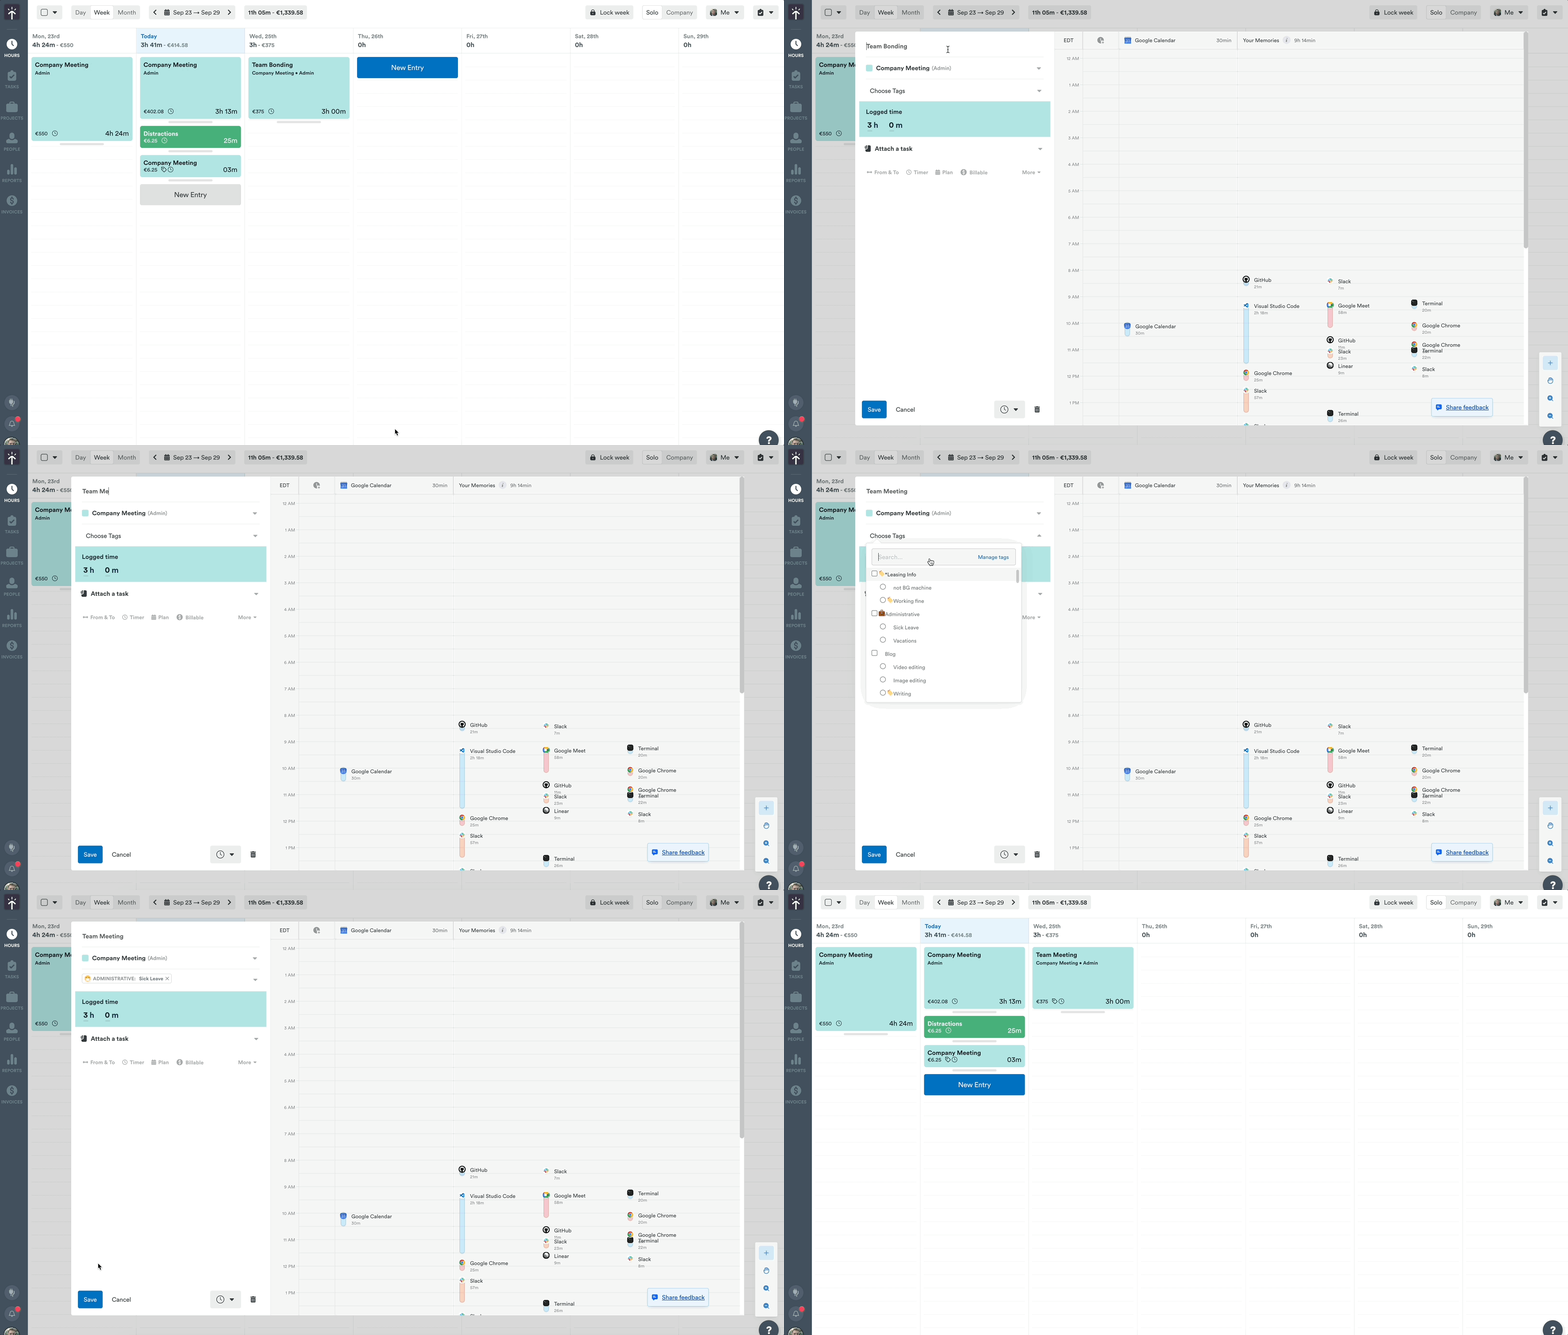
In Timely, as long as entries haven’t been marked as billed, your logged hours can be edited as often as necessary. Just click, make your edits and submit!
Other functions
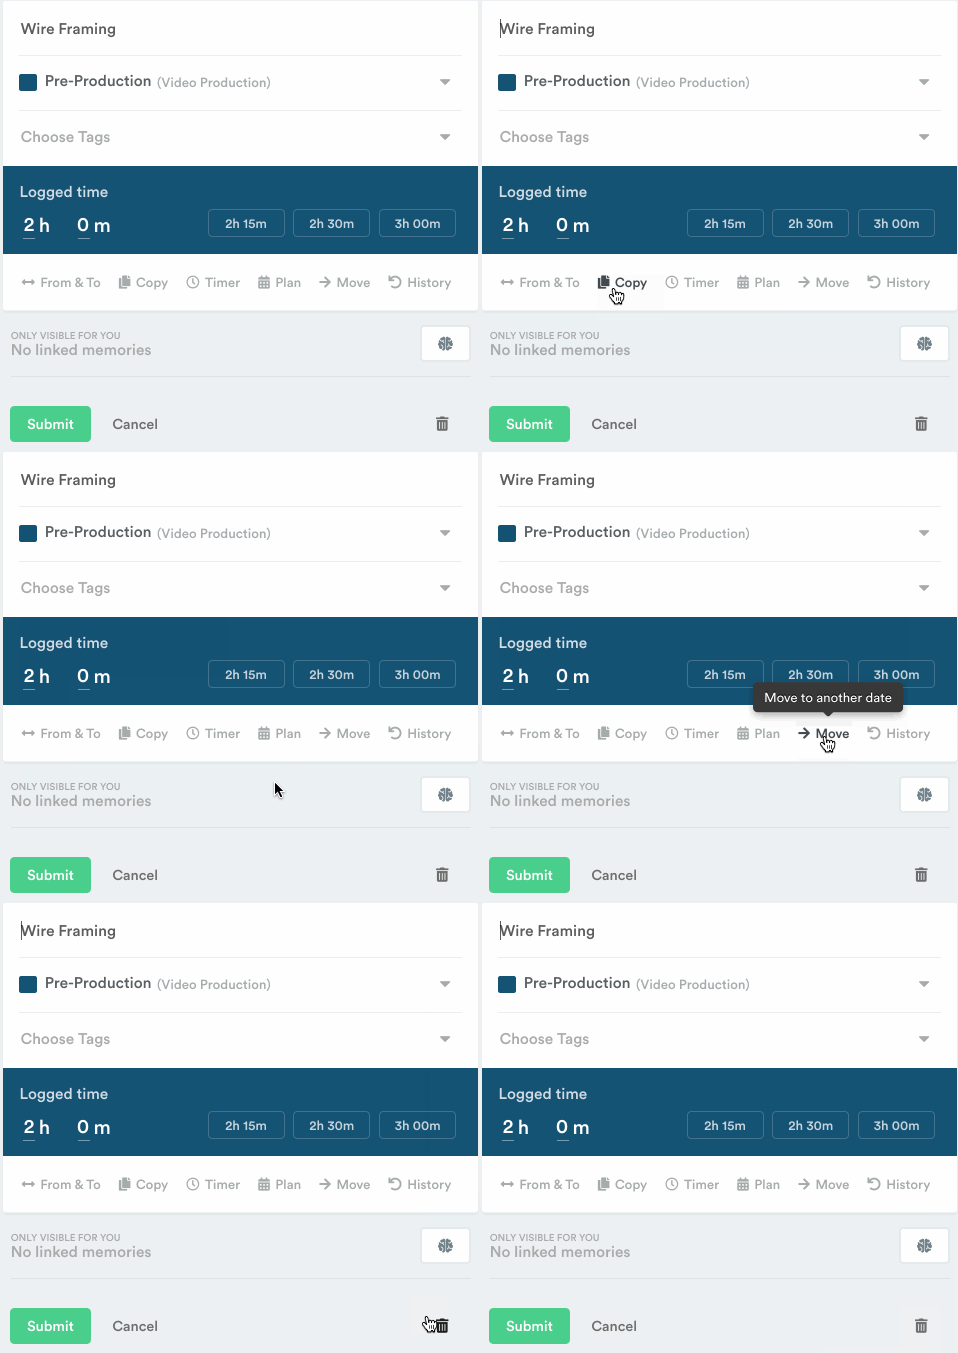
Within the Hour Editor, you can also copy or move entries to another date as well as delete entries if needed.
FAQs
How do I add a planned time entry?
If your workspace doesn’t support the Planning feature, just create a time entry and simply click “Plan time”, then enter your planned hours and submit. If your workspace does support Planning, click here to learn more.
How do I change my planned time to logged hours?
Once you’ve completed a task, you can change your planned time entry to a logged one. Just select it and click the Brain icon to open your Memory timeline. From here, you can select the tracked memories related to the task, add notes and tasks, then submit.
Can I see what tags I’ve applied to an entry after I’ve created it?
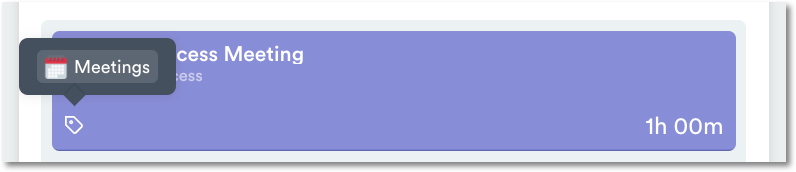
Yes! Just hover over the tag icon in the entry to see what tags you’ve added:
My entry says “This hour is locked” and won’t let me edit it. What’s going on?
Once an entry has been “Marked as Billed”, it becomes locked. This means Managers and Employee level users won’t be able to make edits; only account Admins can adjust entries already marked as billed.
Can I log time to projects I’m not a member of?
This depends on your workspace settings. If your workspace has All projects logging enabled, the project picker shows your member projects first. To find a project you’re not yet a member of, select “Show all projects” at the bottom of the dropdown — this expands the list to every active workspace project. When you save an entry to a project you’re not a member of, you’ll see a dialog asking whether to “Add as member” (permanent membership) or “Log once” (temporary access for just this entry). If All projects logging isn’t enabled, you can only log time to projects where you’re already a member. Admins can contact [email protected] to learn more about enabling this feature.
Last updated October 7, 2026
Have feedback for this article or need more help? Contact us now.