
Managing your workspace
Billing & Workspace ManagementWorkspace managementHandbookEverything you need to customize your Timely workspace.Within Timely, we refer to accounts as “workspaces”. Everything you and your team does in Timely takes place within a workspace: creating projects, creating time entries, running reports — the list goes on!
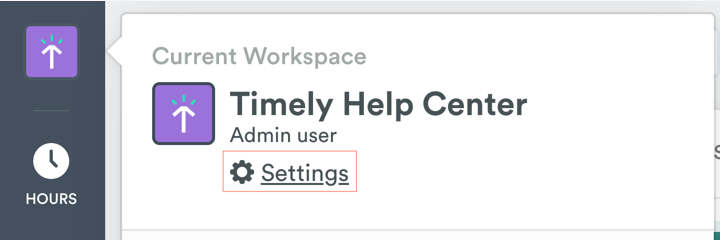
To access your workspace settings, you’ll need to be on the web or desktop app. Simply click the logo in the top-left corner of the screen in Timely then select “Settings” to get started:
Once there, you’ll be able to edit or adjust everything listed below.
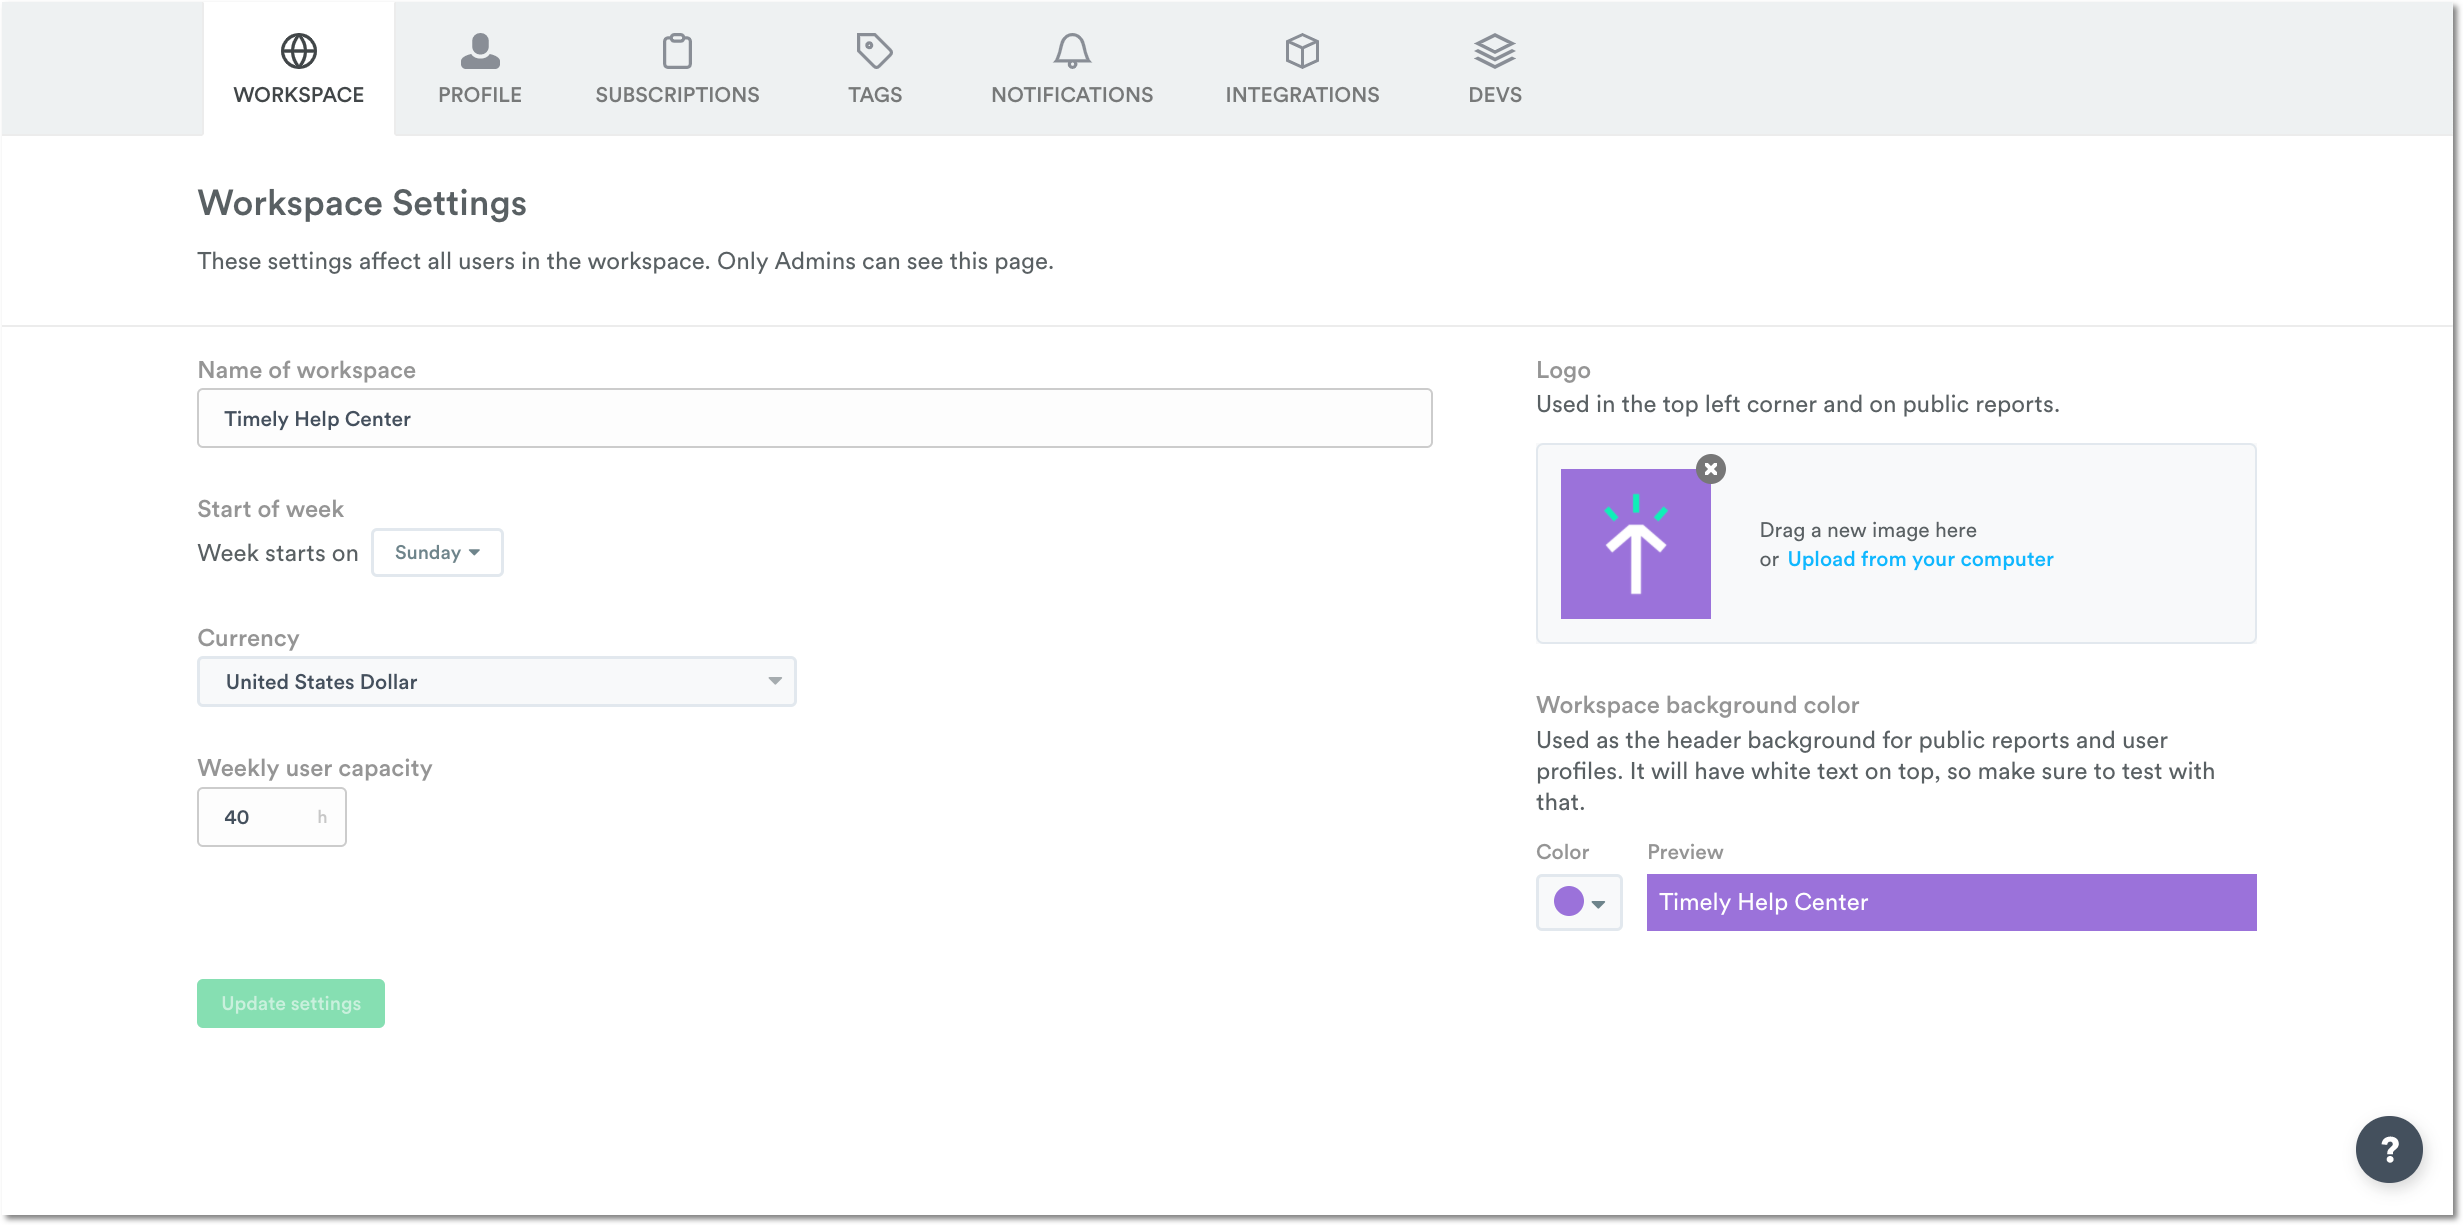
Change the workspace name
This is where you’ll put the name of your company. If you’re a freelancer, that could be your own name or the name you thought of for your work. If you’re managing a business, you’ll put the company’s name here. Updates to any clients or projects can be done from the Projects tab in the navigation bar.
Change the start of the work week
Here you can set the day that your work week begins. As most companies start their days on Sunday or Monday, all other days (Tuesday–Saturday) are not supported.
Change your currency
Choose whichever currency you use in your country or the primary currency which you use to bill your clients.
Set the weekly capacity
Set the minimum hours required for a complete work week at your company. This will be applied to the Control and Capacity features when you navigate to the People tab in the navigation bar.
Change your company logo and background color
Customize your account by adding a logo. This will appear in the upper-left-hand corner of your account for all users. The background color will be used as the header background for public reports and user profiles.
AutoSheet workspace settings
Admins and owners can set AutoSheet defaults for the whole workspace from Settings > AutoSheet > Workspace:
- Member settings — lock Time entry length, Daily generation, or Note language for every member, or leave each one as “Members choose their own”.
- Note instructions — set the tone, length, work to prioritize, and any additional instructions AutoSheet follows when writing notes for everyone.
Note instructions apply to every member’s generated and regenerated notes and replace any personal note preferences. They only change how notes are worded: they can’t change an entry’s project or tags, or override the workspace’s note language. Workspaces with no saved instructions work as before.
See Workspace AutoSheet settings for the full details.
Project templates
As an admin, you can create and manage project templates to help your team quickly set up new projects with consistent settings. Project templates allow you to pre-configure:
- Project name, color, and client defaults
- User assignments and billing rates
- Budget configurations
- Tag requirements
- Auto-creation settings for new clients
To access project templates, navigate to the Project templates section in your workspace settings. Here you can:
- Create new templates with a name and configure whether they should auto-create projects for new clients
- Edit existing templates to update their settings, user assignments, or automation preferences
- Delete templates that are no longer needed
- Manage automation settings like automatically adding all users to template-based projects
When team members create new projects, they’ll be able to select from available templates to quickly apply pre-configured settings, ensuring consistency across your workspace.
Trigger sources
When a template is configured to auto-create projects for new clients, a trigger source controls which client creation events activate it:
- All sources: The template fires for every newly created client, regardless of how the client was added
- Specific integration (e.g., “jira”): The template only fires when clients are created by that named integration
- Import side effects: The template only fires on clients created as a side effect of a CSV import
This allows you to keep templates targeted — for example, applying a Jira-specific project structure only to clients that originate from Jira, without affecting clients added manually or through other integrations.
Transfer ownership of a workspace
If you are the owner of the Timely workspace (i.e. if you were the initial user) you can transfer ownership to another person on your workspace.
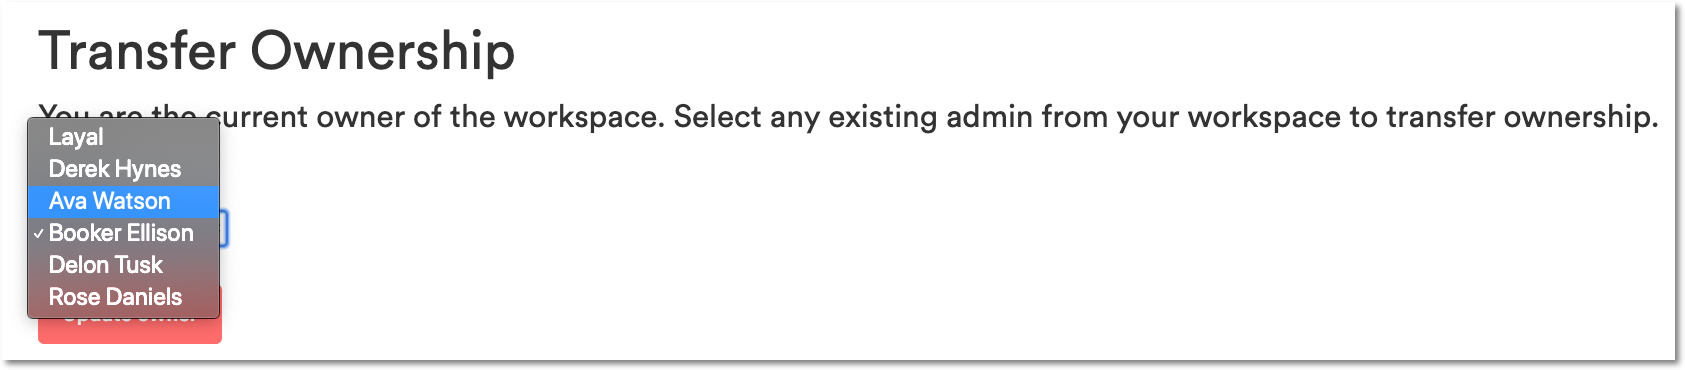
Scroll to the bottom on the workspace settings page, select the new owner from the dropdown of admin users and update!
FAQs
Is Timely supported in languages other than English?
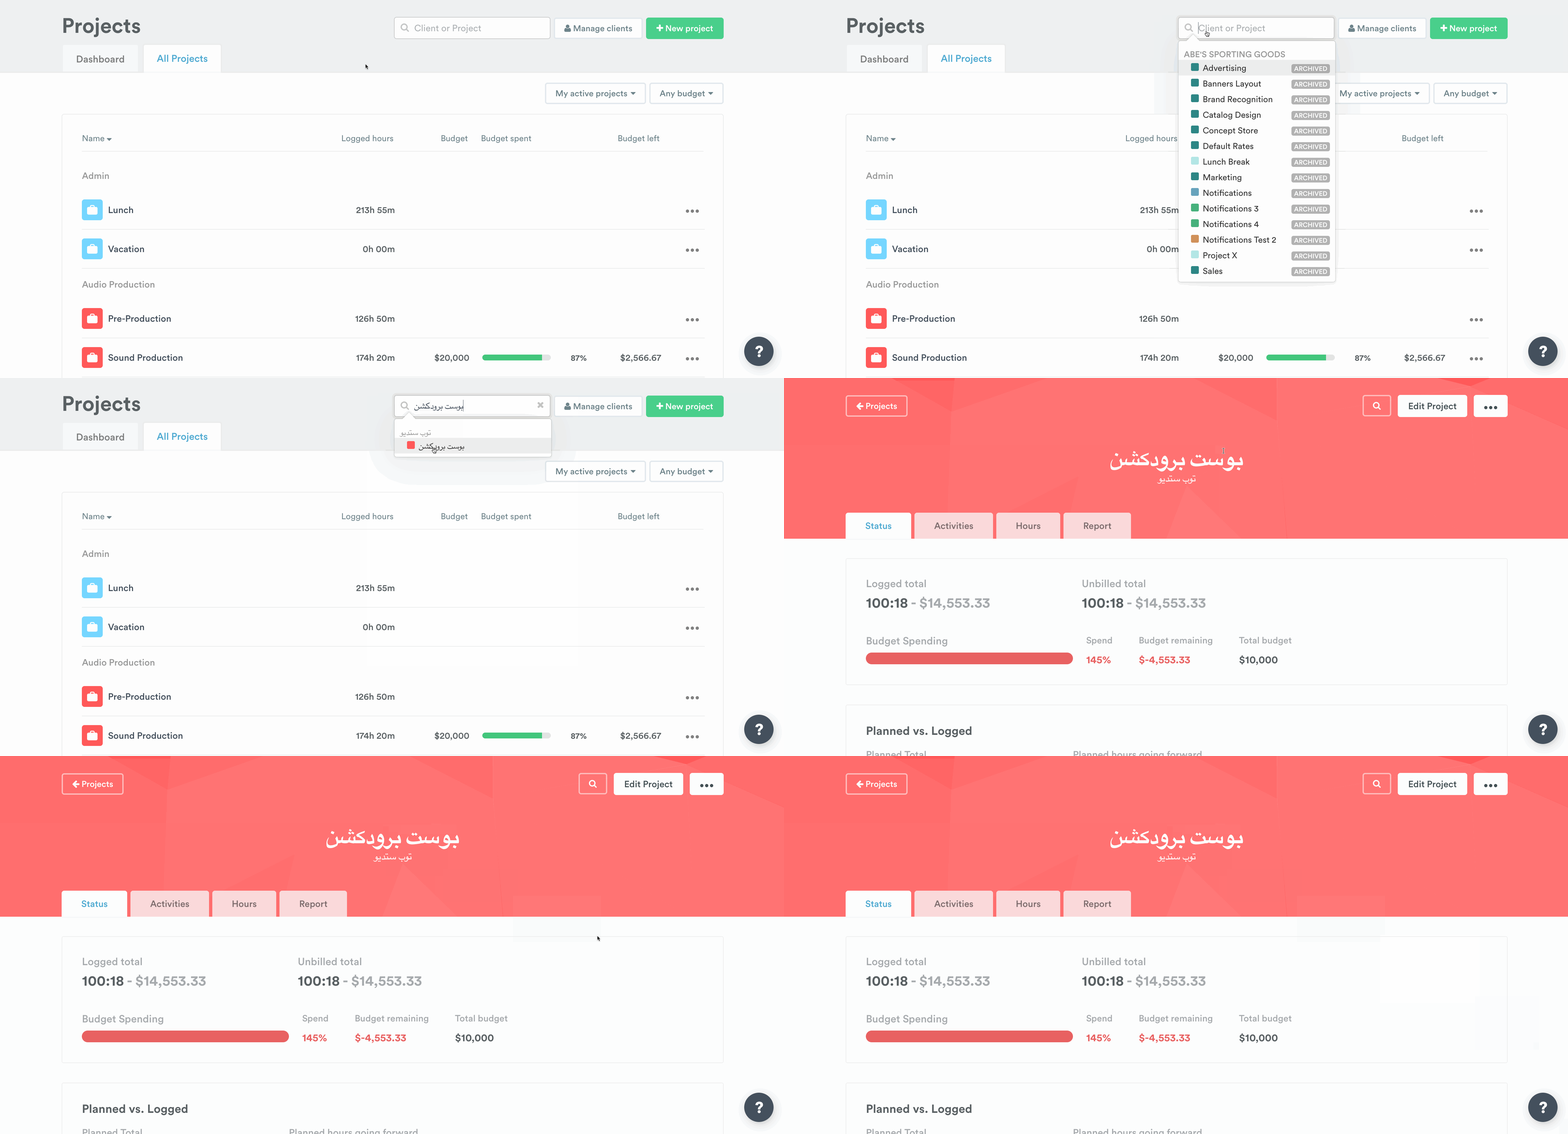
Timely is currently only supported in English, but you are able to use your preferred language within Timely to label clients and projects. You’re able to search for projects and clients in your preferred language as well.
I’m signed in but I don’t see my projects or logged hours!
Keep in mind that Timely accounts follow the email address you used to sign up or the email address you were invited to join Timely with. Unless you’ve updated that info, you’re likely signed into a separate workspace with a different email address. First check to make sure there are no typos or obvious errors in the email address that you see in the workspace you’re signed into. If you’re a part of a company, you can also check with your admin to confirm the email address they have for you in Timely by viewing your user info in the People tab.
Can I have more than one Timely workspace?
Absolutely! If you want to start tracking tasks and projects for your personal ventures, or have multiple distinct entities that need to be kept separate, reach out to us at [email protected] and we’ll be able to assist you further.
Do I have to pay for an additional workspace?
Yes, you’ll need to select and purchase a subscription separate from the plan used on any other workspaces you’re a part of.
Last updated October 7, 2026
Have feedback for this article or need more help? Contact us now.