
Jira Sync Integration
IntegrationsDeep Sync IntegrationsHandbookSync projects, tasks, users, and time entries between Jira and Timely with two-way sync support.Overview
If your team works in Jira but tracks time in Timely, this integration saves your sanity. Instead of bouncing between tools, the Jira sync pipes key data straight into Timely — so your timeline stays accurate, projects stay organized, and your team doesn’t have to lift a finger.
Once connected, Jira projects, tasks, users, and more flow into Timely automatically. Tasks show up as Memories on your timeline, so logging time against actual work is a breeze.
What does it sync?
| Jira Item | Appears in Timely as | Details |
|---|---|---|
| Workspaces | Clients | Default — Jira workspaces become Timely clients |
| Custom field values | Clients | Optional — single/multi-select field values become clients |
| Projects | Projects | Automatically imported from Jira |
| Issues | Linked Work references | Available in time entry search |
| Users | Users | Imported if they authenticate via Timely |
| Issue Activity | Memories | Creating, updating, commenting, logging time |
| Worklogs | Two-way sync | Hours sync back to Jira as worklogs |
| Custom Fields | Client mapping | Single-value fields can focus project lists |
| Tags and Teams | — | Coming soon! |
Connecting Jira to Timely — Workspace Admin
- Navigate to Settings > Integrations
- Choose Jira from Next-Gen Integrations
- Click “Connect workspace with Jira”
- Enter your Atlassian credentials
- Approve the permissions and select your Jira instance
- Ensure the toggle for your Jira instance is ON and click “Configure” to select projects
- Click “Next” to confirm how Timely uses imported data
- Review default settings or click “Change Settings” to customize
- Click “Synchronize with Jira” to finalize
Connecting Jira — Personal Integration
If “Restrict imported data to authenticated users” is enabled:
- Navigate to Settings > Integrations
- Click Jira under Next-Gen Integrations
- Click “Set up personal integration”
- Click “Authenticate with Jira”
- Approve permissions and select your Jira instance
Your Jira timeline experience
Memories are created on the timeline of the user who interacts with a Jira issue — including creating, updating, commenting on, and logging time to an issue.
Logging time against Jira issues
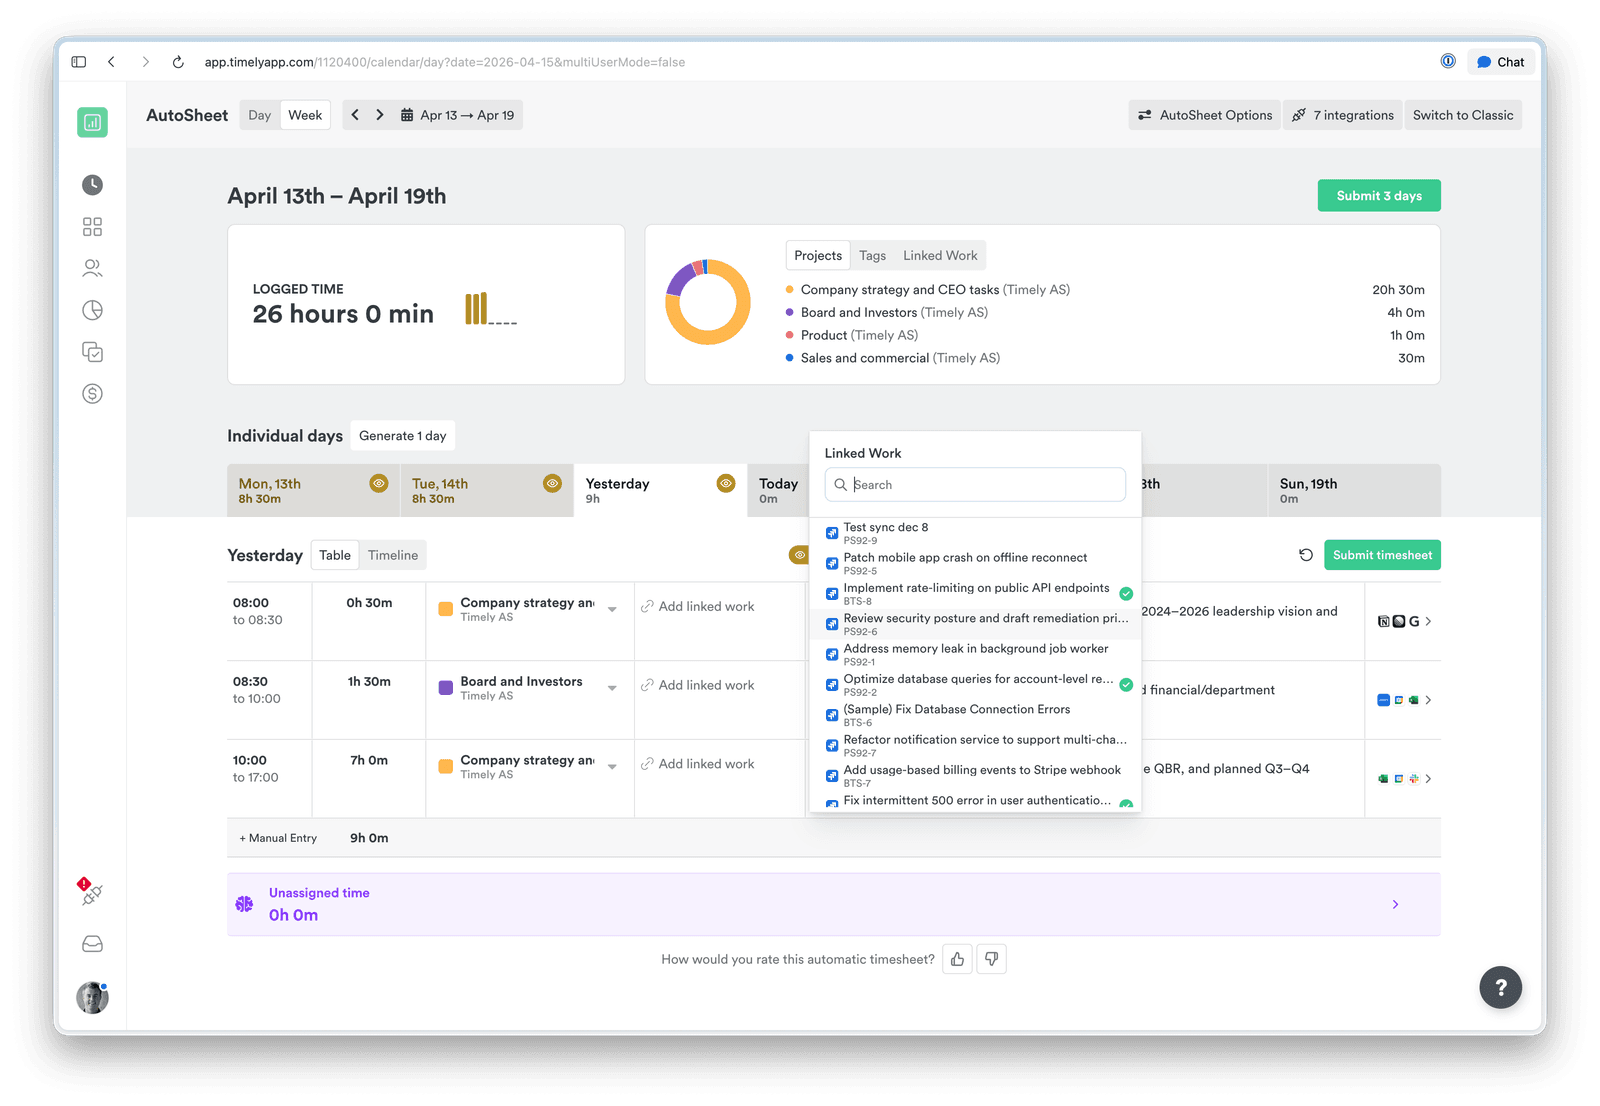
Search for Jira issues directly in the time entry form. With the default configuration, issues appear as Linked Work in AutoSheet or Attach a Task on the Classic timeline.
When selecting Jira memories, you can associate that work with a specific issue ID. This is required for reporting on Jira issues from Timely.
Linked work picker
The linked-work picker shows Jira issues together with any Timely linked work items (work items managed in Timely itself, for example through the Timely API) in one list. Each item has its own icon so you can tell them apart.
Linked-work filters in AutoSheet
When a row in AutoSheet has a project linked to Jira, the linked-work picker automatically narrows its list to Jira issues from that project. Use the Filter menu inside the picker to adjust:
- Scope — All integrations, Same integration (Jira issues only), or Same project (issues from this specific project).
- Status — toggle Open and/or Done issues on or off.
Active filters are shown as chips at the top of the picker. Your preferences are saved and shared with the manual time-logging picker.
How Jira issues load
The picker loads more Jira issues as you scroll. Search looks up all issues, so you don’t need to scroll to find one by name or ID. With the Same project scope, every issue in the project is included.
How custom field values map to clients in the HourEditor
When you open a time entry that is linked to a Jira issue, Timely can automatically narrow the project list to the client that matches the issue’s custom field value. The rules are:
| Custom field state | Project list behaviour |
|---|---|
| Single-select field with one value selected | Project list is focused to the matching client |
| Multi-select field with exactly one value selected | Project list is focused to the matching client |
| Multi-select field with two or more values selected | No client filtering — full project list is shown |
| Field is empty or the value cannot be resolved to a Timely client | No client filtering — full project list is shown |
Custom fields as clients
You can create Timely clients directly from Jira custom field values. Any single-select or multi-select field works — each unique value found on a Jira issue becomes a client in Timely.
To add a field:
- Head to Integrations > Jira and click Configure
- Scroll to Client settings
- Click + Add custom field and select the field you want
- Repeat for any additional fields
Selected fields appear as removable pills. Removing a field stops future imports from that field — clients already created from it are not affected. If a selected field no longer exists in Jira, its pill is marked as deleted so you can spot it and remove it.
How change detection works
Timely keeps watching after the initial import. When a custom field value changes on a Jira issue — a new value appears, or an existing one gets renamed — Timely detects it and re-imports accordingly. New values create new clients; renamed values update the corresponding client name.
Duplicate client names during import
If two or more Jira entities share the same display name (for example, two workspaces or custom field values both called “Acme”), Timely will import all of them rather than silently dropping the duplicates. Each additional client receives a numeric suffix to make it unique — for example, Acme (2), Acme (3), and so on.
Exporting and reporting on Jira time entries
Leverage Timely’s export features to generate files with linked Jira Issue IDs:
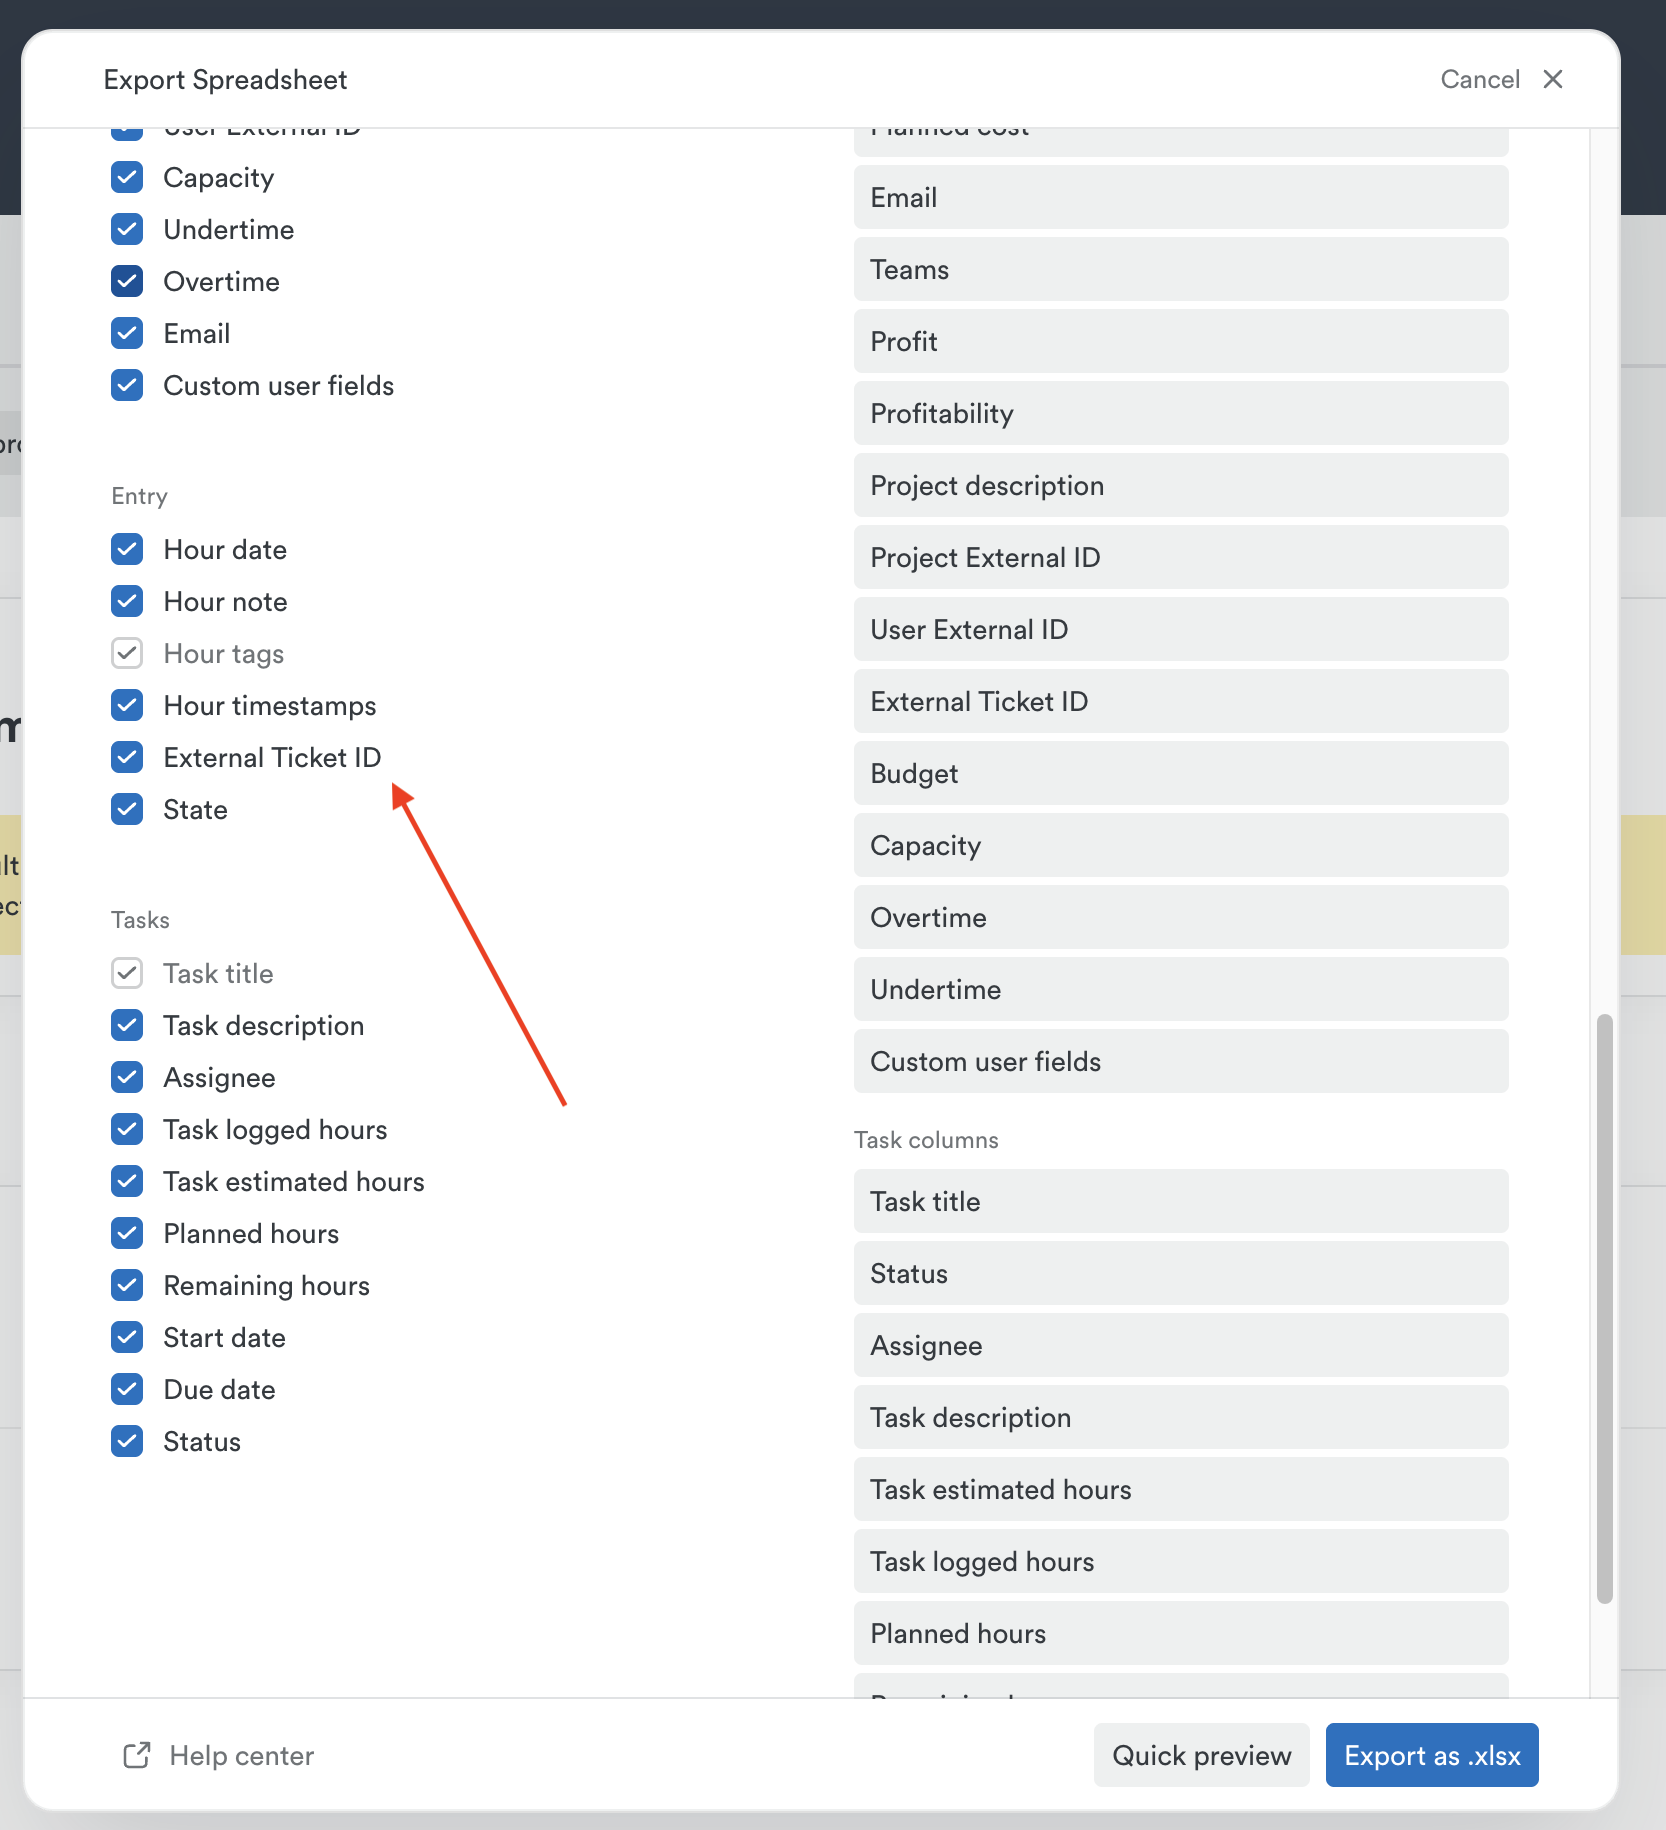
Jira Custom Field column in report exports
Accounts with the Jira sync integration enabled have access to an additional optional column in CSV and XLSX exports: Linked Work Item N Jira Custom Field.
This column surfaces the Timely client that is mapped from the linked Jira ticket’s custom field (for example, a Beneficiary field imported as a client via the custom fields feature). One column is generated per linked work item on the entry (e.g. Linked Work Item 1 Jira Custom Field, Linked Work Item 2 Jira Custom Field, and so on), aligned with the corresponding ID, Title, and Sync Status columns.
Why is this useful? The column lets you compare the client selected on a time entry against the client mapped via the Jira custom field, making it easy to spot mismatches in bulk without reviewing entries one by one.
To include this column in an export:
- Open the Export menu from any report.
- Select Spreadsheet (CSV/XLSX).
- In the column picker, enable Linked Work Item Jira Custom Field under the linked work columns.
Sync hours back to Jira (two-way sync)
When enabled, eligible time entries are sent to Jira as worklogs, including:
- Start time
- Duration (rounded to nearest minute)
- Description (as a comment)
- Project (based on task reference)
What makes a time entry eligible?
- Jira sync must be enabled
- The entry must be linked to a Jira task/issue
- It must have at least 1 minute of logged time
- The user must have connected their own Jira account
What gets updated?
| Action | Response |
|---|---|
| Editing a synced entry | Jira worklog gets updated |
| Deleting a synced entry | Removed from Jira |
| Reassigning an entry | Original worklog removed, new one created |
Checking sync status
When syncing hours to Jira is turned on, the workspace connection’s settings (Settings > Integrations > Jira) include a Time Entry Sync tab. It shows how many time entries are Synced, In progress, and Failed.
If any entries have failed, click the Failed row to expand it. Failures are grouped by reason, with the number of entries for each:
- Authentication failed — the Jira connection needs to be re-authenticated
- Permission denied — the connected Jira account can’t log work on that issue
- Task not found — the Jira issue no longer exists
- Rate limited — Jira received too many requests at once
- Validation error — Jira didn’t accept the entry’s data
- Unknown error — any failure that doesn’t match the reasons above
Background sync schedule
| Task | Frequency | Purpose |
|---|---|---|
| Sync Webhooks | Hourly | Refreshes webhooks before expiry |
| Sync Projects | Every 15 mins | Keeps project data fresh |
| Sync Tasks (legacy) | Daily @ 2am | Backup sync task |
| Sync Identities | Every 6 hours | Brings in newly added users |
FAQs
Do I need the Tasks add-on?
No — you can log time using Linked Work references without it. The add-on is only needed to import Jira issues as full Timely Tasks and sync time back.
Do tasks show up automatically?
Yes — Jira issues appear on your timeline as memories, ready to log.
What if hours fail to sync back?
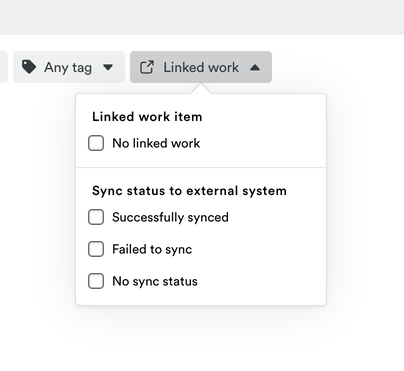
The entry will be marked with a sync error explaining what happened (e.g., expired login, missing permissions). To pull up every entry that failed, head to Reports > Timesheets, click the Linked work dropdown, and select Failed to sync under Sync status to external system. Admins can also see failures grouped by reason in the Time Entry Sync tab (see Checking sync status).
I’ve deleted a worklog in Jira and it keeps reappearing?
With two-way sync, Timely is the source of truth. Delete the hours in Timely first.
Why am I seeing an Atlassian permissions screen when I reconnect Jira?
This is expected. When Timely requires additional OAuth scopes (for example, to support new features), reconnecting your workspace triggers Atlassian’s consent screen so you can approve the updated permissions. Click Accept to complete the process — your existing sync data and settings are preserved.
Last updated October 7, 2026
Have feedback for this article or need more help? Contact us now.