Connecting Timely with Zapier
IntegrationsZapier & AutomationHandbookAutomate the flow of information to and from Timely with the help of Zapier.While we may not be quite at the levels of technological advancement that movies and TV promised us, we have come a long way. Moving data between different apps and software platforms can certainly be a challenge — which is where Zapier comes in!
What is Zapier?
Zapier is a service that lets you create no-code workflows to automate certain tasks and connect different apps and services together. Each workflow, affectionately named a Zap, involves a couple of key components: a Trigger from one tool (the source of the data) and an Action (or multiple actions) in another app (the receiver). By creating a custom Zap, you push or pull data between a connected tool and Timely whenever a specific trigger event is fired.
Creating a Zapier account
Signing up for a Zapier account takes just a few clicks and then you can jump right into creating Zaps.
Connecting with Timely
- Log in to your Zapier account or create a new account
- Navigate to “My Apps” from the navigation bar
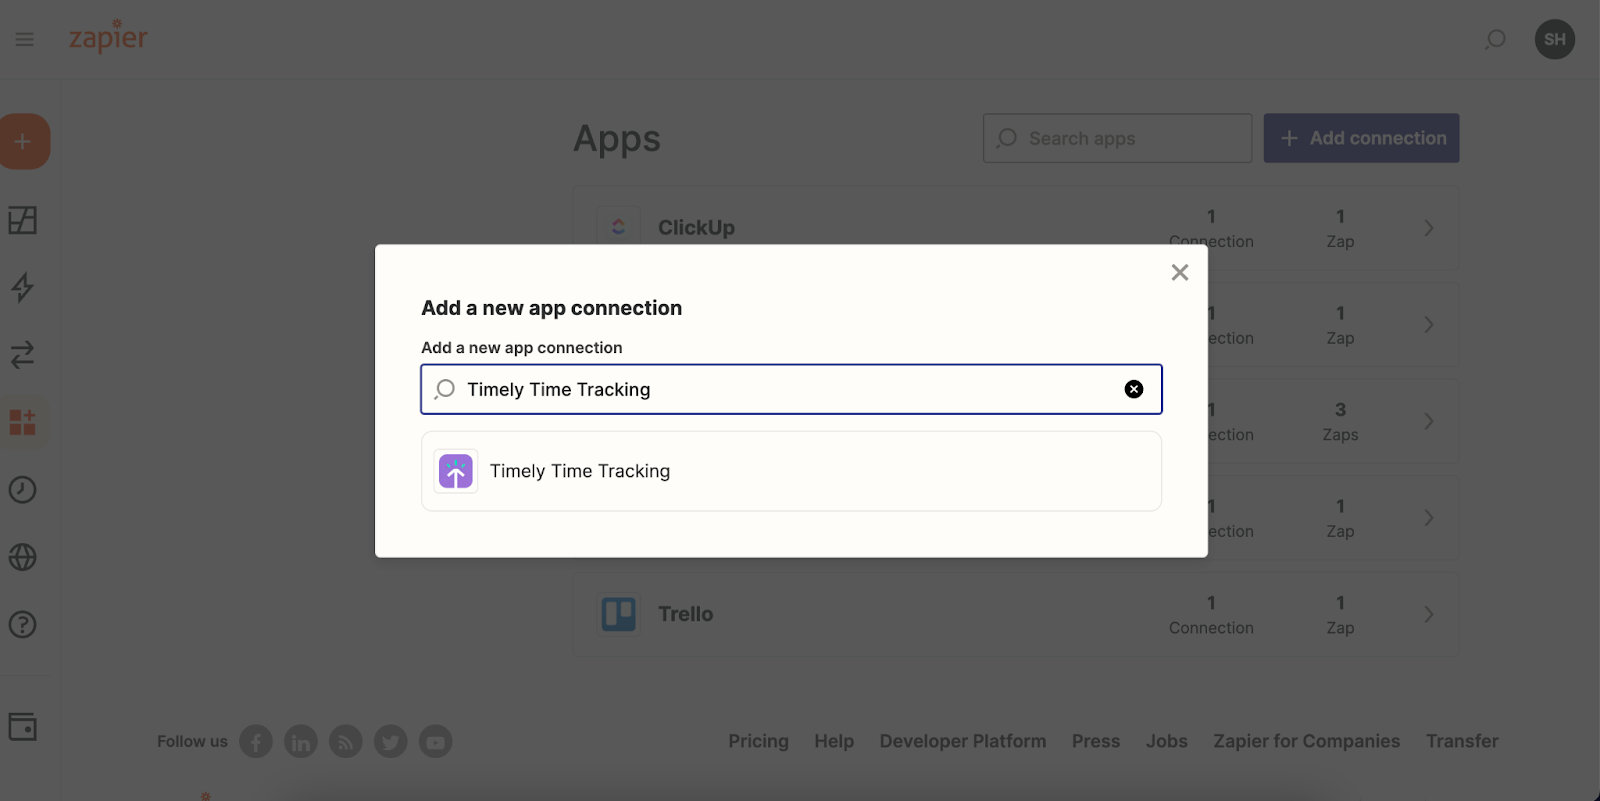
- Click ”+ Add connection” and search for “Timely Time Tracking”
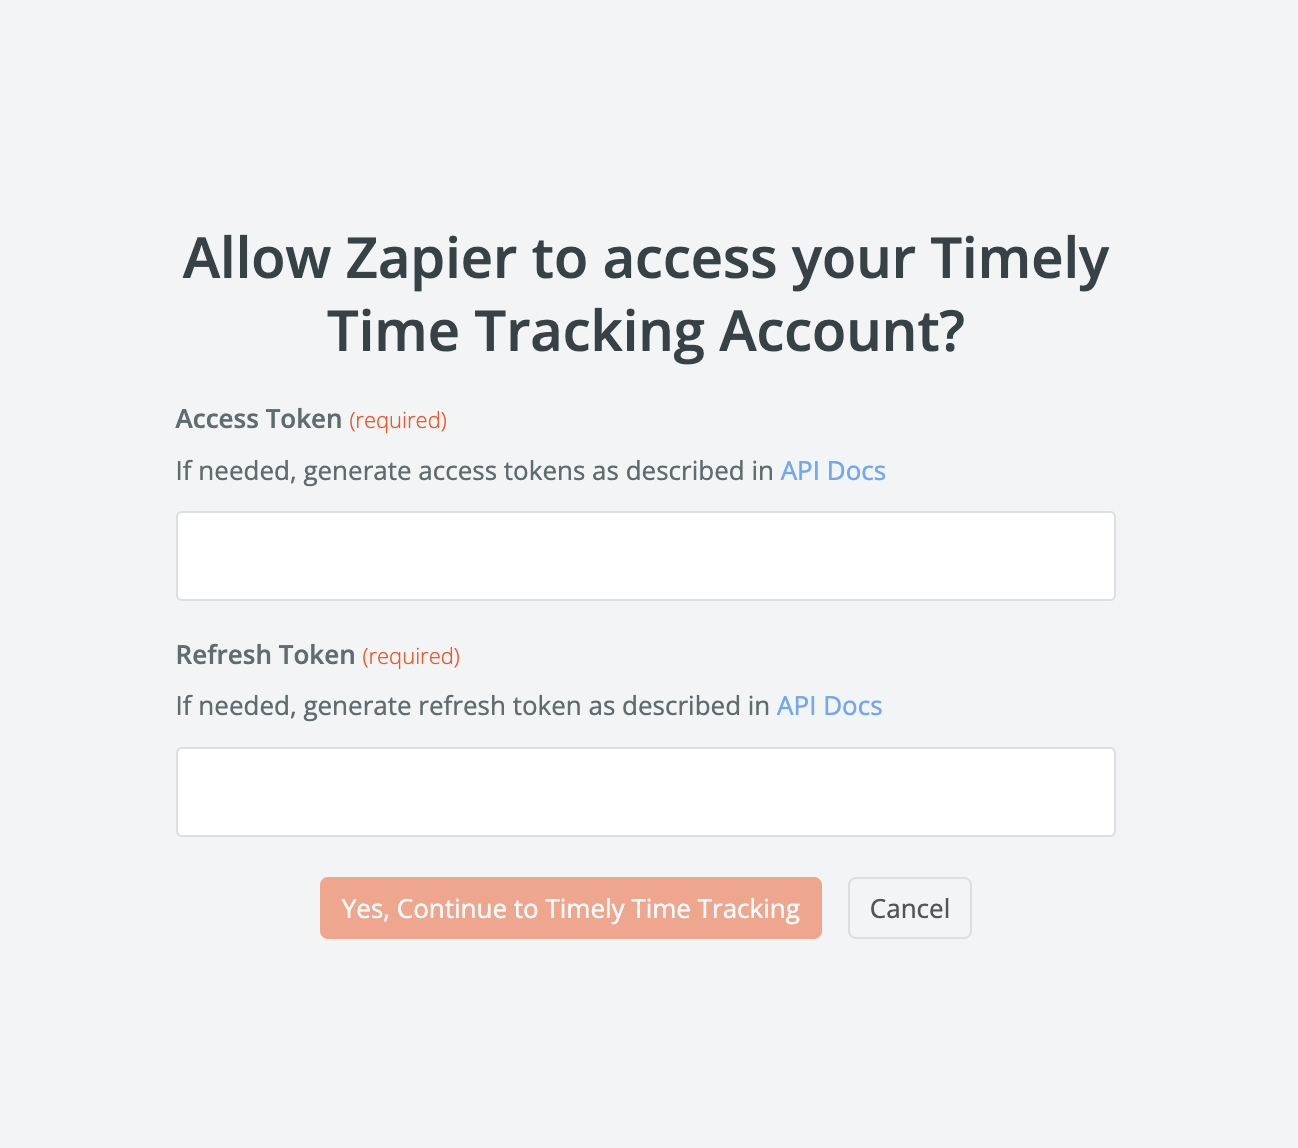
- Use your credentials to connect your Timely account to Zapier
- Once connected, create your first Zap! Use a pre-made Zap or create your own from scratch
Creating your first Zap
- Click ”+ Create Zap” from the Zapier home screen and search for “Timely Time Tracking”
- Choose App & Event — select an event from the dropdown and click Continue
- Choose account — select the Timely account you want to use
- Set up trigger — select the workspace that will trigger the Zap
- Test trigger — ensure everything is connected properly
- Action: app event — select the recipient tool using the search bar
- Choose app & event — choose the event for the receiving app
- Choose account — select the account for the recipient app
- Set up action — map the data to the various fields
- Test action — check your destination app to make sure everything looks as expected
- Click “Publish” and turn on the Zap
Exporting from Timely
You can create Zaps to push the following data from Timely:
- New (or Updated) Project
- New (or Updated) Time Entry
- New or Updated Person
- New Client
- New Tag
- New Workspace
Importing to Timely
You can create Zaps to pull the following data from other apps into Timely:
- New Project
- New Time Entry
- New Person
- New Client
FAQs
How does Zapier work?
Zapier connects apps on the backend to automate tasks you might normally do manually. Check out Zapier’s fantastic article that explains the process in depth.
Will I need a paid Zapier account?
That depends on how you use Zapier. Zapier has different subscription plans to fit different needs. A free account allows limited single-step Zaps at 15-minute intervals.
What are some popular examples?
We’ve put together a few example Zaps that show different workflows with popular use cases. You can also find inspiration on Timely’s listing in Zapier.
How is Zapier different from the Timely API?
Timely offers a robust API for customers who are interested in building a custom integration. The API is best suited for technical users or teams with developers, while Zapier is designed to be user-friendly and does not require engineering resources.
Last updated April 1, 2026
Have feedback for this article or need more help? Contact us now.