Classic: Memory 101
Time Tracking: ClassicHandbookThe basics of Memory explained — learn how Timely's automatic time tracking captures your daily work activities.Memory is the engine behind Timely’s automatic magic! It’s an app that quietly captures everything you do on your computer throughout the day—no timers, no hassle. It’s all stored inside Timely in a special object called (yep, you guessed it!) a “Memory.”
Since the concept of Memory might be new to some, we’ve put together this guide to explain the basics and break down key Timely terms. Let’s get you set up with automatic time tracking in no time!
Getting Started with Memory
Before diving into Timely’s automatic time tracking, you’ll need to get Memory up and running on your computer. This little sidekick is what captures all your daily activities behind the scenes! Follow our installation guides for Mac, Windows, or Linux.
Once Memory is installed, you’ll be tracking time like a pro, and Timely will help you assign that time to projects and tasks with ease.
What are memories?
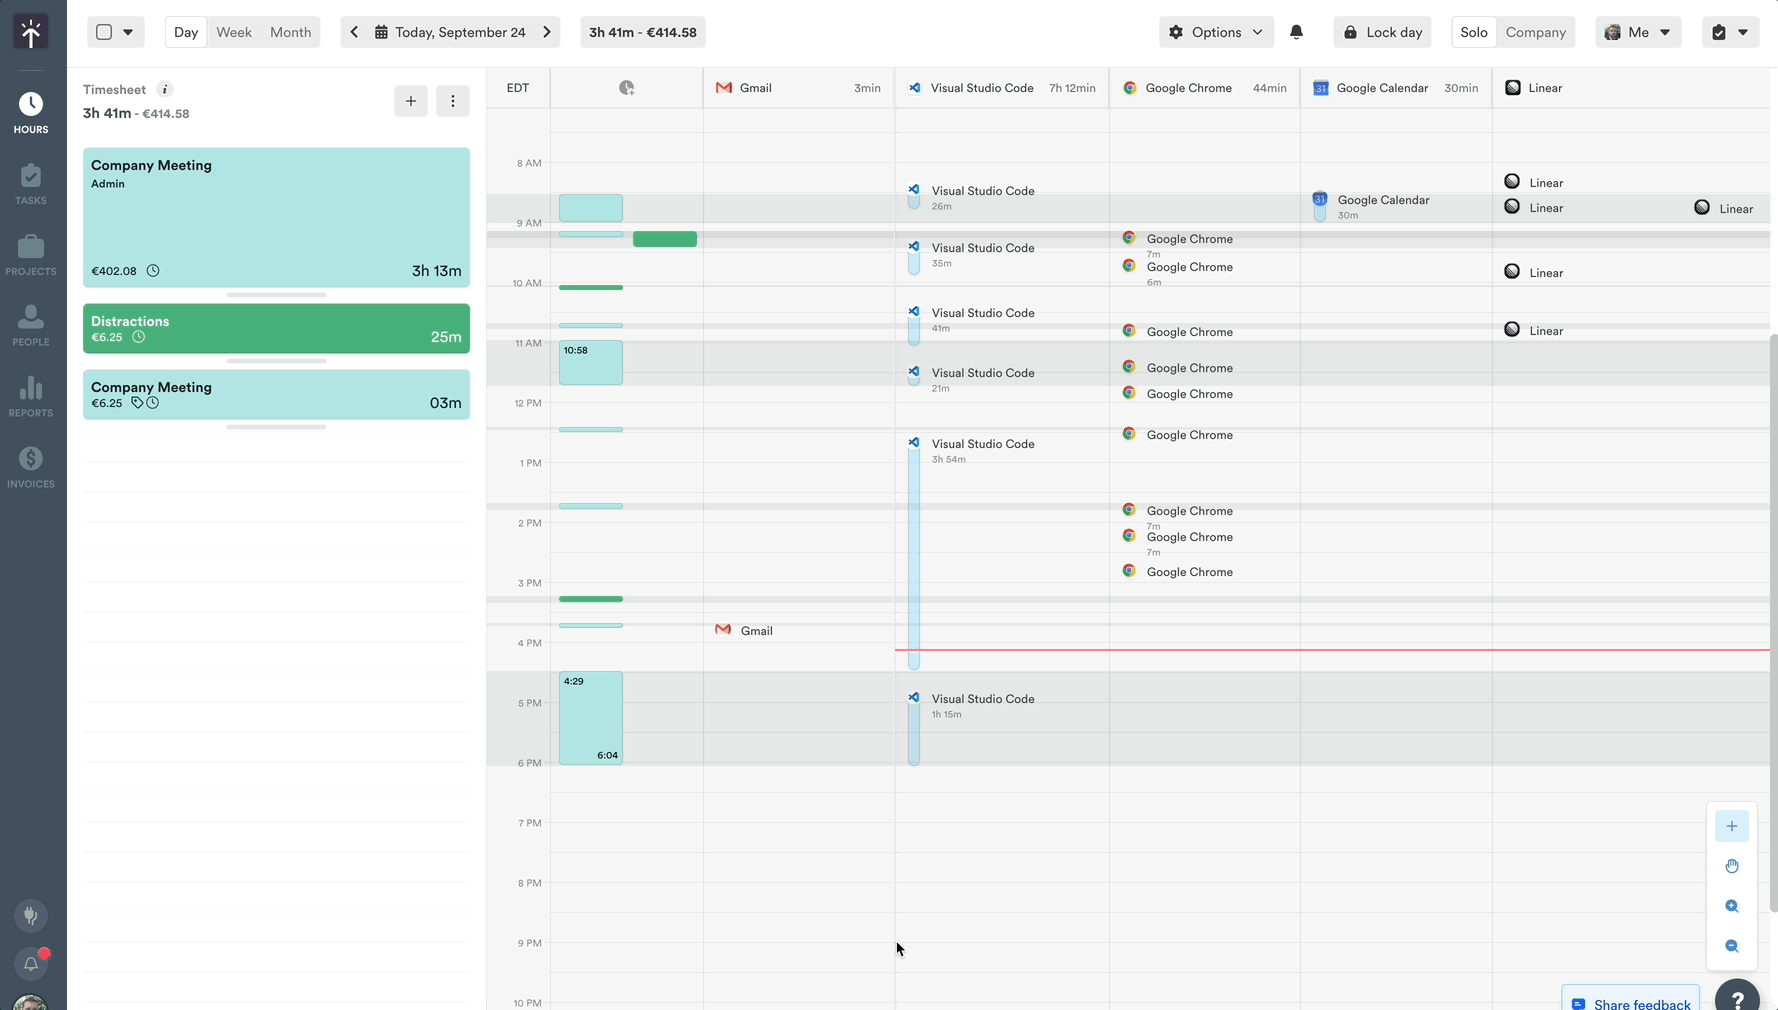
We refer to the individual work events Memory captures as “memories”. These are uploaded to a daily timeline inside Timely that is 100% private to you. Each memory shows you the specific web or desktop app you worked in, with a title of the document or page you visited — as well as when you accessed it and how long you spent on it. Memories can be events from your calendar, your GPS location from the mobile apps, a file you worked on, a video call you attended, an email you sent or a website you visited.
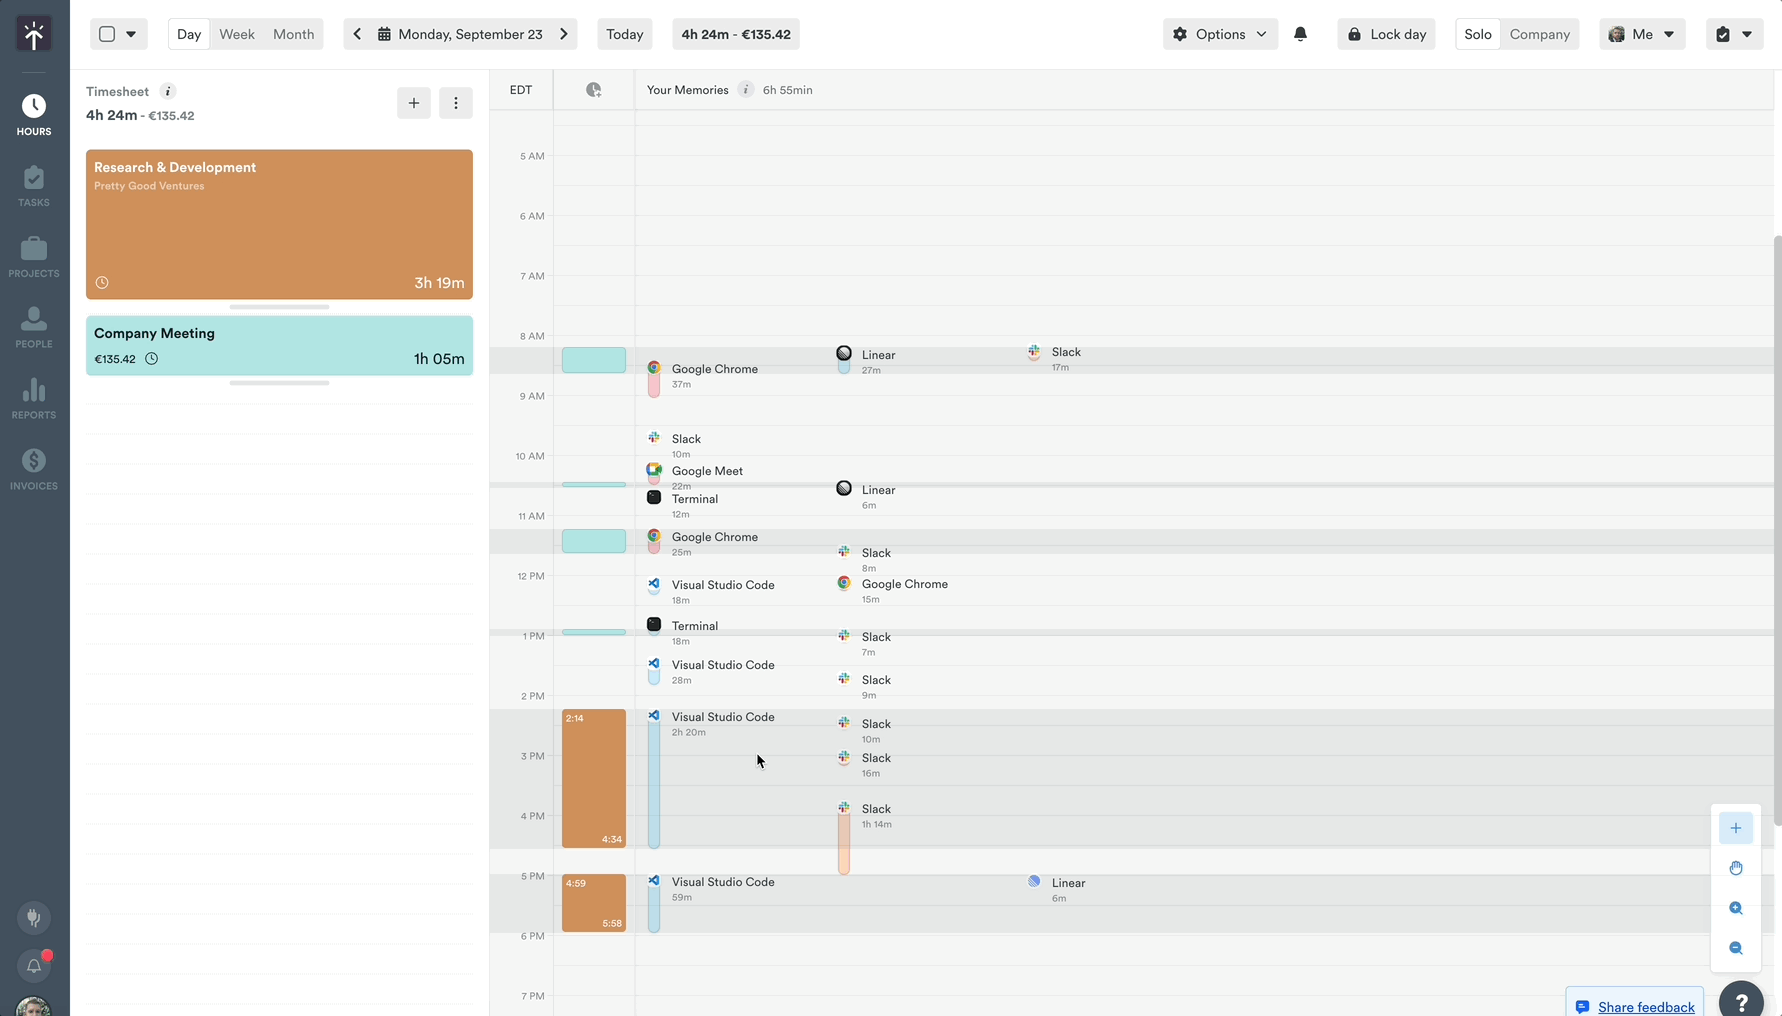
You need to set up Memory on your Mac, Windows, or Linux device to start capturing work memories. Once enabled, head to your Day view in Hours. You’ll see your memories arranged across an elegant timeline, customizable to your preferences.
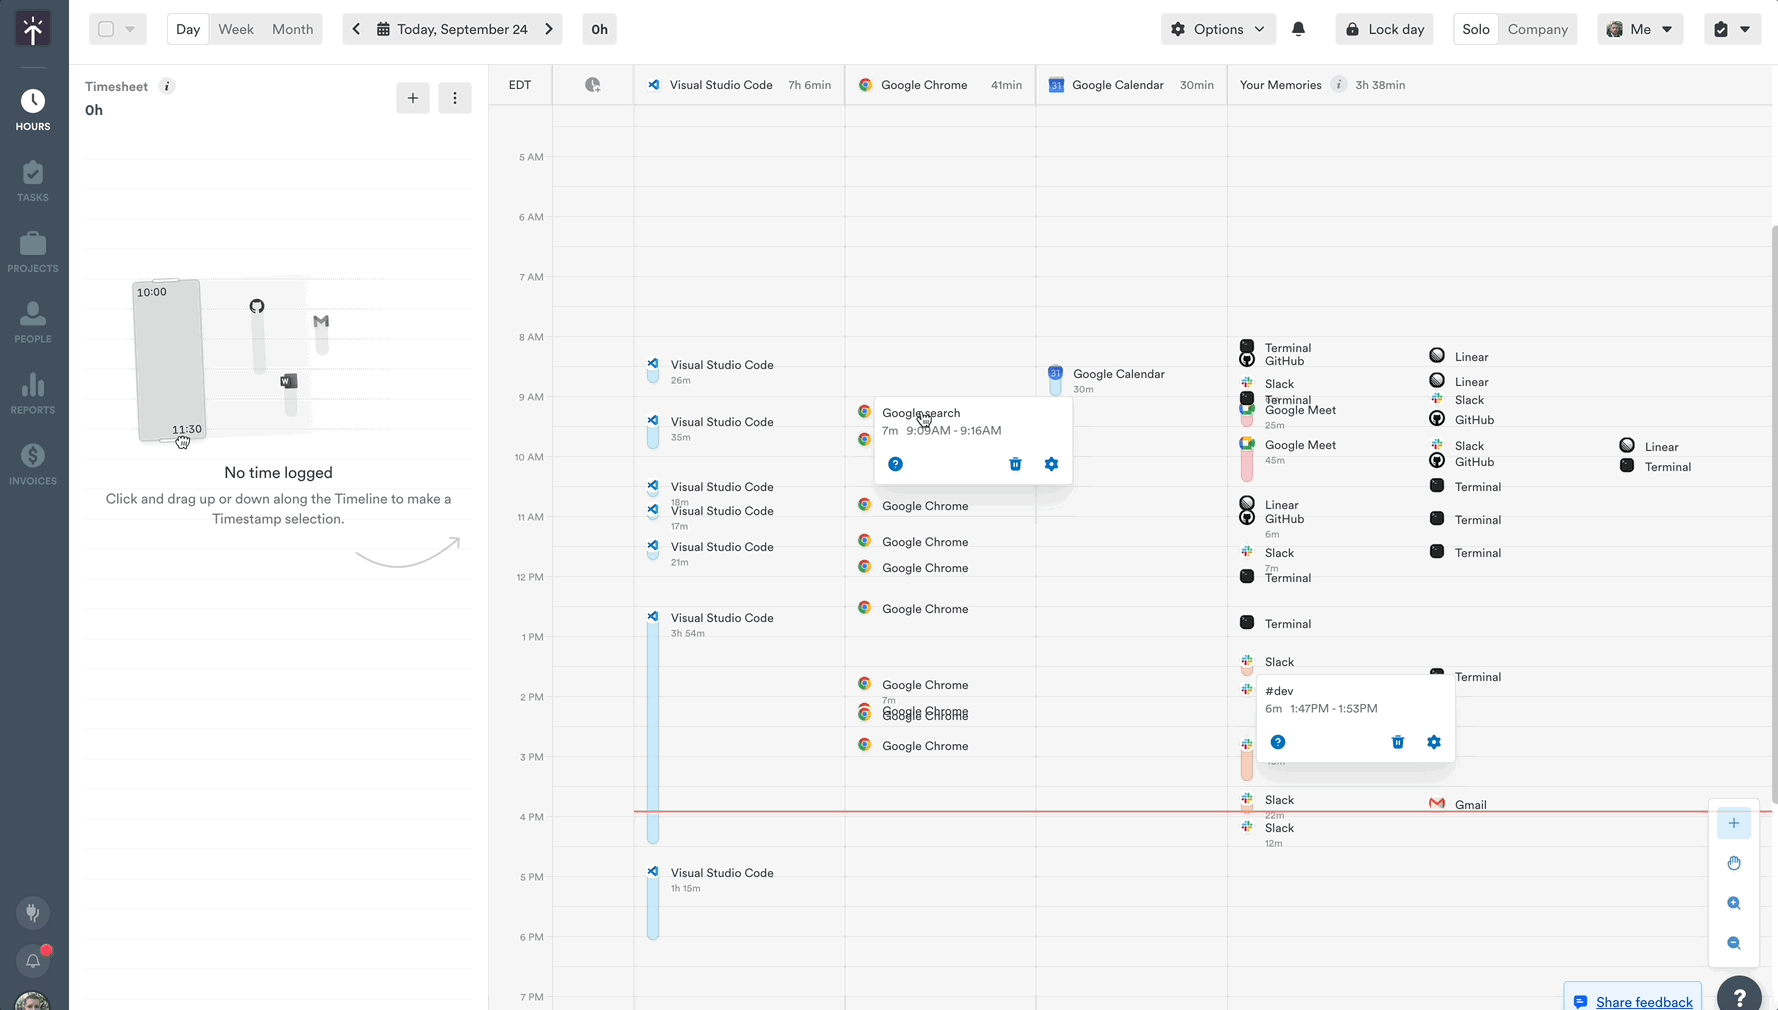
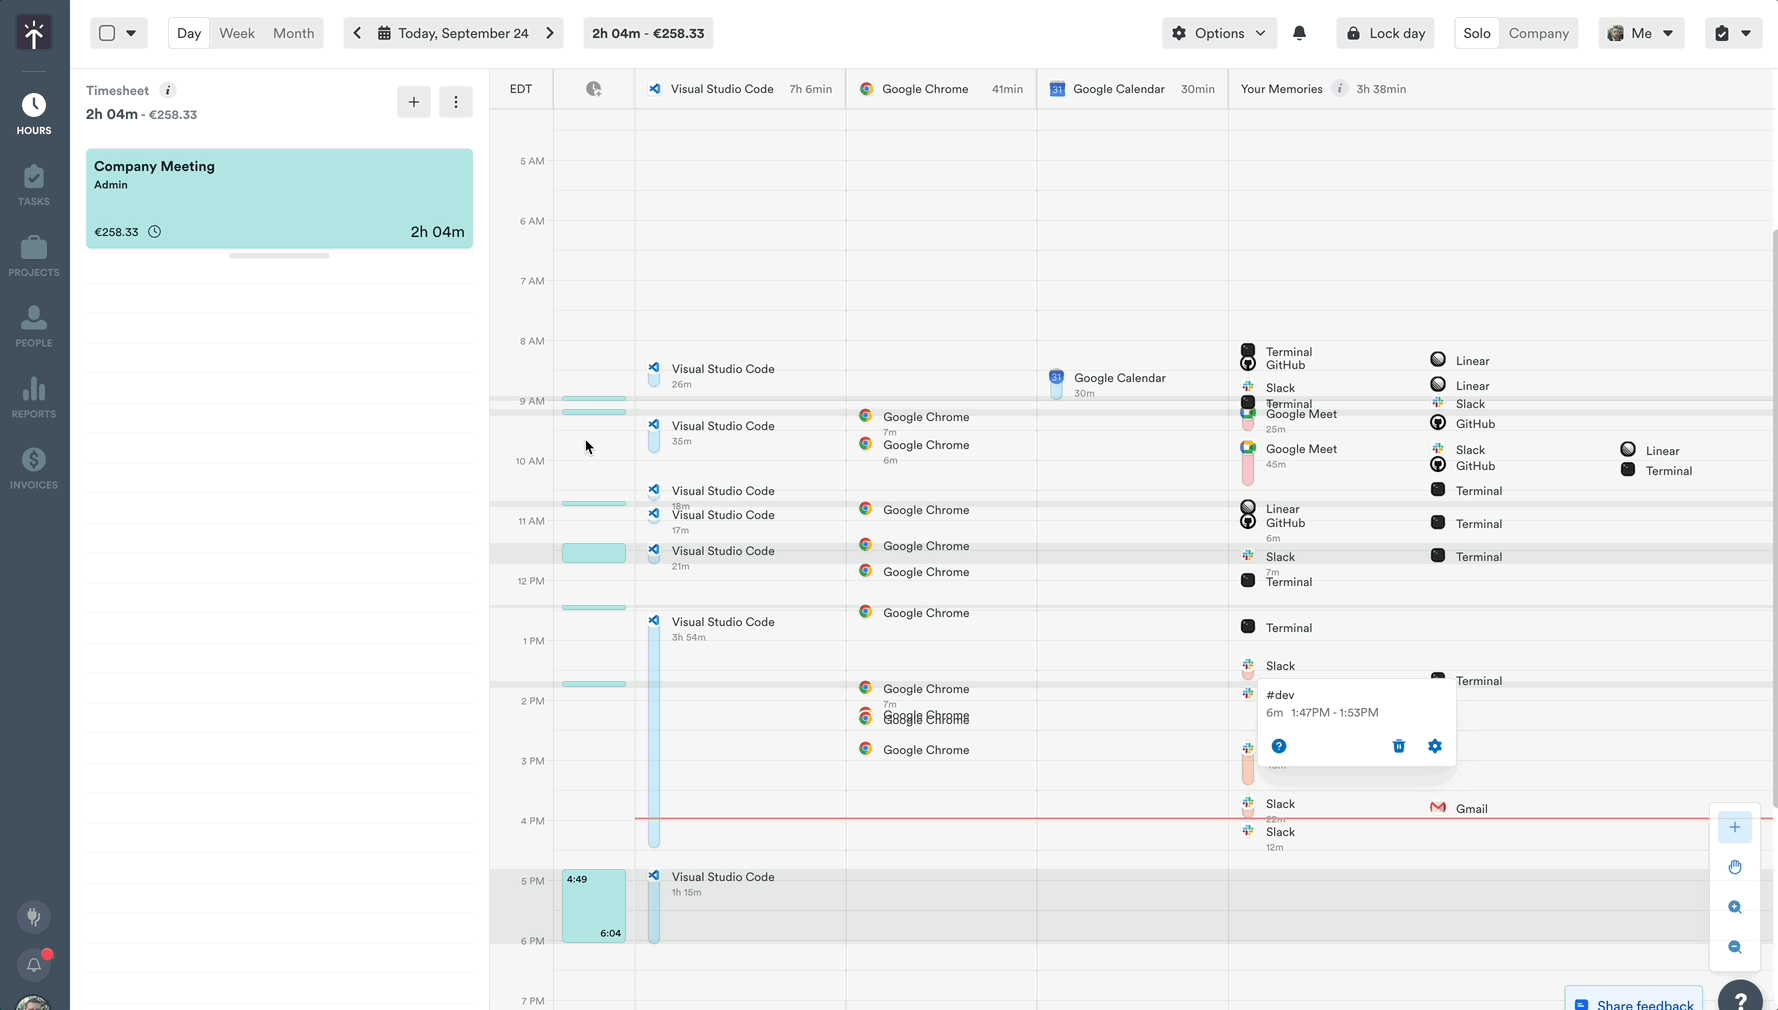
This timeline view lays out your memories in chronological order, pinning them to the time they occurred during the day. It allows you to review simultaneous tasks (like presenting a document or answering an email in a meeting) or — if you have Timely’s location tracker enabled — when you were in a certain place.
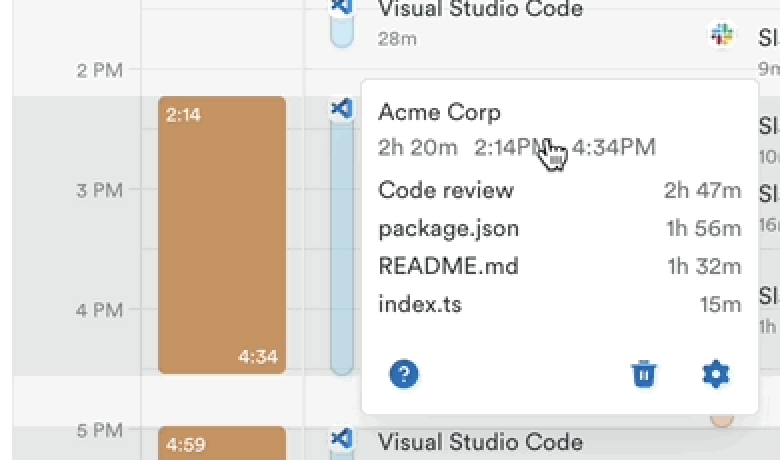
By hovering over the items on your timeline you’ll see additional context such as the file or website name. You can also click the small ❓ icon to see the additional details behind each individual Memory or Memory grouping.
What is Memory history?
Memory history is the cumulative record of all your memories. It lets you go back in time to look at past memories for previous days. Just click through the calendar days on Day view in Hours, or switch to Week or Month view for a wider overview.
All our plans offer unlimited Memory history, meaning there’s no limitations to how far back in the past you can delve! See everything you’ve worked on since you first installed Memory.
Assigning memories to projects and tasks
Memories are the building blocks to help you easily visualize the full context of your day. As you begin assigning them to projects and tasks, you’ll notice that the timestamps from that activity are captured and reflected in your time entry — showing the duration of your work.
Those time frames can be easily edited or adjusted as needed, to more accurately reflect your work.
Want to learn more about logging your time using Memories? We deep dive into that very topic in our Logging hours using Memory article.
Customizing your timeline experience
How to configure memories
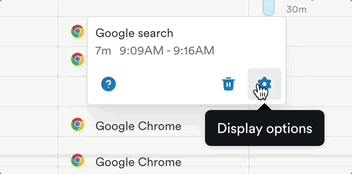
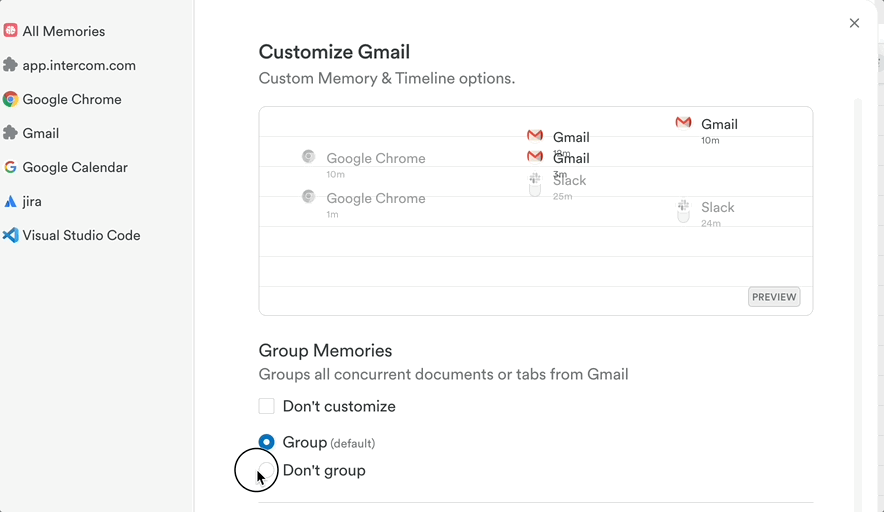
As you begin to explore the Classic timeline experience you’ll likely want to start diving into how specific apps or websites are handled and your memories arranged. To get started, hover over any of the individual memories on your timeline, click the ⚙️ shaped Display options button:
You’ll see a handy preview at the top showing you exactly how the memories from that app will display on your timeline along with a number of helpful customization options for you to choose from:
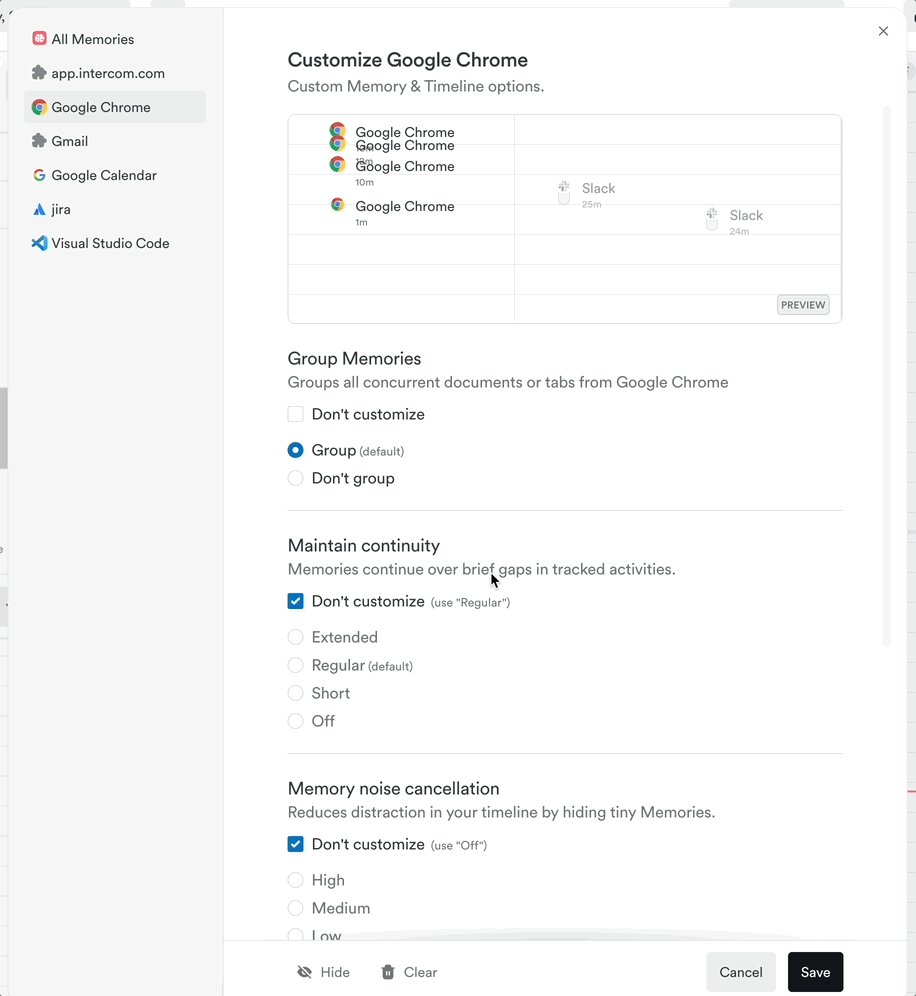
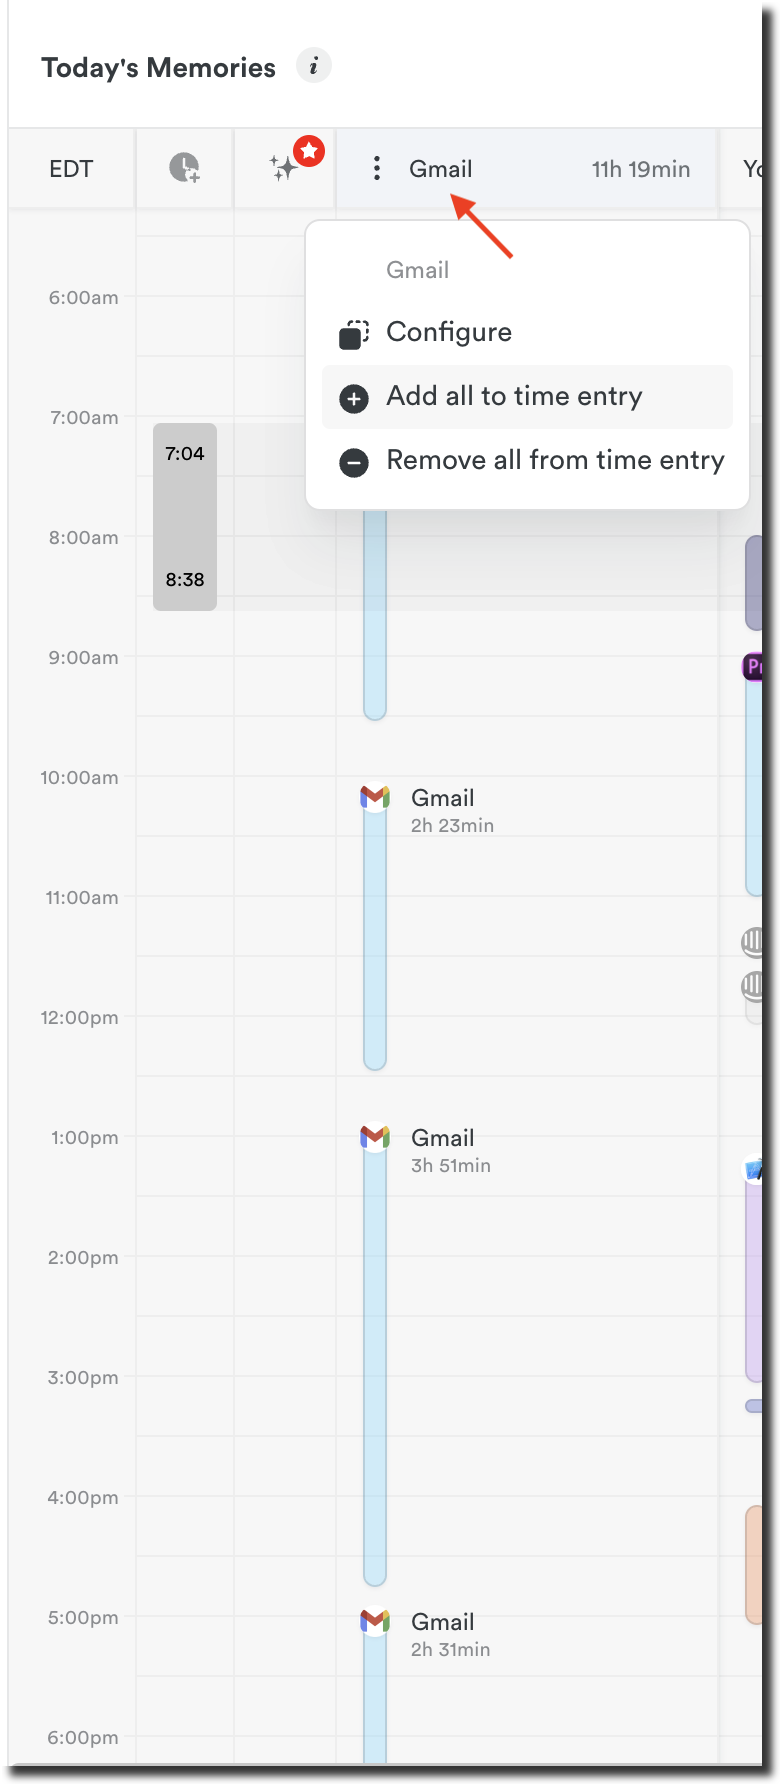
Grouping and ungrouping memories
When grouped, Timely provides a unified view of the time you’ve spent on activities within an app or website and typically arranges that activity on your timeline as one continuous memory named for that specific app or website.
However we recognize that this arrangement may not suit everyone’s needs. Many have requested the ability to view memories in much more granular detail.
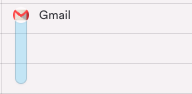
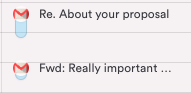
For example, to be able to see time spent per e-mail as separate blocks in the timeline instead of a big “Gmail” block:
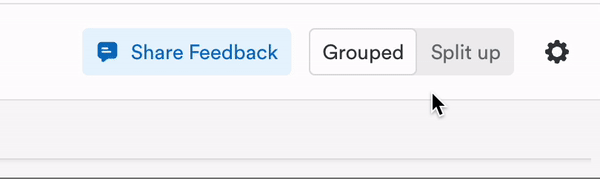
You can now easily ungroup the activities that make up that memory group by changing the grouping option for Gmail, or indeed any other app. When configuring the app or website, simply change the Group Memories setting from “Grouped” to “Don’t group”:
This will result in each e-mail title appearing as separate memories:
If you notice that your memories have “disappeared” after choosing to split, then you’ll want to double check your memory visibility settings.
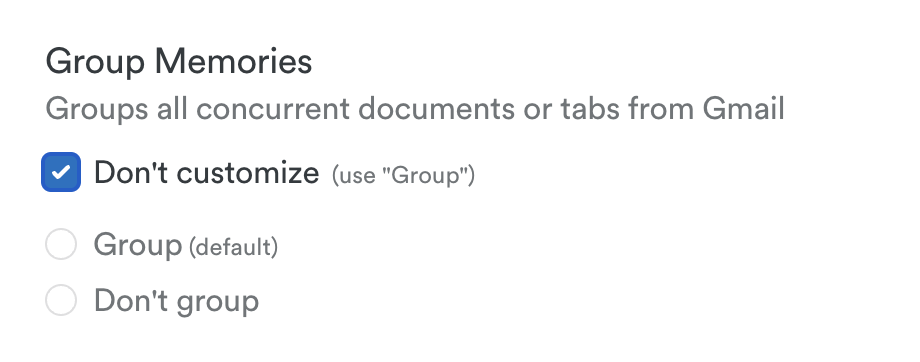
If ever in doubt, you can easily revert back to your default settings by clicking the “Don’t customize” button above each category:
Memory continuity
Multi-taskers rejoice! You can now configure Timely to ignore brief interruptions in your activity tracking, when switching back and forth between two tabs or apps for example, keeping a smooth continuous flow. Simply make your selection under the Maintain continuity setting:
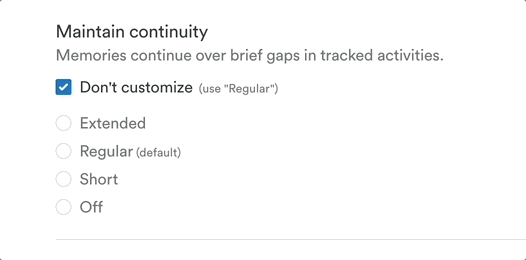
By default this feature is configured for a “middle of the road” approach under Regular, though you can of course choose to give yourself more leeway with the Extended option, more specificity under the Short option, or simply turn this feature Off entirely for targeted accuracy.
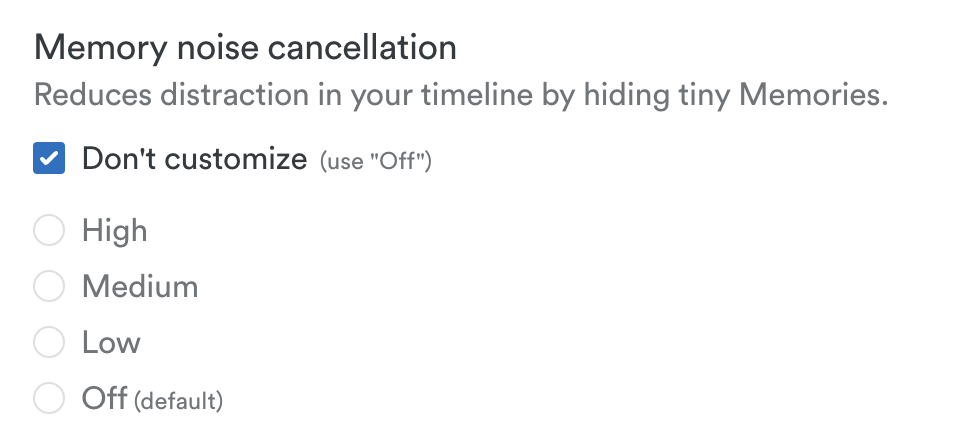
Memory noise cancellation
For those who frequently work with multiple monitors, apps, and windows, or are heavy multitaskers, we also offer a noise cancellation feature to help declutter your timeline.
This enables you to hide micro-memories that might be generated when tabbing between screens or perhaps firing off that millisecond message to a friend or colleague.
You’ll find this option under Memory noise cancellation in the configuration menu and you can select High, Medium, Low as to your preference, or turn this feature Off entirely to display all your activities in full detail.
Memory Titles
In the configuration menu you’ll see a Memory titles option where you can choose how a specific activity is displayed on your timeline. With the File or page name option you’ll be able to see at a glance the important projects and files you’ve worked on throughout the day. With the App name option, you’ll have a slightly more zen timeline with just the basics. Or you can choose to Hide that information and just display the app or website logo for a clean ultra minimalist timeline.

Create custom columns and configure them using Highlight
For those folks that see the same familiar apps or sites on their timeline day in and day out, we’ve added some helpful organization options to keep that activity gathered together in one place where you can easily log it.
By selecting the Highlight option in the configuration menu you’ll see a dedicated column appear on your timeline that gathers the activity from that app or website in one place with a dedicated button to add that time or remove it in just a click.
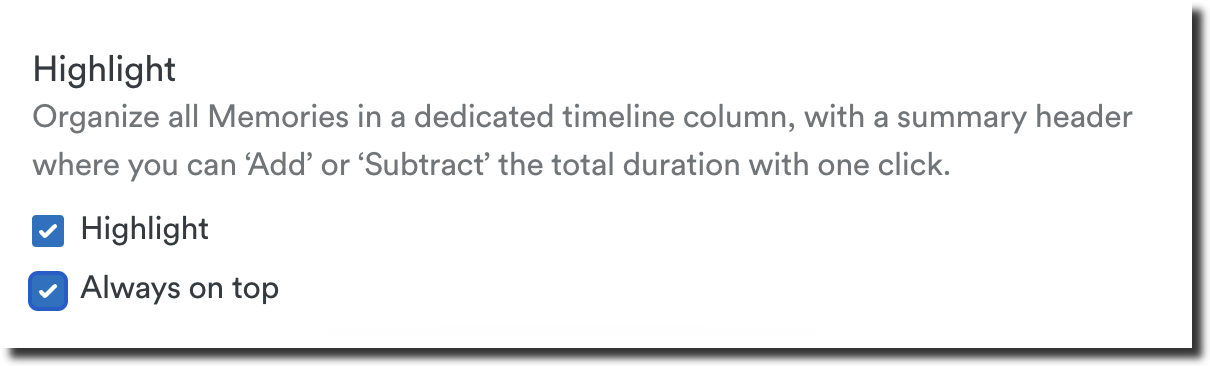
The Always on top option freezes the column associated with that app or website, in a similar fashion to freezing a column in an app such as Excel or Google Sheets. It ensures you always have the most important information at hand and at a glance.
FAQs
Do you have Memory for mobile devices?
At the moment, we only offer Memory for your computer. While Memory can’t currently capture mobile work activity in the same way as our desktop apps for Mac, Windows, and Linux, it’s certainly an interesting idea for us to consider in future. In the meantime, the Timely mobile apps can capture your GPS location to help fill in your day.
What’s the difference between hidden and deleted memories?
Deleting a memory removes it from Timely permanently, whereas hiding an app or activity simply removes it from your view. Keep in mind that memories are always private to you and cannot be viewed by anyone on your account, so there isn’t often a use case for completely deleting a memory.
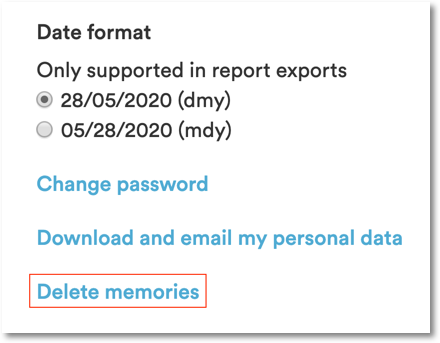
Can I delete all of my memories at once?
While it will severely limit the value you get from automatic time tracking, you have the option to quickly delete whole chunks of your Memory history. You’ll find this option by going to Settings > Profile, then scrolling down to the “Delete memories” link:
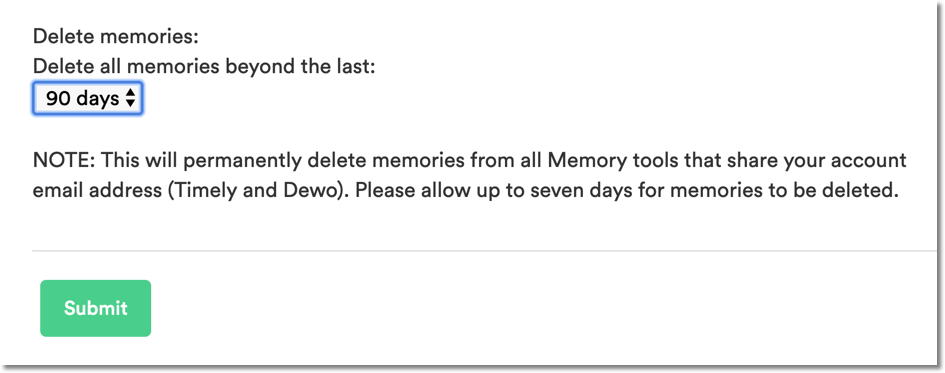
Just select the timeframe of memories you want to delete and hit “Submit”. Keep in mind that it can take up to seven days for memories to be deleted:
From this same page you can see a history of all bulk memory deletion requests, including the status, scope and date they were submitted:

Is my data safe/private?
Data from Memory is private to you and only you! We take privacy very seriously so click to read more about what data we capture, how we protect and process your data and how that data is incorporated into your Timely experience.
Last updated June 19, 2026
Have feedback for this article or need more help? Contact us now.