
Meet Timely AutoSheet
Time Tracking: AutoSheetHandbookYour AI-powered teammate for smarter time tracking — get intelligent, contextual suggestions based on your workday.Video transcript
Hey everyone, Mathias here, founder of Timely. Let me give you a quick overview of what makes Timely so different from every other time tracking tool out there. What really sets it apart is our AutoSheet feature. It makes time tracking fully automatic without sacrificing accuracy.
This is how it works: when you first set up Timely, you connect your calendar and install the Memory desktop app, so we can capture your computer activity. And importantly here, all that activity data is completely private — only you can see it, never your manager or anyone else.
And from that moment on, AutoSheet takes over. Every morning, our AI analyzes your activity from the previous day, and then automatically generates a complete timesheet for you. Let me show you how it works.
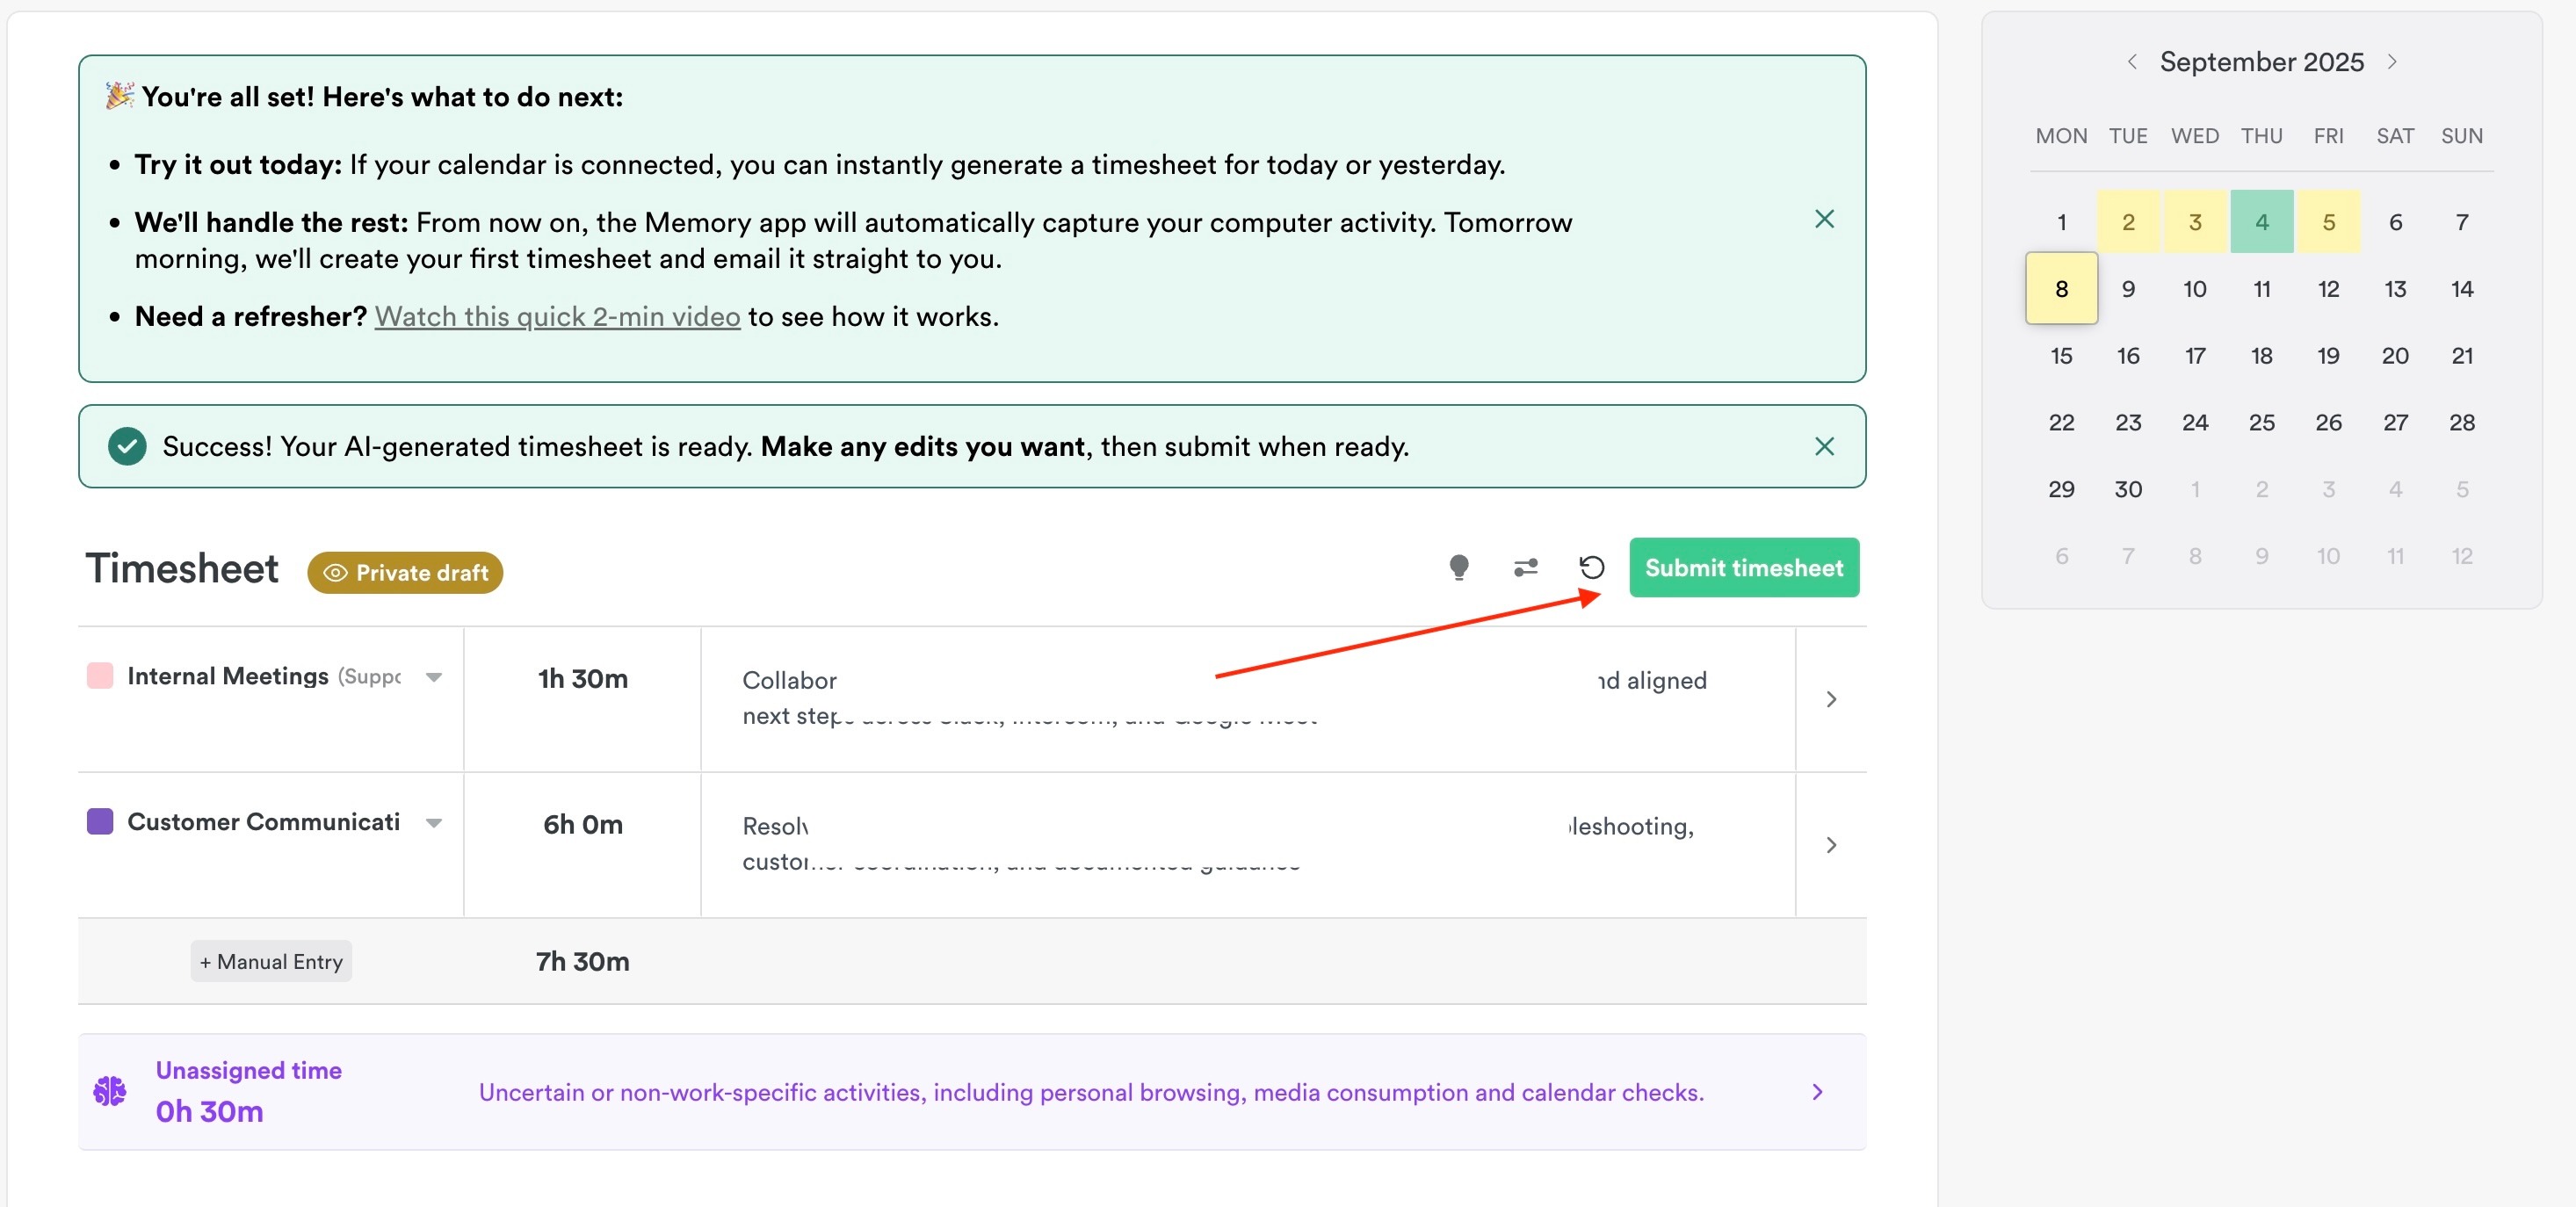
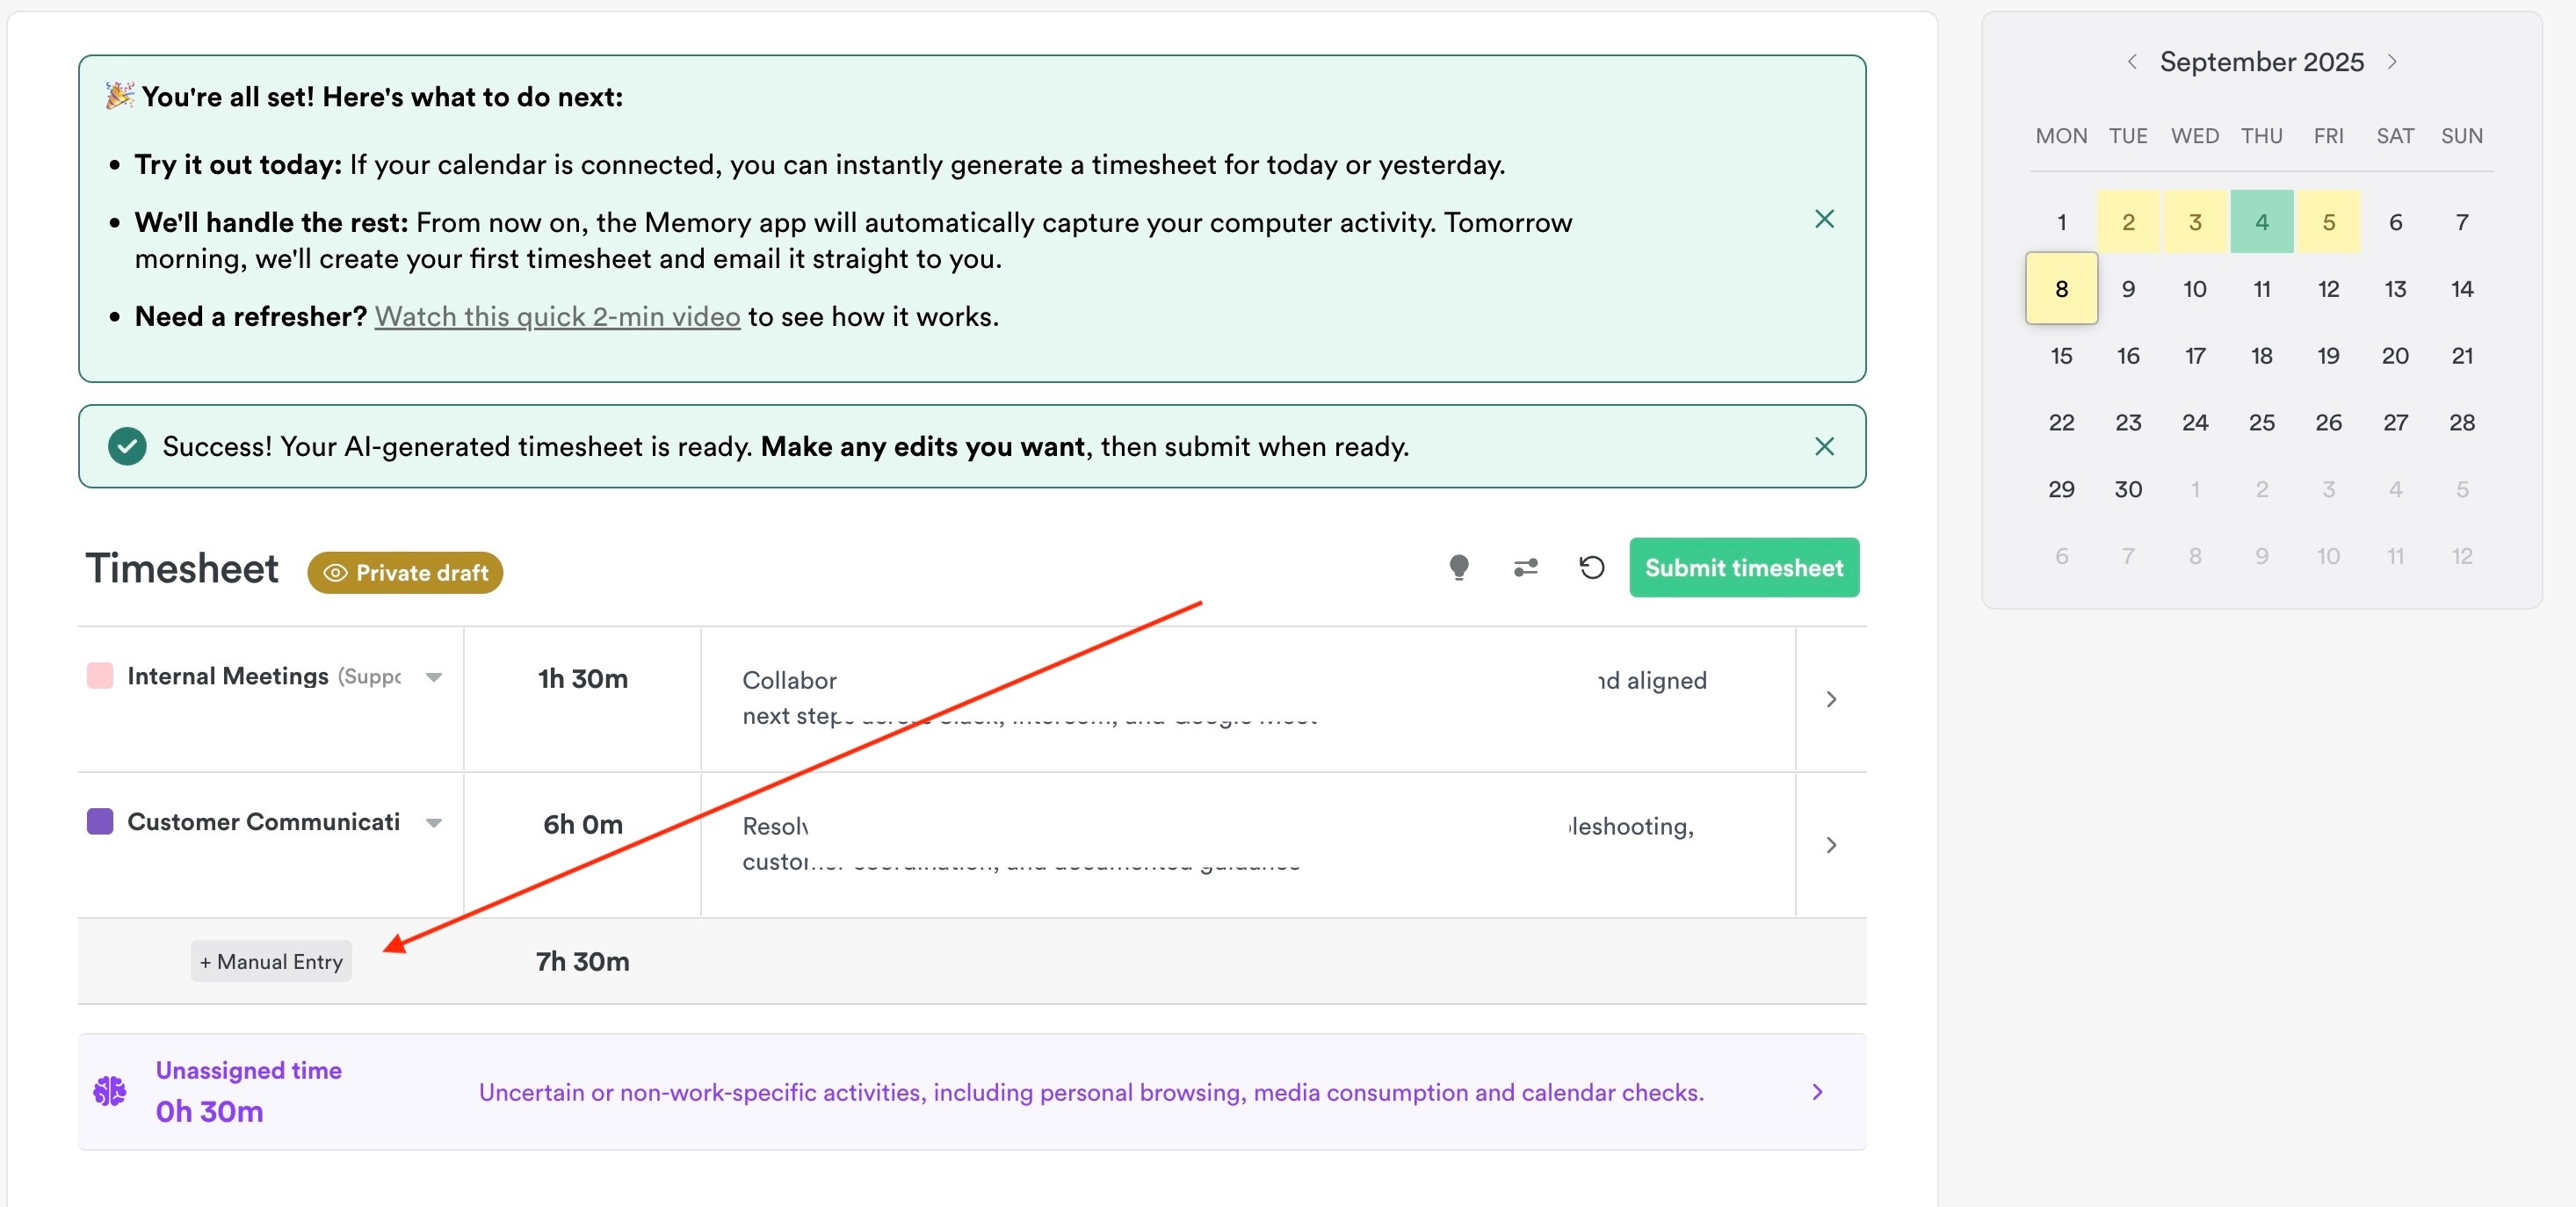
This is what a completed timesheet looks like in Timely, and everything you see here was generated by the AI system. In the top, you have your hourly total. Currently it says you’re in a private draft mode, so only you and you alone can see this timesheet before you submit it.
Below that, you have the summary section, which gives you a quick and clear snapshot of how your time was distributed across projects, tags, and linked work if you use them.
And below that are the actual individual time entries, and the AI fills in everything for you — project, hours, tags, detailed notes. All you have to do is review it, and if everything looks good, you just hit submit. One click, and you’ve completed your entire timesheet.
If you do want to make changes, you can edit anything you see here. Just tap it, do any edits you might want to do, and then hit submit again if you’re happy. And if you do want to see what these entries are based on, just click this button over here to view the individual activities that the AI system is looking at.
Early on, you might want to help teach the AI by reassigning a couple of these entries to the right project, and when you then select a project and reassign them, that’s how you’re teaching the AI system and how to make better suggestions in the future.
And that was a quick overview of AutoSheet. Give it a try, and let’s finally put an end to time tracking once and for all.
Timely AutoSheet is an AI agent that writes your timesheets for you. It fills out everything — projects, tags, time entries, and full text summaries — so you don’t have to. All based on the activity captured by your Memory app and integrations, AutoSheet analyzes your workday, groups it into meaningful time blocks, and assigns everything to the right place. All you need to do is review and hit submit!
What is Timely AutoSheet?
Timely AutoSheet is a standalone, AI-powered experience that creates a complete timesheet proposal for you using the activity captured by your Memory app and integrations.
It processes that activity into clear time blocks, assigns projects and tags intelligently, and suggests a high-level summary for each time entry—so you don’t have to log everything manually.
Using a blend of pattern recognition, historical project mappings, and AI reasoning, it will:
- Identify unlogged hours
- Suggest a project assignment
- Generate a concise activity summary
- Present you with one-click logging options
Setting up AutoSheet without Memory
AutoSheet is designed to work with the Memory app (and/or a connected calendar) to automatically capture your activity. If you open AutoSheet before installing Memory or connecting a calendar, you’ll see a “Connect your data sources” prompt with a download button.
If you’d prefer not to install Memory right away, you can click “Log time manually instead” on that prompt. This saves your choice and replaces the setup prompt with a warning that reads:
Timely is designed to track your time automatically. Without the Memory app there is no activity for AutoSheet to build your timesheet from, so your experience will be seriously degraded. You can still add time manually.
Without Memory or a connected calendar, AutoSheet has no activity to work from, so AI-generated suggestions and the Generate button won’t appear. From the warning you can still:
- Add time manually using the Add manual time link
- View the full timeline
- Download Memory at any point using the button shown in the warning
Your choice persists across reloads and devices. As soon as you install Memory or connect a calendar, AutoSheet returns to its full automatic mode.
How it works
The Timely AutoSheet uses your Memory activity (from connected sources like the Memory app, integrations, and manual entries) to analyze what you were working on and when.
Suggestions appear in the Hours > Timesheet view whenever unlogged time is detected.
You can click each suggestion to view details or edit before logging. Or, if everything looks good, you can approve and log all suggestions at once.
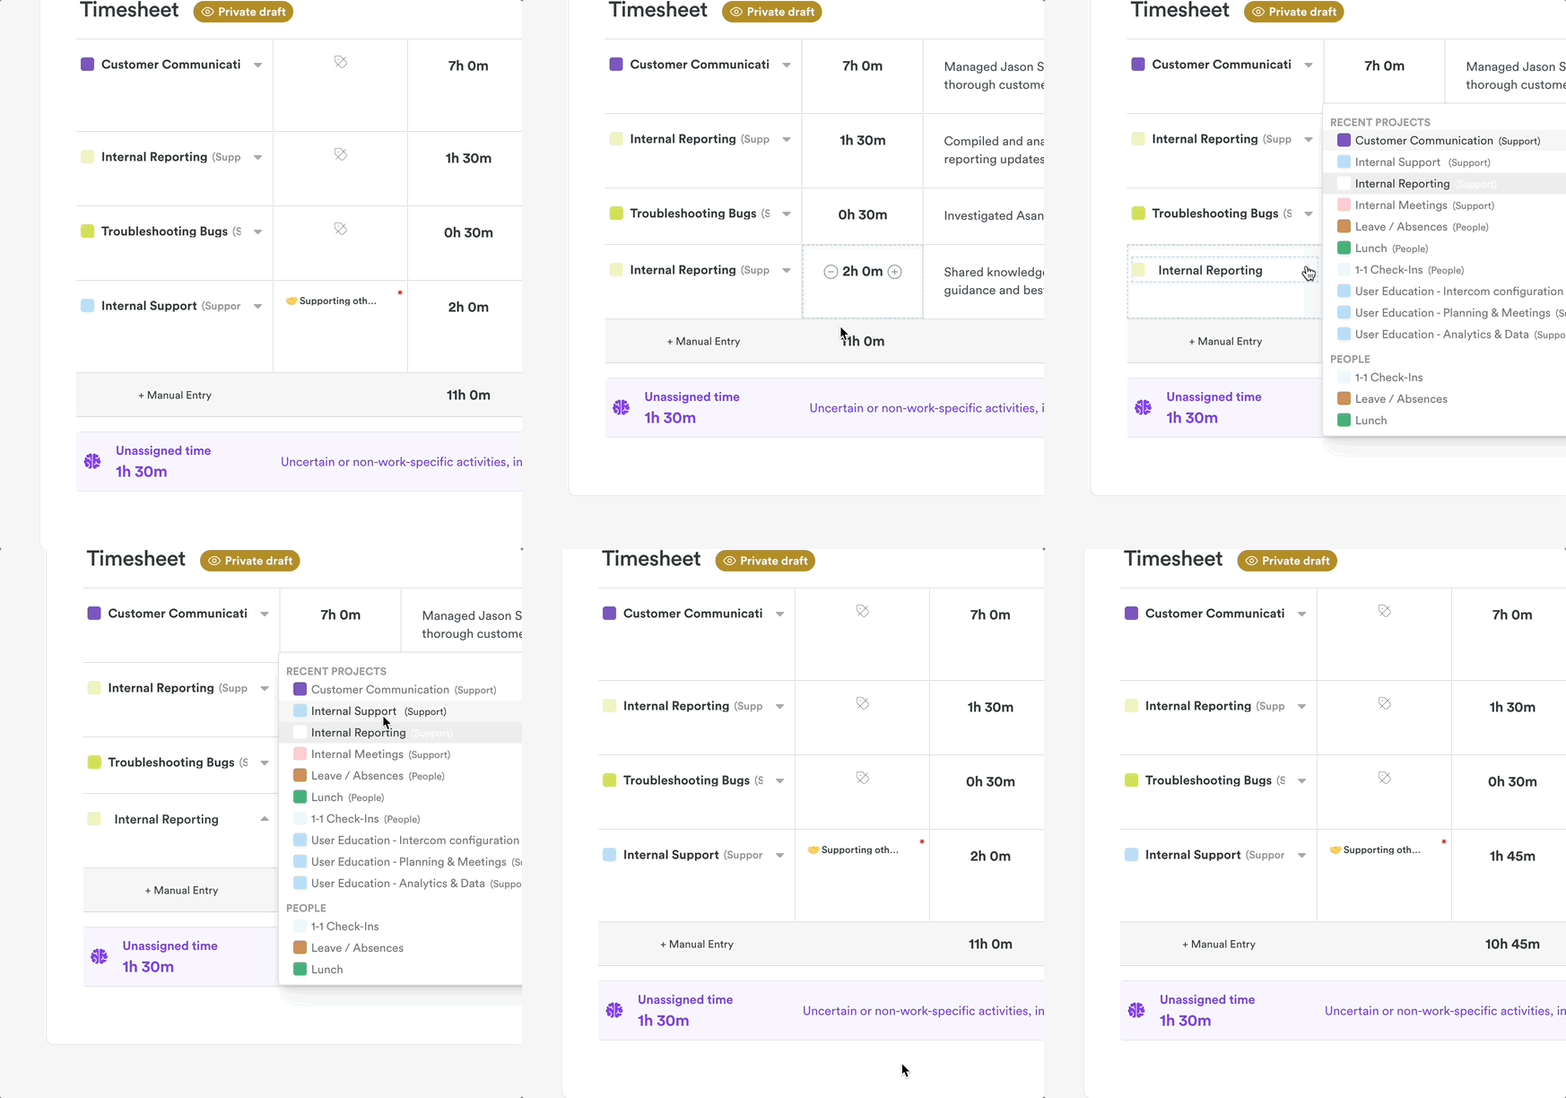
If adjustments are needed to those suggestions, you can use the project and tags dropdown to re-assign those activities to the more appropriate project or task. When moving items between projects, AutoSheet automatically regenerates notes to preserve the context of your work, ensuring important details aren’t lost during reassignment.
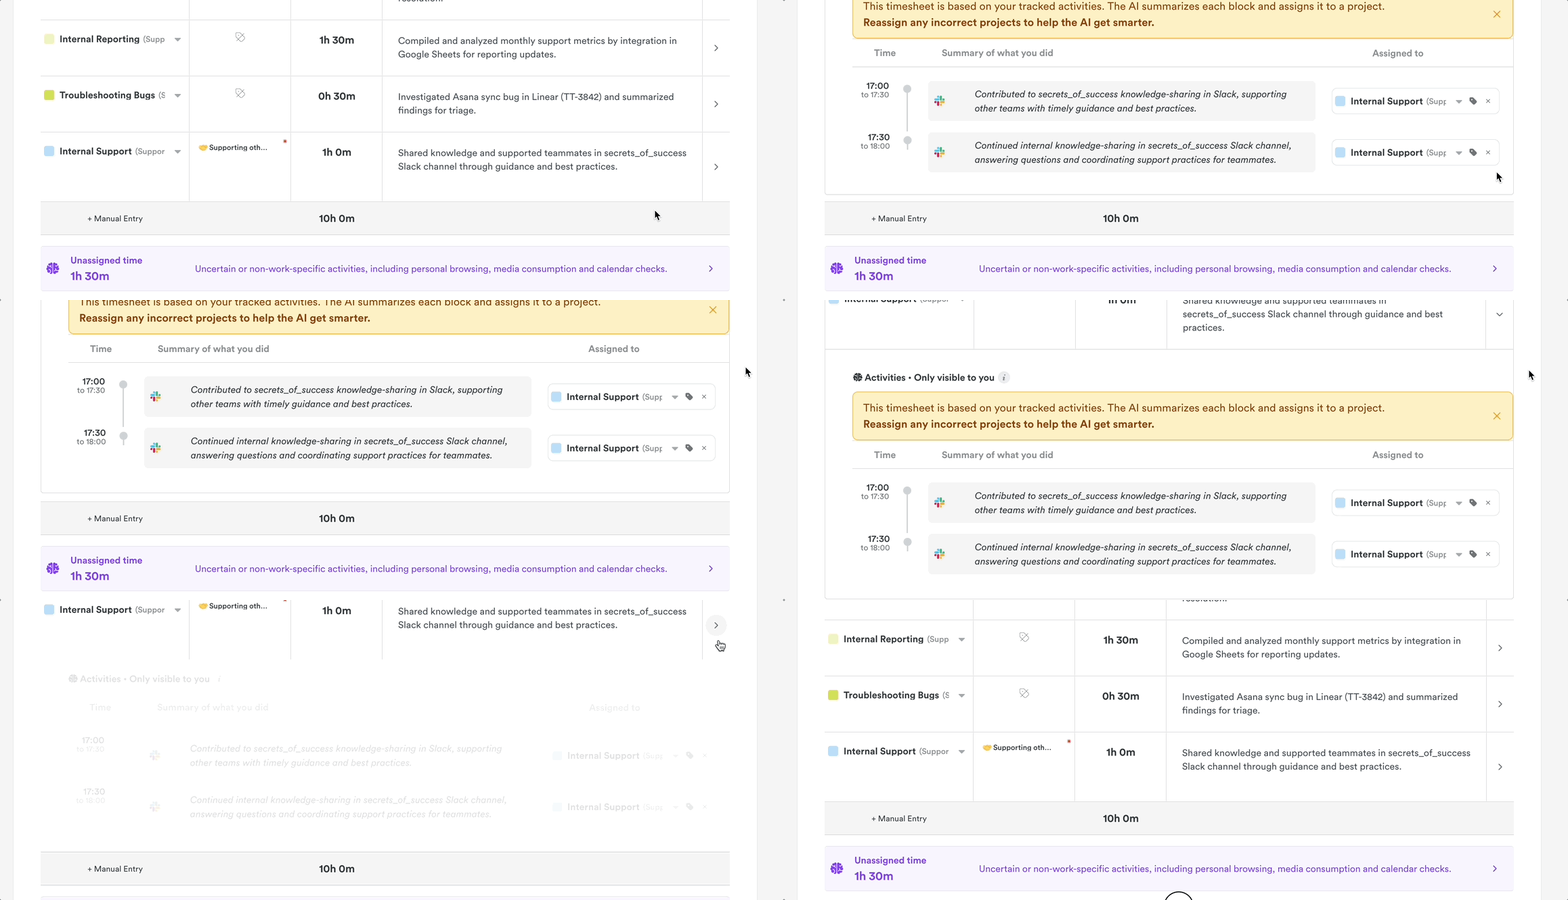
In just a click you can also see exactly what memories or integration activities prompted that AI suggestion:
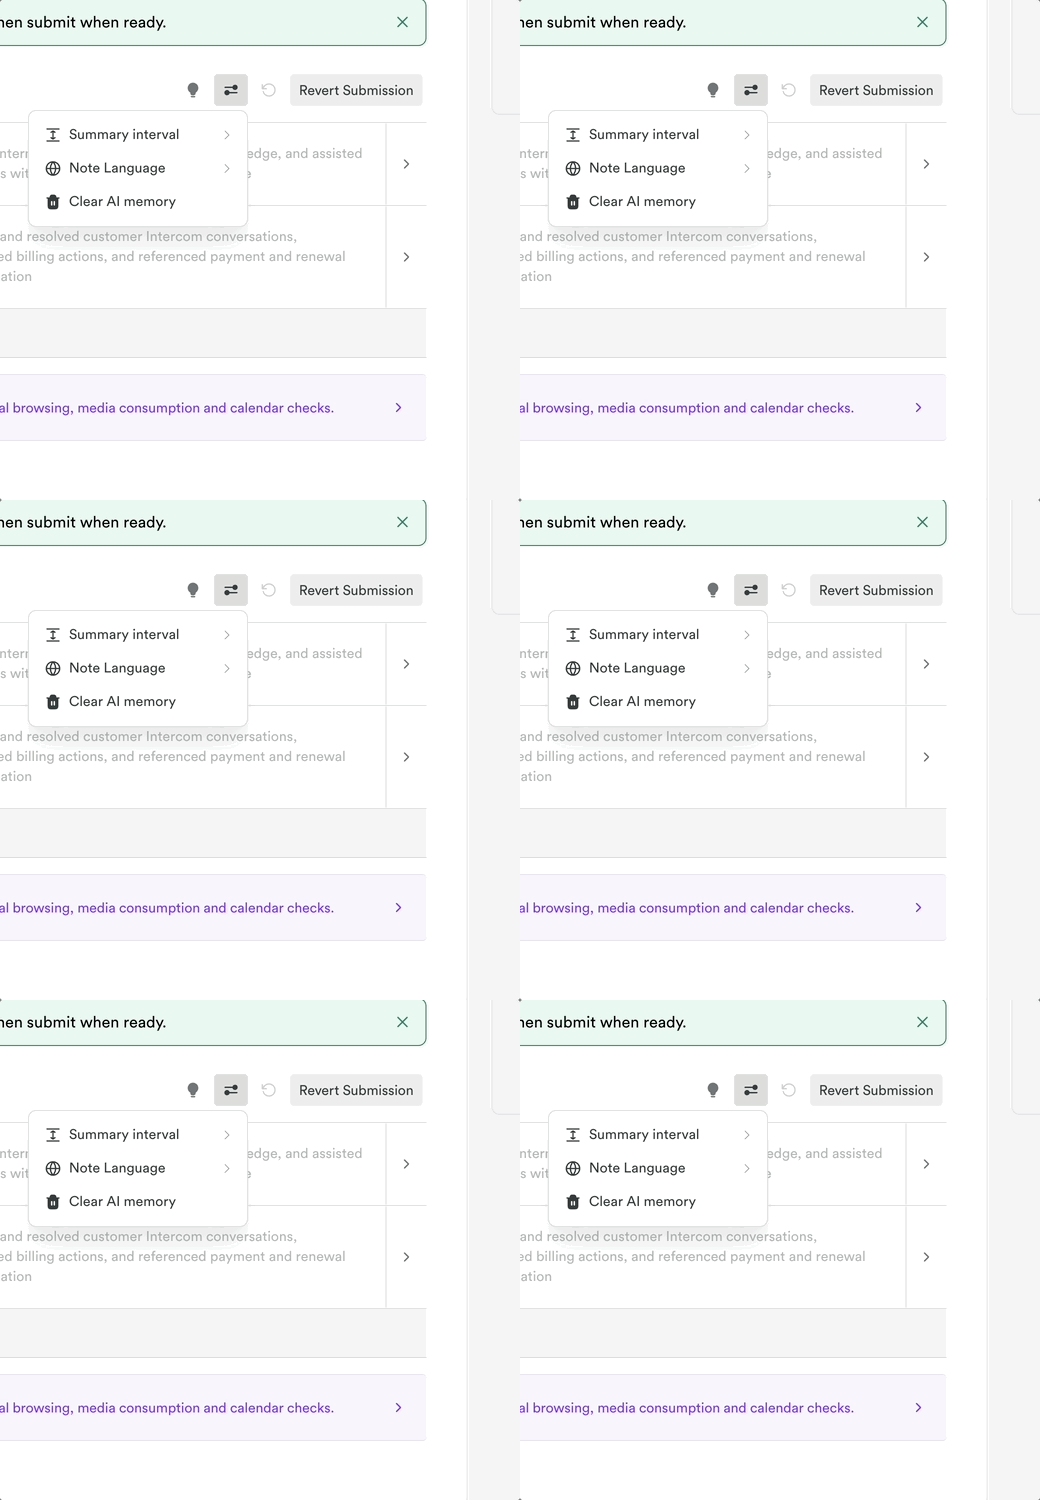
If you’d like to adjust the summary interval, language of your suggestions, or completely reset your AI mode, use the options toggle in the top right-hand corner:
Workspace AutoSheet settings
Workspace owners and admins can configure AutoSheet for everyone from Settings > AutoSheet > Workspace. Members only see their own Personal AutoSheet settings at Settings > AutoSheet. The Workspace page always shows the workspace-level values, never the admin’s own personal preferences, and has two sections.
Member settings
The Member settings section controls three AutoSheet preferences across the workspace:
- Time entry length — the summary interval used when generating entries.
- Daily generation — whether AutoSheet runs automatically each morning.
- Note language — the language used for generated entry notes.
Each field starts with a “Members choose their own” option. While that’s selected, members set the field themselves in their Personal AutoSheet settings. Pick any other value and the field is locked for every member, admins included. Locked fields appear disabled with a locked badge in each member’s Personal AutoSheet settings, and Reset skips them.
Note instructions
The Note instructions section shapes how AutoSheet writes entry notes for everyone in the workspace:
- Note tone — choose a preset tone (such as formal or concise) or enter a custom instruction.
- Note length — set a preferred length for generated notes.
- Work to prioritize — highlight categories of work you want the AI to focus on.
- Additional instructions — a free-text box (up to 4,000 characters) for extra guidance. Quick-add snippets insert common instructions; snippets that would take the text over 4,000 characters are greyed out until there’s room.
Once saved, the instructions apply to every member’s generated and regenerated notes from the next generation onwards, and they replace any personal note preferences members had set. Members see a short notice in their Personal AutoSheet settings that workspace note instructions are in effect, but not the instruction text itself. If two admins edit the instructions at the same time, neither overwrites the other’s changes.
Instructions only change how notes are worded. They can’t move an entry to a different project, change its tags, or override the workspace’s note language. Workspaces without saved instructions work exactly as before.
Default tags and AutoSheet
When a project has default tags configured, those tags are automatically added to every time entry created when you submit an AutoSheet timesheet — the same as in Classic mode. Tags already on the entry are kept, and the project’s default tags are merged in alongside them.
For example, if a project has a default tag of Client work and an AutoSheet entry already carries Design and Review, the submitted hour will have all three tags.
You don’t need to do anything — default tags are applied automatically when you submit. Project default tags are set by admins and managers, so if you’re unsure which defaults apply to a project, check with your workspace admin.
Per-entry billable override
By default, each AutoSheet entry follows its project’s billable setting: entries on billable projects are logged as billable and entries on non-billable projects as non-billable, the same as in the manual hour editor. AI-generated entries always start out following the project default.
While reviewing your timesheet, you can override the billable status of individual entries before submitting:
- On a billable project, you can switch a single entry to non-billable — for example, to keep a goodwill task or internal discussion off a client invoice. Other entries keep following their project default.
- On a non-billable project, entries are always non-billable. Marking one as billable shows a validation error, and the entry can’t be submitted until you clear the override.
Changing an entry’s project resets its billable override, so the entry picks up the new project’s default.
Reading the timeline view
Each entry block on the AutoSheet timeline is designed to stay readable at a glance:
- Tags appear as compact icons — hover over an entry to see their full names.
- Linked work is shown on the entry when your workspace has a task integration connected or uses Timely linked work items; hover to see the full title.
- Generate and Regenerate note buttons sit inline with each entry’s description, so you can create or refresh a summary without leaving the timeline.
- Short entries — and any entry whose note is cut off — show a hover tooltip with the project, time range, duration, full note, and tags.
You can resize any entry by dragging its top or bottom edge. Resize handles are hidden while an entry editor panel is open — save or cancel first, then drag the block edges.
Collapsed gap bands
To keep your working day easy to scan, the AutoSheet timeline automatically collapses long stretches of inactivity into short hatched gap bands. Each band displays the amount of time it represents (for example, “No activity for 8h 15m”) so you always know what’s hidden.
A stretch of time is collapsed when:
- It falls between two activity blocks and contains 3 or more hours of inactivity, or
- It falls at the start or end of the day and contains 2.5 or more hours of inactivity.
Activity blocks keep at least 30 minutes of visible padding on each side, so short gaps — like a typical lunch break — stay at full scale.
To expand a collapsed gap, click anywhere on the hatched band, or click the matching marker in the time gutter on the left. The hidden stretch opens to its full height, and a Hide chip appears pinned to the top of the expanded area.
To collapse it again, click the Hide chip. Expanded gaps are remembered for the current day only — switching to another day and back resets all bands to their collapsed state.
Drag-selecting across a gap band is clipped to the visible stretch where the selection started — hidden time cannot be claimed while a band is collapsed. Expand the band first if you need to select time within it.
Resizing an entry toward a collapsed gap is allowed: the entry’s moving edge shows the live target time as you drag, and the entry snaps to the interval grid and stops at the nearest neighbour when you release.
Editing entries on the timeline
Clicking an entry on the AutoSheet timeline opens a side panel next to the block, where you can edit:
- Project — change the assigned project at any time.
- Tags — required tags appear directly below the project picker with a validation indicator.
- Linked work — long titles are shortened in the panel; the full title stays visible in the preview.
- Note — edit the AI-generated summary or write your own.
Time and duration stay visible on the timeline block itself rather than in the panel.
| Action | What happens |
|---|---|
| Click an existing entry | The panel opens beside it; the saved block stays visible for comparison |
| Edit any field | Changes are held as a draft until you click Save |
| Click Save | Your changes are saved; the entry’s times stay as they are |
| Click Cancel, press Escape, or click outside the panel | The draft is discarded |
| Switch to a different day or entry | The current draft is discarded |
| Click Delete | A confirmation appears — confirm to remove the entry, or dismiss to keep editing |
| Press Escape with a picker open | The linked-work filter menu closes first, then the picker, then the editor |
Regenerate note works immediately when clicked. It’s disabled while the note has unsaved edits, so it never overwrites text you’ve typed.
Linked work picker
The linked-work picker shows one list of work items from every available source, each with its own icon so you can tell them apart:
- Integration tasks — tasks from connected tools such as Jira and ClickUp.
- Timely linked work items — work items managed in Timely itself (for example through the Timely API) rather than in an external tool.
The picker is available when your workspace has at least one task integration connected or uses Timely linked work items.
Linked work picker filters
When a row in AutoSheet has a project assigned, the linked-work picker automatically narrows its list to items from that project. This means you no longer have to scroll through every item from every connected tool to find the right one.
You can fine-tune what appears in the picker using the Filter menu inside the dropdown:
- Scope — choose between All integrations, Same integration (tasks from the same tool as the row’s project), or Same project (tasks linked directly to the row’s project).
- Status — toggle Open and/or Done tasks on or off to focus on what’s relevant.
Active filters are shown as chips at the top of the picker so you can see and clear them at a glance. Your scope and status preferences are saved and shared with the manual time-logging picker — changing them in one place updates the other.
How the task list loads
The picker searches your entire task list, not just the first page of results:
- Tasks load as you scroll. There’s no cap on how many tasks are shown — in large workspaces, keep scrolling and more results load automatically.
- Deeply nested subtasks are included, however many levels below their parent they sit.
- The Open/Done filter applies to the full list, so toggling it searches all matching tasks rather than only the ones already loaded.
- Search covers everything. Typing in the search box looks up the full task set, so you don’t need to scroll to find a task by name.
The picker stays available even if the current filters return no results — adjust the scope or status filter to broaden the search.
How AutoSheet matches work items automatically
AutoSheet can spot work item codes in your activity — for example a ticket reference like PROJ-123 captured while you were working — and assign the matching linked work item to the time entry for you. It first checks items from your connected integrations (such as Jira or Linear), then Timely linked work items, and picks the best match. As long as a work item with a matching code exists in your workspace, the entry is linked without any manual selection.
AutoSheet reminder notifications
Timely sends you an AutoSheet reminder email when your daily timesheet is ready to review and submit. The reminder is on by default — no setup needed — and prompts you to open AutoSheet, check your entries, and submit the day.
To stop these reminders, turn them off in Settings > Notifications. See Notifications for details.
Email integration
AutoSheet also enhances your timesheet reminder emails with a visual “Breakdown of your day” section that mirrors the summary you see in the web app. These enhanced email reminders include:
- Donut charts showing the distribution of your time across projects and tags
- Project breakdown with color-coded sections and client groupings
- Tag breakdown (when entries include tags) with duration and percentage information
- Clear visual summaries that help you quickly understand your day before reviewing your full timesheet
This makes it easier to review and approve your AutoSheet timesheets directly from your email notifications, giving you the same comprehensive overview whether you’re in the app or checking your inbox.
Working with empty time intervals
AutoSheet lets you select and assign time to periods where no activity was recorded. On the timeline, you’ll see empty intervals between your logged activities that you can hover over and select, just like regular activity blocks.
When you hover over an empty interval, you’ll see a popover that reads “No activity recorded for this period.” You can click to select these empty periods and then reassign them to the appropriate project using the same controls as regular activities.
You can also drag across empty timeline space to create a new entry:
- Click and drag to draw the time range you want.
- The entry editor panel opens with that range — nothing is saved yet.
- Choose a project (and any required tags).
- Optionally add a note or linked work.
- Click Save, or click Cancel or press Escape to discard the draft.
If the range overlaps an existing entry, Save is blocked until you adjust the block edges. If the new entry has the same project, tags, and linked work as the entry next to it, saving merges the two, and the note you wrote replaces the existing note.
This is especially useful for:
- Meetings or calls where you weren’t actively using your computer
- Offline work that the Memory app couldn’t capture
- Any gaps in your timeline that represent billable time
Empty intervals can be selected individually or combined with adjacent activities for bulk reassignment, making it easy to account for all your time even when some work wasn’t automatically captured.
Adding a manual entry
When you add a manual entry to your timesheet, the side-panel editor opens. Choose a project first — Tags, Linked Work, and Note become available once a project is selected. Nothing is saved until you click Save.
If you create a new project from the editor, it’s saved straight away and selected in your draft. Cancelling the editor afterwards doesn’t undo the new project.
Adding manual time before a timesheet is generated
On a day that has no AI-generated timesheet yet and hasn’t been submitted, you can still log time directly in AutoSheet. Look for the Add manual time link on the day view — clicking it creates a local 15-minute pending entry that appears above the Generate surface. This covers days where the Memory app recorded no activity at all, but it isn’t limited to them: in the day view, any day you haven’t generated yet offers the link.
From there, the same editor flow applies: the entry is only saved once you choose a project and click Save. AutoSheet then creates the timesheet proposal and records the entry in one step — no extra confirmation needed.
If you cancel the panel or click outside before choosing a project, nothing is saved and the day stays empty.
Adjusting entry durations
Time entries always stay within a single day. When you extend an entry’s duration — using the row’s +/− buttons or by dragging the top or bottom edge of a block on the timeline — it won’t cross midnight: the entry stops at the end of the day, and the + button disables once it reaches the day’s last interval.
What’s new or different?
| Feature | Timely AutoSheet | Classic Timeline |
|---|---|---|
| AI-powered summaries | Yes | No |
| Automatic project/tag assignment | Yes | Partial |
| Smart deduplication | Yes | No |
| Configurable time intervals | Yes (15–120 min) | Yes (manual logging) |
| Supports project metadata learning | Yes | Partial |
| Fully standalone view | Yes | No |
| Enhanced email summaries | Yes | No |
| AutoSheet reminder notifications | Yes | No |
| Empty interval selection | Yes | No |
| Streamlined timeline UI | Yes | No |
| Side-panel entry editor (Save/Cancel) | Yes | No |
| Linked-work picker (integration tasks + Timely items, scope + status filters) | Yes | No |
| Loads every task, including deep subtasks | Yes | No |
| Automatic work item code matching | Yes | No |
| Collapsed gap bands for inactive periods | Yes | No |
| Manual-only mode (without Memory) | Yes | No |
| Project default tags applied on submit | Yes | Yes |
| Per-entry billable override | Yes | No |
| Workspace settings and note instructions (admin) | Yes | No |
Optimizing your Timely AutoSheet experience
To get the most out of the Timely AutoSheet:
- Stay consistent: The assistant learns from your history, so regular and accurate logging helps improve future suggestions
- Use descriptive project and task names: This helps the AI map activity more confidently and generate clearer summaries
- Install the Memory app: More activity data = better suggestions. Download the app here
- Review and approve your timesheets: While the assistant is smart, your final review ensures everything is logged correctly!
FAQs
Where does the data come from?
The assistant uses your Memory app and integrations (like Google Calendar, Teams, Zoom, etc.) to create detailed activity summaries.
What if a suggestion is incorrect?
You can change the project, summary, or duration before logging, or simply dismiss the suggestion altogether.
Is this available on all plans?
Timely AutoSheet is rolling out to select users with an active subscription.
Why don’t I see any suggestions?
Suggestions only appear when there’s unlogged time with associated memory activity. If you’re not seeing suggestions, check that you have the Memory app installed and running. On a day you haven’t generated yet, you can also use the Add manual time link to log time directly — bear in mind that saving a manual entry switches off AI generation for that day until you reset the timesheet.
Can I use AutoSheet without installing Memory?
Yes, though the experience is much more limited. Click “Log time manually instead” on the setup prompt to dismiss it. AI generation and activity-based suggestions won’t be available, but you can still add time with the Add manual time link. The full automatic experience comes back as soon as you install Memory or connect a calendar. See Setting up AutoSheet without Memory.
Why did automatic timesheet generation stop?
If you haven’t accepted any timesheet in a workspace for more than 7 days, AutoSheet pauses automatic generation for that workspace to avoid piling up unreviewed drafts. You’ll receive an email alert and an in-app notification when this happens, letting you know that automatic generation has been paused and how to resume it.
To re-enable automatic generation, simply generate and accept any timesheet in that workspace — the next morning’s automatic generation will resume.
The pause is per workspace: if you’re a member of multiple workspaces, automatic generation continues uninterrupted in workspaces where you’ve accepted a timesheet within the last 7 days.
Manual generation from the Hours > Timesheet view continues to work normally regardless of the pause.
What happens if timesheet generation fails?
Timely shows a notification at the top of the screen explaining what went wrong. It stays visible long enough to read or screenshot. Common causes:
- Day is locked — unlock the day in the Hours Dashboard, then generate again. See Locked time.
- A draft already exists — if a draft was already created (for example in another tab), the existing draft loads automatically. No action needed.
- Network or server error — wait a moment and try again.
Tasks from my integration aren’t appearing in the Linked Work dropdown — what should I do?
The picker loads tasks as you scroll, so scroll to the bottom of the list to load more. If you’re filtering by Same project, every task in that project is included, even deeply nested subtasks. If you still can’t find a task, search for it by name.
Can admins enforce note style or settings across the whole workspace?
Yes. Workspace owners and admins can go to Settings > AutoSheet > Workspace to lock Time entry length, Daily generation, and Note language for all members, and to set workspace-wide note instructions. See Workspace AutoSheet settings.
Is my data secure?
Yes, as always in Timely, your memory data stays private and secure. AI processing is done in a way that protects your personal information and never shares sensitive memory data with 3rd parties.
Can I switch back to the Classic or Legacy Timeline / List views?
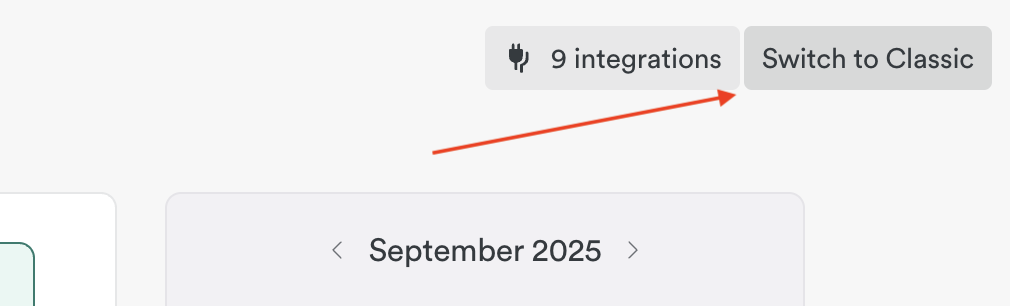
Yes, you can switch back to the Classic or Legacy Timeline and List views at any time. You’ll see a “Switch to Classic” button in the top right hand corner of your AI Timesheet to make the switch.
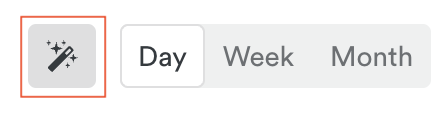
To access the Timely AutoSheet experience again, simply click the wand icon in the top left-hand corner:
Last updated October 7, 2026
Have feedback for this article or need more help? Contact us now.